
Pets bring joy to our homes, but their furniture can be pricey. DIY pet furniture is a fun, affordable way to create cozy spaces for your furry friends. This guide shares practical, beginner-friendly projects to build pet beds, scratching posts, and feeding stations. Each idea is budget-friendly, uses simple materials, and adds charm to your home. Let’s dive into these creative ideas to keep your pets happy and your wallet full.
Why Choose DIY Pet Furniture?
Building your own pet furniture saves money and lets you customize designs to fit your space and your pet’s needs. Store-bought items often lack personality or durability. DIY projects allow you to:
- Use affordable, recycled materials.
- Match your home’s style.
- Create sturdy, pet-safe furniture.
- Enjoy a rewarding hands-on project.
Benefits of DIY for Pets and Owners
- Cost Savings: DIY projects can cost 50-70% less than retail pet furniture.
- Personalization: Tailor sizes, colors, and features to your pet’s habits.
- Sustainability: Repurpose old items to reduce waste.
- Bonding: Crafting for your pet feels good and strengthens your connection.
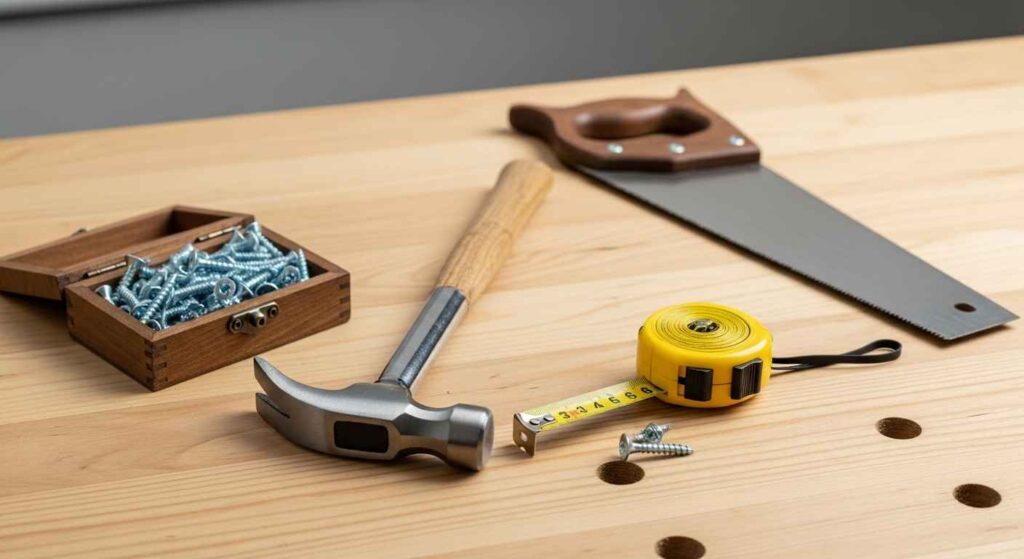
Top DIY Pet Furniture Ideas
Here are five practical DIY pet furniture projects. Each includes materials, steps, and tips to ensure success. These projects suit small spaces and various pet types, like cats, dogs, or even rabbits.
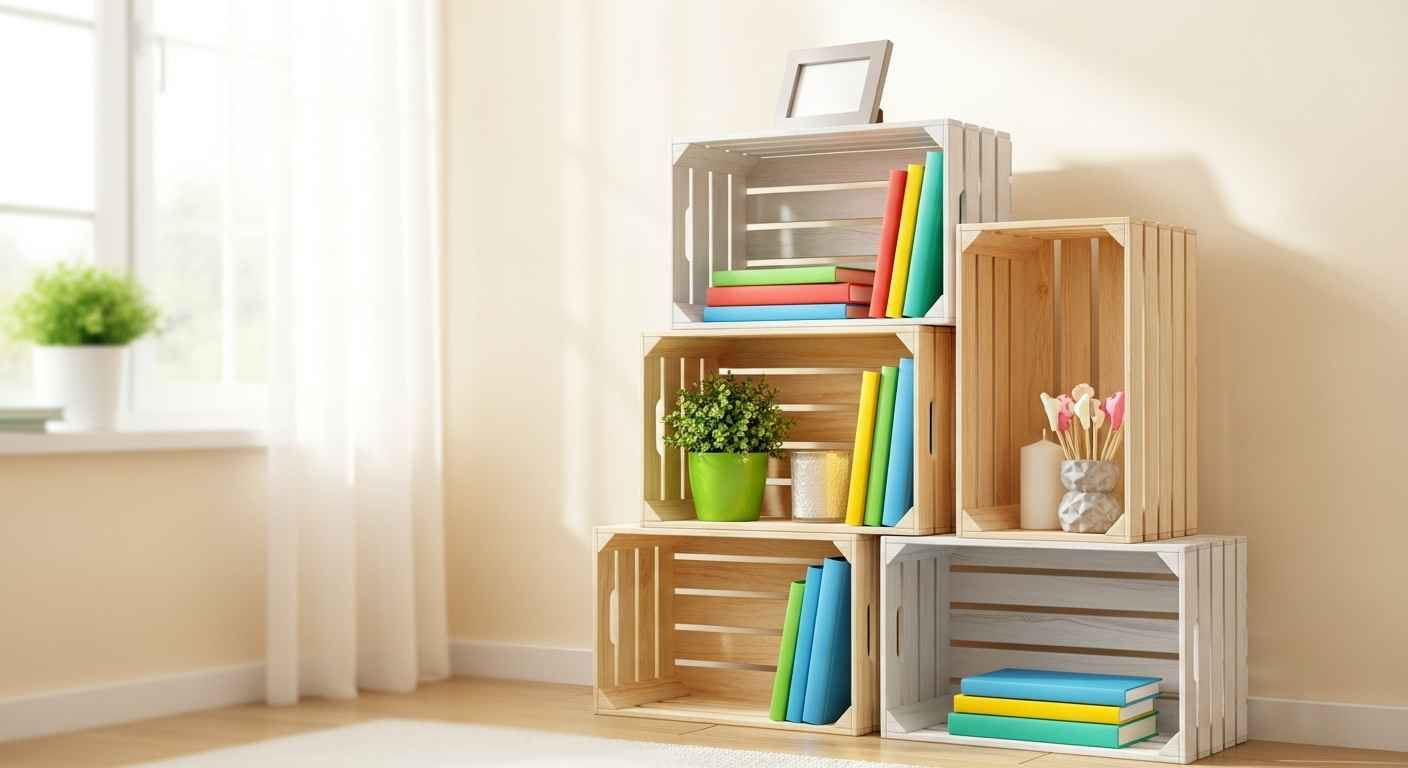
1. Wooden Crate Pet Bed
A wooden crate pet bed is simple, rustic, and cozy. It’s perfect for dogs or cats and can be customized with paint or cushions.
Materials Needed
- Wooden crate (check local hardware stores or online marketplaces).
- Sandpaper (medium grit).
- Non-toxic paint or wood stain.
- Cushion or old pillow for padding.
- Fabric for a washable cover.
Steps to Build
- Sand the crate to smooth rough edges.
- Paint or stain the crate with pet-safe products. Let it dry for 24 hours.
- Measure the crate’s interior for the cushion size.
- Cut an old pillow or foam to fit, then cover it with washable fabric.
- Place the cushion inside the crate.
Tips
- Use crates from thrift stores to save money.
- Add a nameplate for a personal touch (avoid sharp edges).
- Ensure the cushion is removable for easy cleaning.
For more budget-friendly furniture ideas, check out our DIY Pallet Furniture Ideas to Save Money.

2. Cardboard Cat Scratching Post
Cats love scratching, and store-bought posts can be expensive. A cardboard scratching post is cheap, eco-friendly, and easy to make.
Materials Needed
- Cardboard boxes (free from grocery stores).
- Box cutter or scissors.
- Non-toxic glue.
- Sisal rope (optional for extra texture).
- Wooden base (optional for stability).
Steps to Build
- Cut cardboard into 2-inch wide strips.
- Roll one strip tightly to form a core.
- Glue additional strips around the core to create a thick post.
- Secure the post to a wooden base with glue for stability.
- Wrap sisal rope around the post for added texture (optional).
Tips
- Make the post tall enough for your cat to stretch (at least 24 inches).
- Sprinkle catnip on the post to attract your cat.
- Replace worn-out cardboard as needed.
For more cat-friendly ideas, visit ASPCA’s Pet Care Tips.
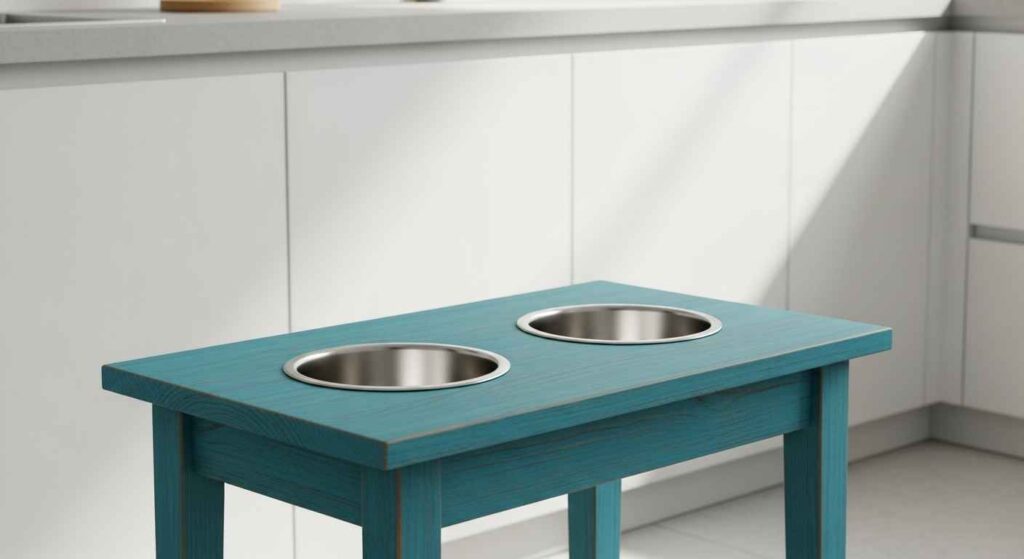
3. Elevated Pet Feeding Station
An elevated feeding station helps pets eat comfortably and keeps your floor clean. This project works for dogs or cats.
Materials Needed
- Wooden box or small table (thrift stores work great).
- Sandpaper.
- Non-toxic paint.
- Two stainless steel bowls.
- Measuring tape.
Steps to Build
- Sand the box or table to remove splinters.
- Paint it to match your home’s decor. Let it dry completely.
- Measure the diameter of your pet’s bowls.
- Cut two holes in the top of the box or table to fit the bowls snugly.
- Place the bowls in the holes.
Tips
- Ensure the station height suits your pet (6-12 inches for most dogs).
- Use stainless steel bowls for durability and easy cleaning.
- Add a drawer for storing pet food.
Need more storage ideas? See our Garage Storage Systems That Work.
4. Repurposed Suitcase Pet Bed
Turn an old suitcase into a stylish pet bed. It’s great for small dogs or cats and adds vintage charm to your home.
Materials Needed
- Old suitcase (hard-sided works best).
- Screwdriver (to remove hardware).
- Foam or pillow for cushioning.
- Fabric for a cover.
- Four small wooden legs (optional).
Steps to Build
- Remove any sharp hardware from the suitcase.
- Clean the suitcase thoroughly.
- Cut foam to fit inside the suitcase base.
- Cover the foam with washable fabric and secure it with glue.
- Attach wooden legs to the suitcase bottom for elevation (optional).
Tips
- Use a suitcase with a flat base for stability.
- Choose durable, pet-friendly fabric like cotton or canvas.
- Place the bed in a quiet corner for your pet’s comfort.
For more repurposing ideas, read our Repurpose Old Doors Into Furniture DIY Guide.
5. PVC Pipe Pet Tunnel
A PVC pipe tunnel is perfect for cats, rabbits, or small dogs who love to play and hide. It’s lightweight and easy to assemble.
Materials Needed
- PVC pipes (1-inch diameter, available at hardware stores).
- PVC connectors (elbows and T-joints).
- Pipe cutter or hacksaw.
- Non-toxic paint (optional).
- Soft fabric or carpet scraps.
Steps to Build
- Cut PVC pipes into desired lengths (12-24 inches).
- Assemble pipes into a tunnel shape using connectors.
- Sand any rough edges for safety.
- Paint the structure if desired, using pet-safe paint.
- Line the inside with fabric or carpet for comfort.
Tips
- Create multiple exits for extra fun.
- Ensure the tunnel is wide enough for your pet to move comfortably.
- Secure the structure to prevent tipping.
Common Questions About DIY Pet Furniture
Based on Google’s “People Also Ask” and “Related Searches,” here are answers to popular questions about DIY pet furniture.
How Do You Make Pet Furniture Safe?
- Use non-toxic paints and glues.
- Sand down sharp edges or corners.
- Avoid small parts that pets could swallow.
- Test stability to prevent tipping.
What Materials Are Best for DIY Pet Furniture?
- Wood: Durable and easy to work with (use untreated wood).
- Cardboard: Cheap and great for cats.
- Fabric: Choose washable, pet-friendly options like cotton.
- PVC: Lightweight and versatile for tunnels or frames.
How Can I Make Pet Furniture Eco-Friendly?
- Repurpose old items like crates, suitcases, or pallets.
- Use reclaimed wood or recycled cardboard.
- Avoid single-use plastics or harmful chemicals.
Discover more eco-friendly ideas in our Best Eco-Friendly Paint Options for Healthier Homes.
How Much Does DIY Pet Furniture Cost?
Most projects cost $10-$50, depending on materials. Repurposing items like old suitcases or crates can drop costs to nearly $0.
Tips for Success
- Measure Twice: Ensure furniture fits your pet’s size and habits.
- Test Durability: Pets can be rough, so build sturdy pieces.
- Clean Regularly: Use washable fabrics to keep furniture fresh.
- Involve Pets: Let them explore the furniture during assembly to get comfortable.

Conclusion
DIY pet furniture is a rewarding way to create cozy, personalized spaces for your pets. From wooden crate beds to PVC tunnels, these projects are affordable, fun, and practical. Use pet-safe materials, repurpose items, and follow our step-by-step guides to build furniture that lasts. Your pets will love their new spaces, and you’ll love the savings and satisfaction of a job well done.
Start your project today and share your creations with us at TheHavenly.site! For more home improvement ideas, check out our DIY Plant Stand Projects Under $30 or Rustic Farmhouse DIY Decor Ideas.

Leave a Reply