Old doors don’t belong in the trash. These sturdy pieces hold incredible potential for your next DIY project. With basic tools and creativity, you can turn that forgotten door into stunning furniture that saves money and adds character to your home.
Why Repurpose Old Doors Instead of Buying New Furniture?
Repurposing doors makes financial sense. A solid wood door costs $50-200 at salvage yards, while similar new furniture runs $300-800. You also get unique character that mass-produced pieces lack.
Environmental benefits matter too:
- Keeps materials out of landfills
- Reduces demand for new lumber
- Preserves vintage craftsmanship
- Creates one-of-a-kind pieces

What Types of Doors Work Best for Furniture Projects?
Not all doors work equally well for furniture projects. Here’s what to look for:
Solid Wood Doors (Best Choice)
- Oak, pine, mahogany, or other hardwoods
- Handle weight and stress better
- Sand and stain beautifully
- Last for decades with proper care
Hollow Core Doors (Limited Use)
- Lightweight cardboard interior
- Good for wall-mounted projects
- Poor for weight-bearing furniture
- Best for decorative pieces only
Panel Doors vs. Flat Doors
- Panel doors offer built-in design elements
- Flat doors provide clean surfaces for painting
- Both work well depending on your project goals
Where to find quality doors:
- Architectural salvage yards ($30-150)
- Facebook Marketplace ($20-100)
- Estate sales ($15-75)
- Home renovation sites (often free)

Essential Tools and Materials for Door Furniture Projects
Basic Tools You’ll Need:
- Circular saw or miter saw
- Power drill with bits
- Random orbital sander
- Tape measure and pencil
- Safety glasses and dust mask
- Clamps (at least 4)
Common Materials:
- Wood screws (2.5″ and 1.25″)
- Wood glue
- Sandpaper (120, 150, 220 grit)
- Wood stain or paint
- Polyurethane finish
- Hinges or hardware (project-specific)
Cost breakdown for basic setup: $150-250 for tools, $20-40 per project for materials.
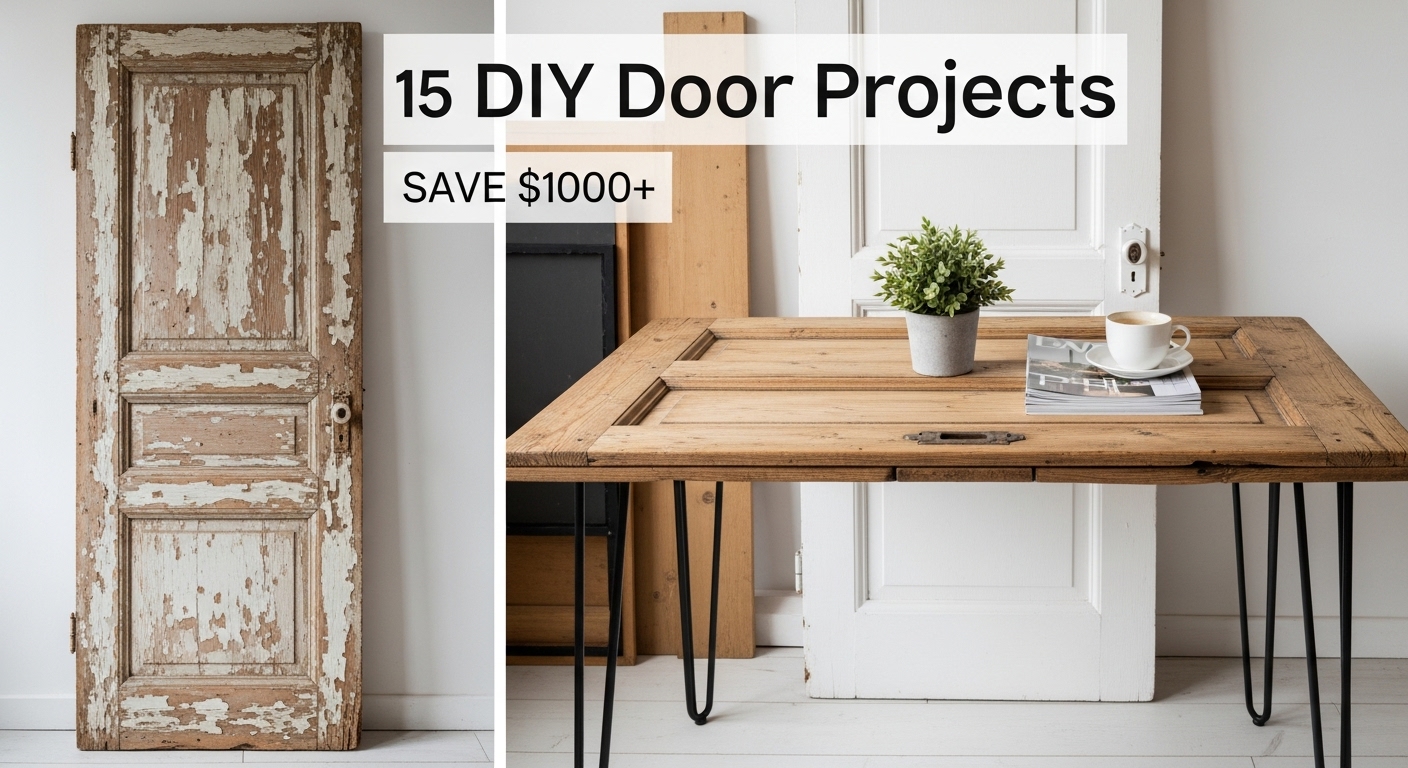
Project 1: Rustic Dining Table From Old Door
This project works best with solid wood doors measuring 6-8 feet long.
Materials Needed:
- 1 solid wood door
- 4 hairpin legs (28-30″ height)
- Wood screws
- Sandpaper
- Wood stain
- Polyurethane finish
Step-by-Step Process:
- Prepare the door surface
- Remove all hardware completely
- Fill holes with wood putty
- Let dry 2-4 hours
- Sand the entire surface
- Start with 120 grit sandpaper
- Progress to 150, then 220 grit
- Wipe clean with tack cloth
- Attach the legs
- Mark leg positions 6″ from each corner
- Pre-drill holes to prevent splitting
- Secure legs with provided screws
- Apply finish
- Stain if desired (follow manufacturer’s directions)
- Apply 2-3 coats of polyurethane
- Sand lightly between coats with 320 grit
Time required: 6-8 hours over 2-3 days (including drying time) Cost: $75-125 total Skill level: Beginner

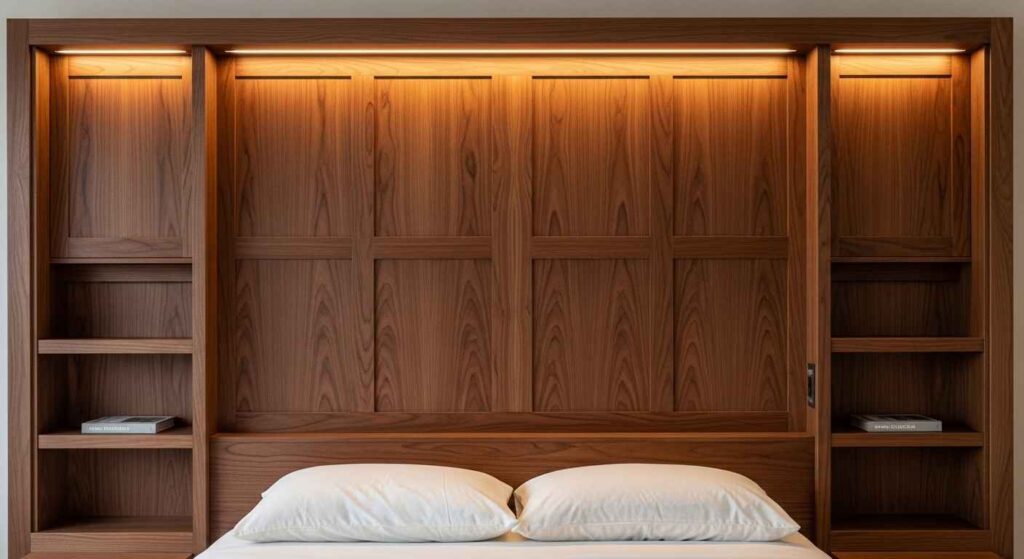
Project 2: Headboard With Built-in Storage
Panel doors work perfectly for bedroom headboards. The raised panels add visual interest without extra work.
What You’ll Need:
- 1 panel door (twin: 30″, full: 54″, queen: 60″, king: 76″)
- Wall mounting hardware
- Small shelves or cubbies (optional)
- LED strip lighting (optional)
Construction Steps:
- Size the door properly
- Measure your mattress width
- Mark cutting lines if trimming needed
- Cut with circular saw using guide
- Create mounting system
- Install French cleat on wall
- Attach matching cleat to door back
- Test fit before final installation
- Add storage features
- Mount small shelves in door panels
- Install cup holders or phone holders
- Add hooks for accessories
Pro tip: Paint the door before installation to avoid wall damage during finishing.
Project 3: Entryway Bench With Coat Storage
Turn a door into functional entryway furniture that handles daily family needs.
Required Materials:
- 1 solid door
- 2×4 lumber for frame
- Plywood for seat support
- Foam cushion
- Fabric for upholstery
- Coat hooks
- Storage baskets
Building Process:
- Cut door to bench length
- Standard bench: 36-48″ long
- Cut door width to 16-18″ deep
- Build support frame
- Create box frame from 2x4s
- Height should be 16-18″ for comfortable seating
- Attach frame to door bottom
- Add seating surface
- Cut plywood to fit top
- Secure with wood screws from underneath
- Add foam and fabric for comfort
- Install coat storage
- Mount hooks 6″ apart on back panel
- Add shelf above hooks if desired
- Include storage baskets below seat

Project 4: Kitchen Island From Double Doors
Two matching doors create an impressive kitchen island with serious storage space.
Planning Your Island:
- Standard counter height: 36″
- Allow 42-48″ walking space around island
- Include electrical planning for outlets
Construction Overview:
- Join doors together
- Align doors carefully
- Use wood glue and screws
- Clamp until dry (4+ hours)
- Build base cabinet
- Frame with 2×4 construction
- Add adjustable shelves inside
- Install soft-close hinges
- Create work surface
- Butcher block countertop works well
- Secure with figure-8 fasteners
- Allow for wood movement
- Add finishing touches
- Install under-cabinet lighting
- Add electrical outlets if needed
- Apply durable finish to all surfaces
Cost estimate: $200-400 depending on countertop choice Time required: 12-16 hours over one weekend
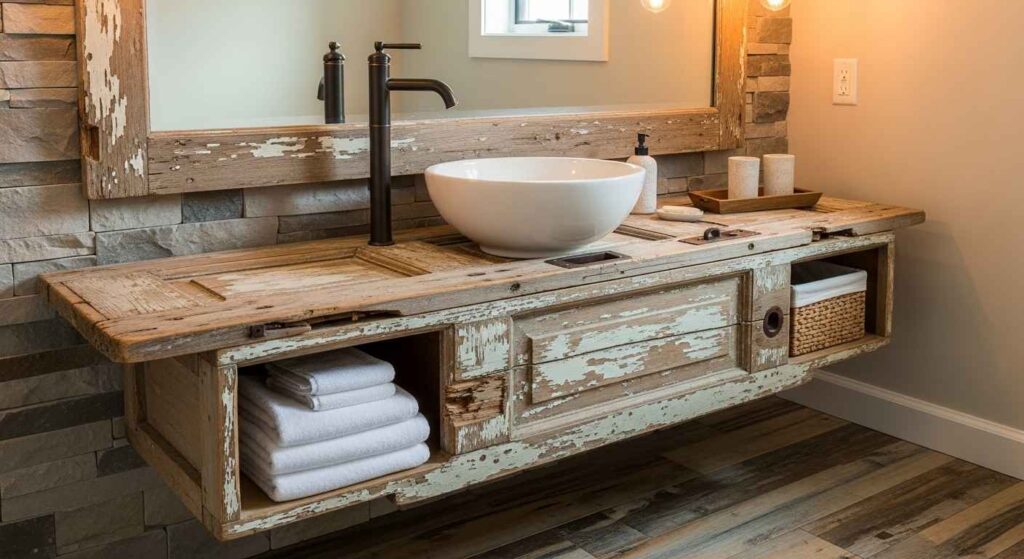
Project 5: Bathroom Vanity Cabinet
Old doors make stunning bathroom vanities with character that store-bought pieces lack.
Special Considerations for Bathrooms:
- Use moisture-resistant finishes
- Ensure proper ventilation around vanity
- Plan plumbing access carefully
- Include storage for daily essentials
Key Steps:
- Prepare for plumbing
- Mark sink and faucet locations
- Cut holes with jigsaw or hole saw
- Sand all cut edges smooth
- Build cabinet box
- Use plywood for sides and back
- Include adjustable shelf
- Plan towel storage space
- Apply bathroom-grade finish
- Use polyurethane with high durability rating
- Apply extra coats in high-moisture areas
- Allow full cure time before use
Coffee Table Ideas Using Old Doors
Small doors or door sections make perfect coffee tables for living rooms.
Design Options:
Glass Top Style:
- Add tempered glass top for smooth surface
- Showcase door’s natural character underneath
- Easy to clean and maintain
Storage Coffee Table:
- Hollow out sections for hidden storage
- Add hinged tops for access
- Perfect for remotes, games, books
Lift-Top Mechanism:
- Install hardware for lifting top section
- Creates workspace while watching TV
- Popular with small space living
Sizing Guidelines:
- Standard coffee table: 36-48″ long x 16-20″ wide
- Height: 16-18″ (2-4″ lower than sofa seat)
- Leave 12-18″ between table and seating
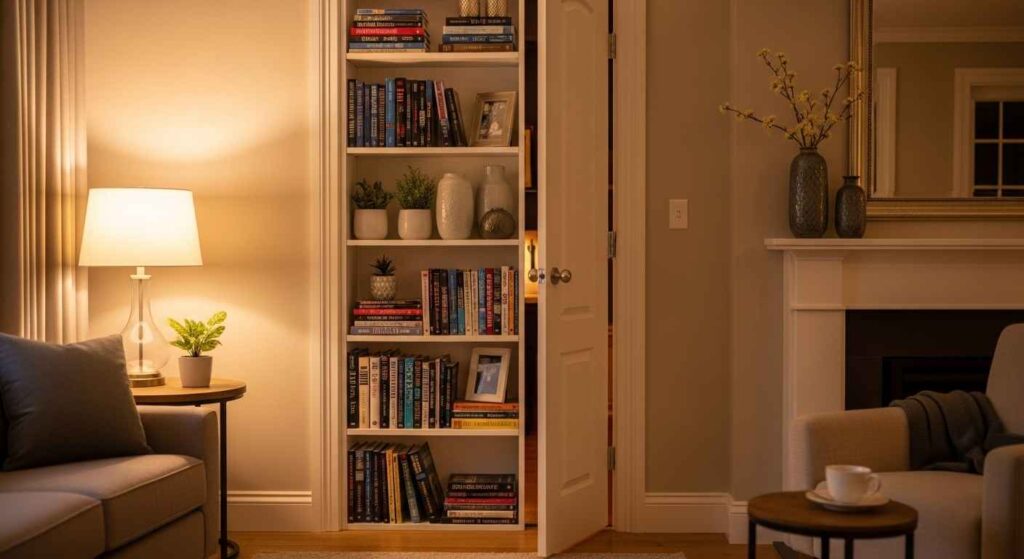
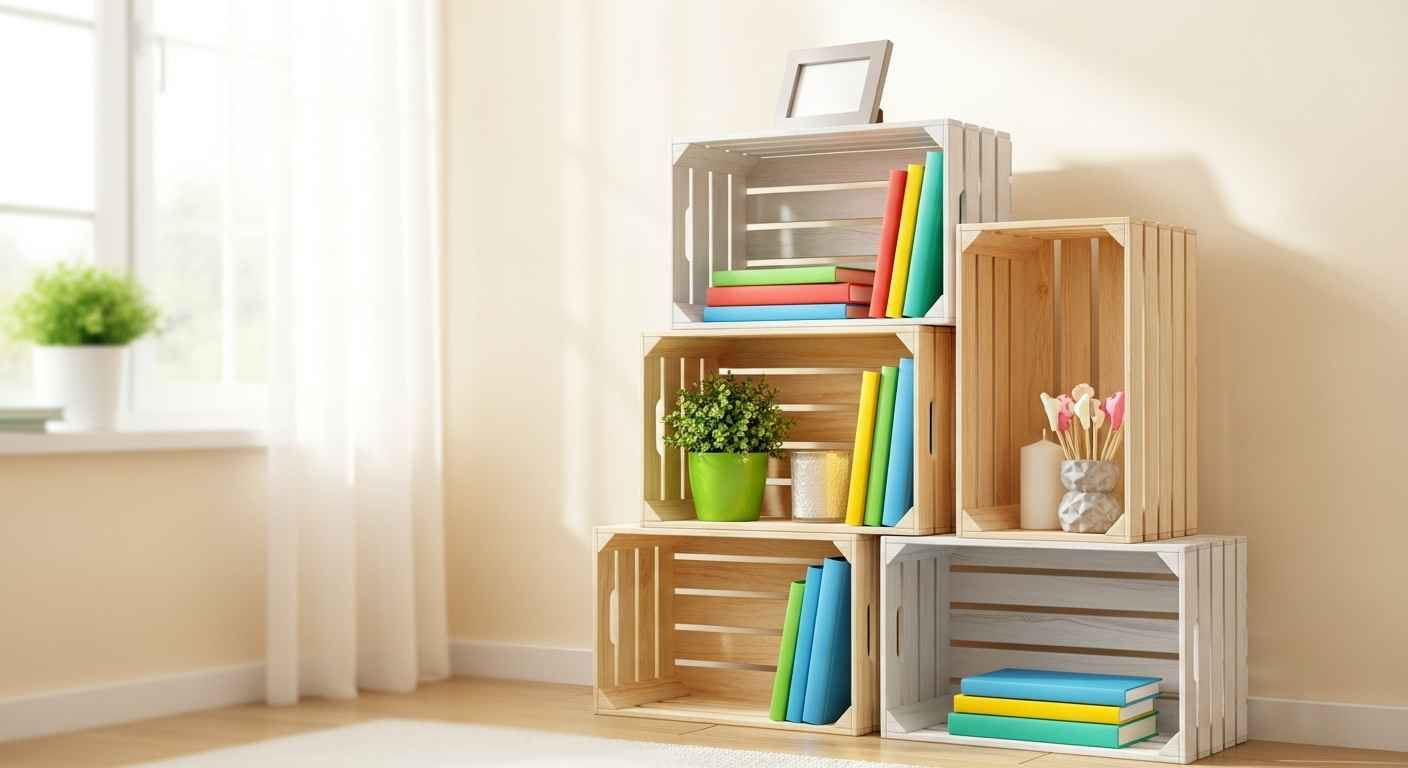
Bookshelf and Display Cabinet Projects
Tall doors work wonderfully as bookcases and display furniture.
Simple Bookshelf Conversion:
- Add horizontal shelves
- Mark shelf positions with level
- Cut shelf brackets from matching wood
- Secure with wood screws and glue
- Back panel options
- Leave open for wall color to show through
- Add plywood back painted in accent color
- Install beadboard for cottage style
- Finishing touches
- Add crown molding to top
- Install adjustable shelf pins
- Include LED strip lighting for displays
Load capacity: Plan for 25-30 pounds per shelf with proper support
Outdoor Furniture Ideas
Weather-resistant treatments allow door furniture to work beautifully outdoors.
Garden Bench Project:
- Use exterior-grade wood treatment
- Add drainage holes to prevent water buildup
- Consider removable cushions for weather protection
Patio Table Options:
- Tile mosaic tops work well with door bases
- Include umbrella hole for shade
- Add wheels for easy moving
Garden Gate Integration:
- Combine furniture with functional gate design
- Create garden room dividers
- Add climbing plant supports
Weather protection tips:
- Apply marine-grade polyurethane annually
- Store cushions during severe weather
- Use stainless steel hardware to prevent rust
Common Mistakes to Avoid
Poor Door Selection:
- Avoid water-damaged doors with rot
- Check for lead paint on pre-1978 doors
- Don’t use doors with structural damage
Inadequate Preparation:
- Skipping proper sanding leads to poor finish
- Not filling holes creates unprofessional look
- Rushing stain application causes blotchy results
Safety Oversights:
- Always wear safety glasses when cutting/sanding
- Use dust masks to avoid inhaling particles
- Check for lead paint before sanding older doors
Structural Issues:
- Undersized hardware leads to failure
- Not accounting for door weight in mounting
- Poor joint construction reduces furniture lifespan
Finishing Techniques That Make the Difference
Stain Selection:
- Light oak: Shows wood grain while brightening
- Dark walnut: Creates rich, formal appearance
- Gray wash: Provides modern farmhouse look
- Clear coat only: Maintains natural wood color
Paint Options:
- Chalk paint: Easy application, vintage look
- Milk paint: Eco-friendly with unique texture
- Standard latex: Durable and widely available colors
Distressing Techniques:
- Sand edges lightly for worn appearance
- Use steel wool for soft texture
- Apply dark wax in crevices for age

Cost Breakdown and Budget Planning
Typical Project Costs:
Dining Table:
- Door: $50-100
- Legs: $40-80
- Materials: $25-40
- Total: $115-220
Headboard:
- Door: $30-75
- Hardware: $15-30
- Materials: $20-35
- Total: $65-140
Kitchen Island:
- Doors (2): $100-200
- Countertop: $75-200
- Materials: $50-100
- Total: $225-500
Money-Saving Tips:
- Buy doors in bulk for better prices
- Share large tool purchases with neighbors
- Look for free doors during renovation seasons
- Use existing hardware when possible
Maintenance and Care for Door Furniture
Daily Care:
- Dust regularly with microfiber cloth
- Clean spills immediately to prevent staining
- Use coasters and placemats for protection
Annual Maintenance:
- Inspect all hardware for looseness
- Reapply finish to high-wear areas
- Check for signs of pest damage
Long-term Preservation:
- Refinish every 3-5 years depending on use
- Store outdoor pieces during harsh weather
- Keep indoor humidity between 30-50%
Safety Considerations and Lead Paint
Pre-1978 Door Warning: Doors manufactured before 1978 may contain lead paint. Test before sanding or cutting. If lead is present, hire certified professionals for removal.
General Safety Rules:
- Work in well-ventilated areas
- Wear appropriate protective equipment
- Keep workspace clean and organized
- Have first aid supplies readily available
Conclusion
Repurposing old doors into furniture offers endless creative possibilities while saving money and helping the environment. Start with simple projects like headboards or benches, then advance to complex pieces like kitchen islands as your skills grow.
Remember that each door has its own character and potential challenges. Take time to plan your project thoroughly, invest in quality materials, and don’t rush the finishing process. With patience and creativity, you’ll create unique furniture pieces that tell a story and serve your family for years to come.
The key to success lies in matching the right door to the right project, using proper techniques, and finishing with care. Whether you’re building your first door table or your tenth repurposed piece, each project teaches valuable skills while adding personality to your home.
Related Projects You Might Enjoy:
- DIY Pallet Furniture Ideas to Save Money – More reclaimed wood furniture projects
- Affordable Backyard Makeover Ideas Under $1000 – Outdoor space improvements
- Time-Saving Organization Systems That Work – Storage solutions for your new furniture


Leave a Reply