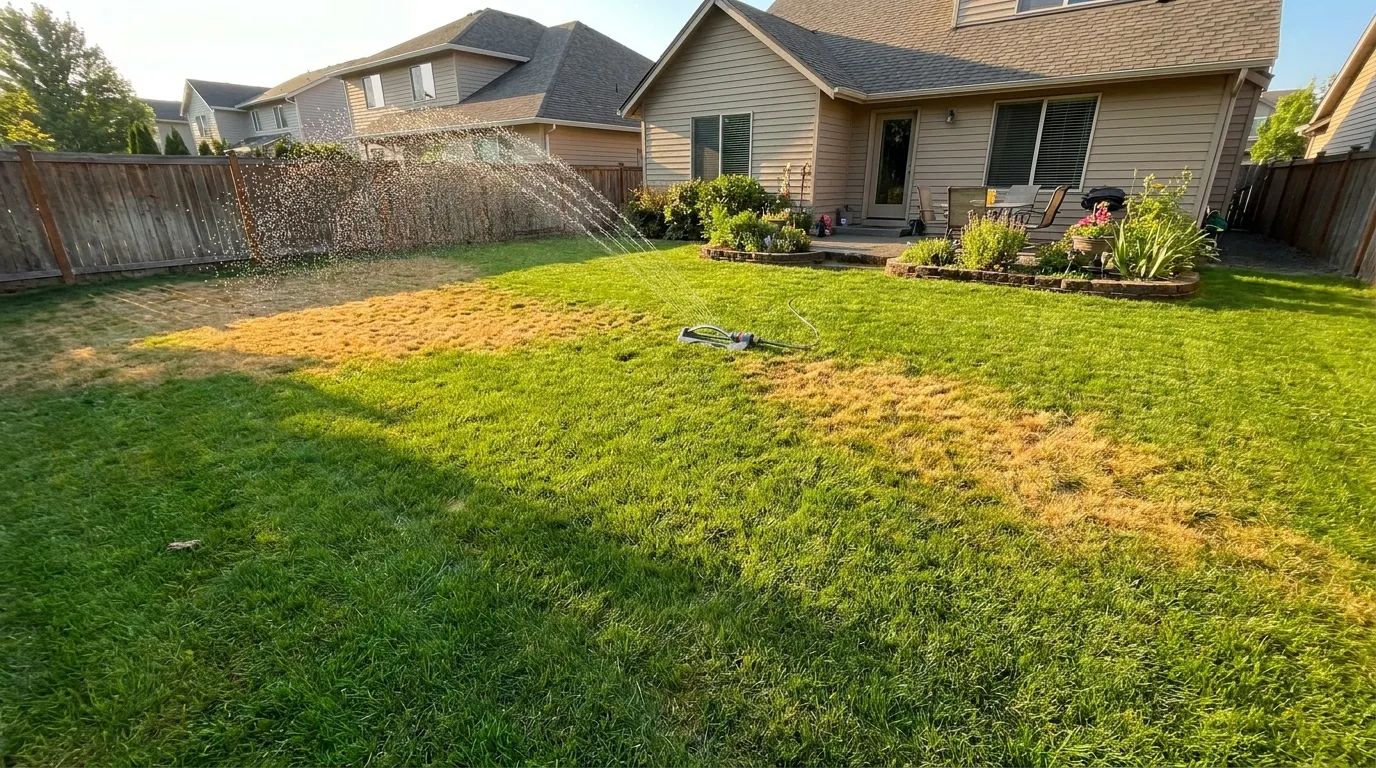
Most dead or dying lawns aren’t victims of drought. They’re victims of the sprinkler.
Homeowners water faithfully — sometimes every single day — and still end up with yellow patches, weak growth, and fungal problems they can’t explain. The issue isn’t the effort. It’s the method. Seven specific watering habits account for the majority of residential lawn damage, and most of them feel like the right thing to do at the time.
Here’s what’s actually happening underground, and how to fix it.
Mistake 1: Watering Every Day for a Short Amount of Time
This is the single most common lawn watering mistake — and the most damaging over time.
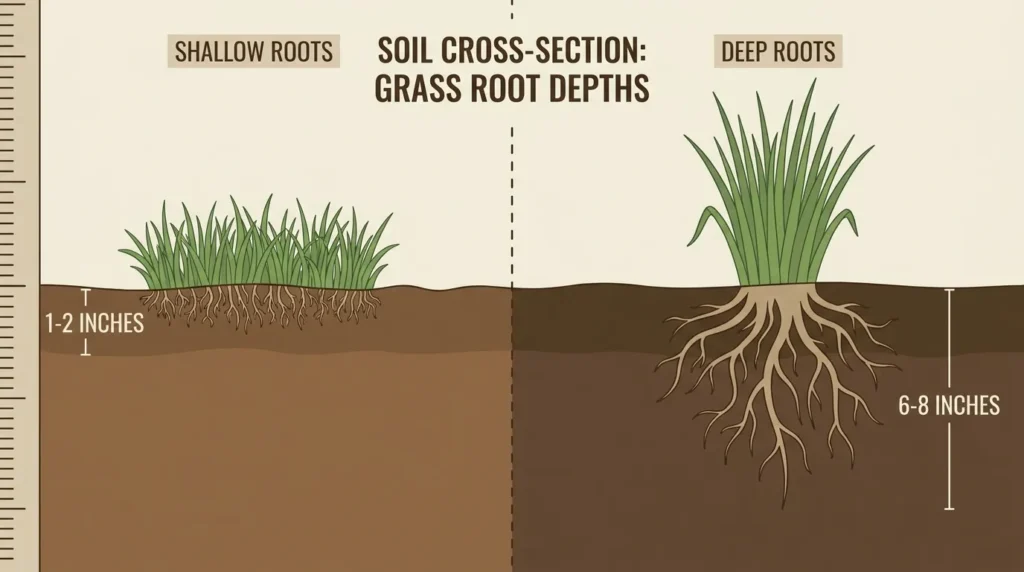
When water only reaches the top inch or two of soil, grass has no reason to send roots deeper. Moisture sits right at the surface, always available, so roots stay shallow — 1 to 2 inches deep instead of the 6 to 8 inches a healthy lawn needs. That works fine until one hot afternoon hits or you miss a single watering. The grass dries out, goes into heat stress, and browns fast. Daily light watering essentially trains your lawn to be fragile.
The fix: Pull back to 2–3 deep watering sessions per week. Each session should push water 6 to 8 inches into the soil. That depth forces roots downward to chase moisture, which is how you build drought resistance.
The EPA estimates up to 50% of outdoor water is wasted through daily, shallow irrigation. Deep and infrequent watering uses less water and produces stronger grass — it’s the most impactful single change you can make to your routine.
How to check: Push a screwdriver 6 inches into your soil after watering. If it slides in without much resistance, you’ve hit the right depth. If it stops at 2–3 inches, water longer per session, not more often.
Want a schedule dialed in for your specific grass type and region? The watering schedule generator builds one in about 60 seconds.
Mistake 2: Watering at the Wrong Time of Day
Timing matters more than most homeowners realize — it can determine whether you get healthy grass or a fungal problem.
Midday watering (10 AM–4 PM): Up to 30% of water evaporates before reaching the root zone. You’re spending water on air.
Night watering: The opposite problem. Moisture sits on grass blades for 8 to 10 hours in the dark. That sustained wet period creates ideal conditions for fungal diseases — brown patch, dollar spot, and powdery mildew thrive in exactly those conditions. A lawn watered consistently at night will develop disease. It’s a matter of when, not if.
The fix: Water between 6 AM and 10 AM. Temperatures are low, evaporation is minimal, there’s usually little wind, and the grass dries off naturally during the day. It’s the most efficient watering window by a wide margin.
If you’re already seeing irregular brown or orange patches, they may be fungal rather than drought-related. The common lawn diseases guide covers identification and fixes for the most frequent turf diseases.
Mistake 3: Missing the Signs You’re Overwatering
Overwatered grass looks strikingly similar to underwatered grass — both turn yellow, both look stressed. That’s the trap. When an already-overwatered lawn starts deteriorating, many homeowners respond by watering more. The damage accelerates quickly.
Five signs you’re overwatering right now:
- Spongy soil underfoot — Walk across your lawn. A soft, bouncy feel means the soil is waterlogged.
- Yellow or pale green patches — Yellowing from overwatering happens because roots are suffocating, not drying out.
- Mushrooms or a musty smell — These signal consistently wet soil and oxygen-depleted (anaerobic) conditions at the root level.
- Puddles that sit for more than 2 hours after watering — Water should absorb, not pool.
- Weeds like nutsedge or dollar weed dominating — These moisture-loving weeds outcompete grass in saturated soil.
The screwdriver test: Before your next scheduled watering, push a standard screwdriver 6 inches into the soil. If it goes in easily, skip that session entirely. The soil still has moisture. Overwatered lawns often need water only every 5 to 7 days, not twice a week.
Let the top 2 inches of soil dry between sessions. When blades start to fold slightly lengthwise, or footprints don’t spring back within a few seconds, that’s your cue to water.
Mistake 4: Running the Same Watering Schedule All Year
A timer program set in July will actively harm your lawn by October.
Grass water demand shifts constantly with temperature, sunlight hours, humidity, and growth stage. Running identical schedules year-round almost always means overwatering in spring and fall — and underwatering at peak summer heat.
Seasonal adjustments that matter:
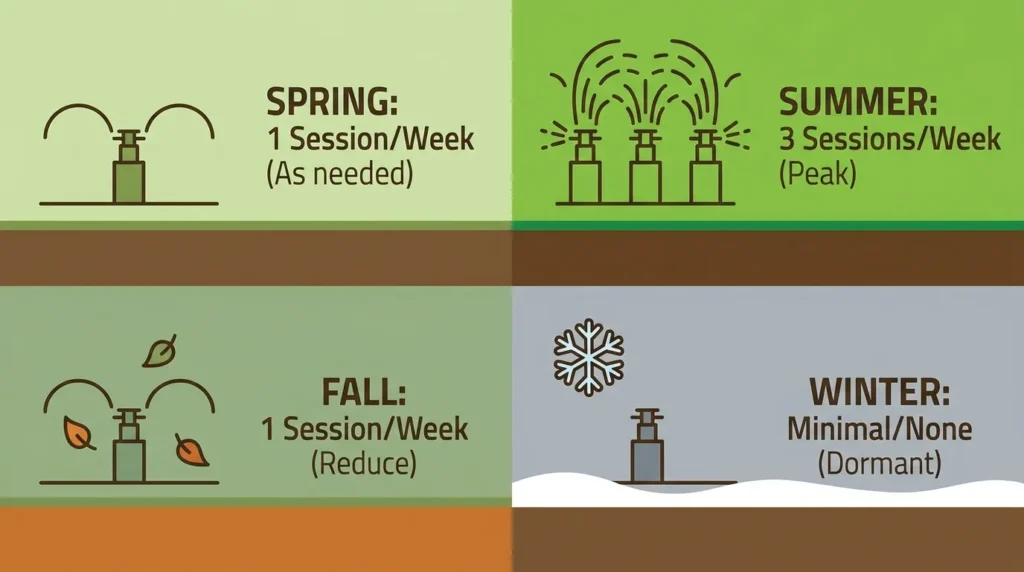
- Spring: Soil is often already moist from rain and the ground is cool. Start with one deep session per week. Add a second only when you see visible stress.
- Summer: Peak demand. Two to three deep sessions per week, early morning.
- Fall: Growth slows, evaporation drops. Scale back to one session per week.
- Winter (warm-season grasses): Dormant grass goes brown — that’s normal. Reduce to once every 2–3 weeks in dry climates, or stop entirely where winter rain is reliable.
The dormancy mistake: When warm-season grasses go brown in late fall, many homeowners water heavily trying to “revive” them. Dormant grass sitting in cold, saturated soil for weeks is where root rot and winter fungal disease begin. Brown in November usually means dormancy, not drought. Don’t panic-water.
Use a seasonal lawn care calendar to track when to shift your schedule through the year — the transition weeks in spring and fall are where most over- and under-watering happens.
Installing a rain sensor is the cheapest upgrade available. A basic model costs $15–$30 and shuts off your irrigation system automatically after rainfall. It takes 20 minutes to install and pays for itself in the first month of summer.
Mistake 5: Ignoring Your Soil Type
Sandy, clay, and loam soils respond completely differently to irrigation. Treating them identically is one of the most overlooked mistakes.
Sandy soil drains fast — water moves through and past the root zone quickly. Sandy lawns need shorter but more frequent watering to keep moisture where the roots actually are.
Clay soil absorbs water slowly and holds it for a long time. Clay lawns need fewer sessions applied at a slower rate. Water too fast on clay and most of it runs off the surface before it can penetrate.
Loam soil sits in the middle — good drainage, good retention. It’s the most forgiving and typically matches standard watering advice.
The squeeze test: Grab a handful of moist soil and squeeze it. Sandy soil won’t form a ball. Loam forms a ball that breaks when poked. Clay forms a firm ball that holds its shape.
Soil type also affects fertilizer absorption. Waterlogged soil causes nutrients to wash away as runoff before grass can use them. The lawn fertilizer calculator accounts for soil type and grass variety when calculating application amounts.
Your grass type also changes water requirements significantly. Cool-season grasses like Kentucky bluegrass and tall fescue need more consistent moisture than warm-season varieties like Bermuda or Zoysia, which tolerate dry periods far better. The best grass types for different climates guide breaks down the water needs of each variety in detail.
Mistake 6: Uneven Sprinkler Coverage
You can have perfect timing and frequency and still end up with a patchy lawn. If sprinkler heads are misaligned, clogged, or the wrong type for your layout, some areas get soaked while others stay consistently dry. The result looks like a disease problem but is entirely a distribution issue.
Common coverage problems:
- Heads spraying driveways, sidewalks, or fences
- Single long cycles on sloped terrain (water pools at the bottom, top stays dry)
- Water pressure outside the 40–60 PSI sweet spot (foggy mist = too high; weak throw = too low or clogged)
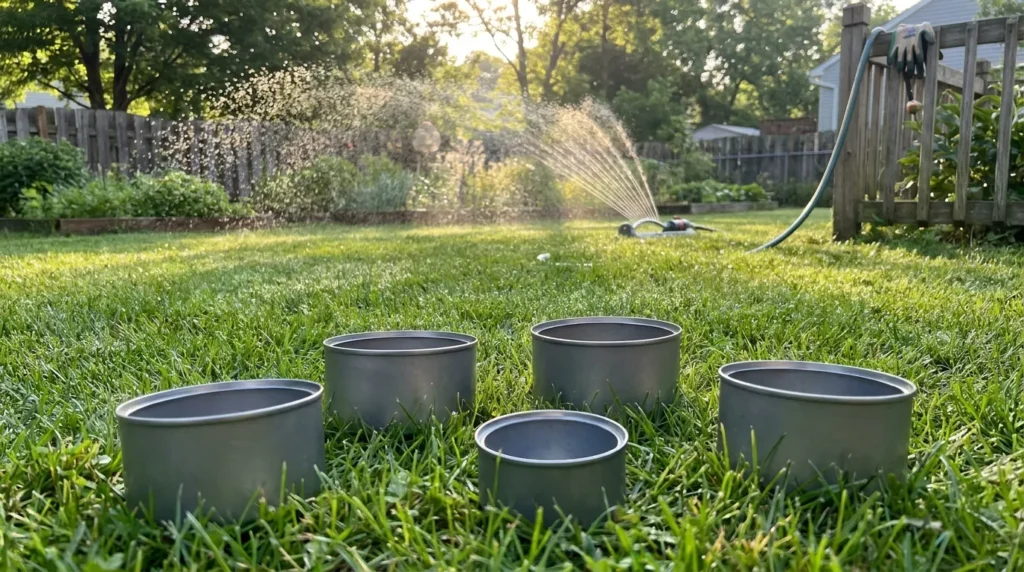
The tuna can test: Place 4–6 empty, flat-bottomed cans at different spots across your lawn. Run each irrigation zone for 15 minutes. Measure the water collected in each can. Large differences between cans mean uneven coverage. Adjust heads and test again until readings are consistent across the zone.
Do this test at the start of each season. Heads shift over time, nozzles wear, and pressure changes — what was calibrated well last fall may be off by spring.
For a full upgrade, the smart irrigation systems guide covers zone-based controllers that handle uneven coverage problems automatically, including weather adjustments and per-zone scheduling.
Mistake 7: Watering Over Compacted or Thatch-Heavy Soil
This is the mistake most homeowners never identify — because the lawn looks like it needs more water when it actually needs aeration.
When soil is compacted or buried under a thick thatch layer (the dense mat of dead grass debris between soil and living blades), water can’t penetrate. It runs off the surface. You can run sprinklers for 40 minutes and the root zone might receive a fraction of that water. No amount of watering schedule adjustment will fix the problem until you fix the soil.
Signs your lawn has a compaction problem:
- Water pools on the surface and drains slowly even on flat ground
- Soil feels rock-hard even after rain
- Grass looks dry and stressed despite regular watering
- A screwdriver won’t push in past 2 inches after watering
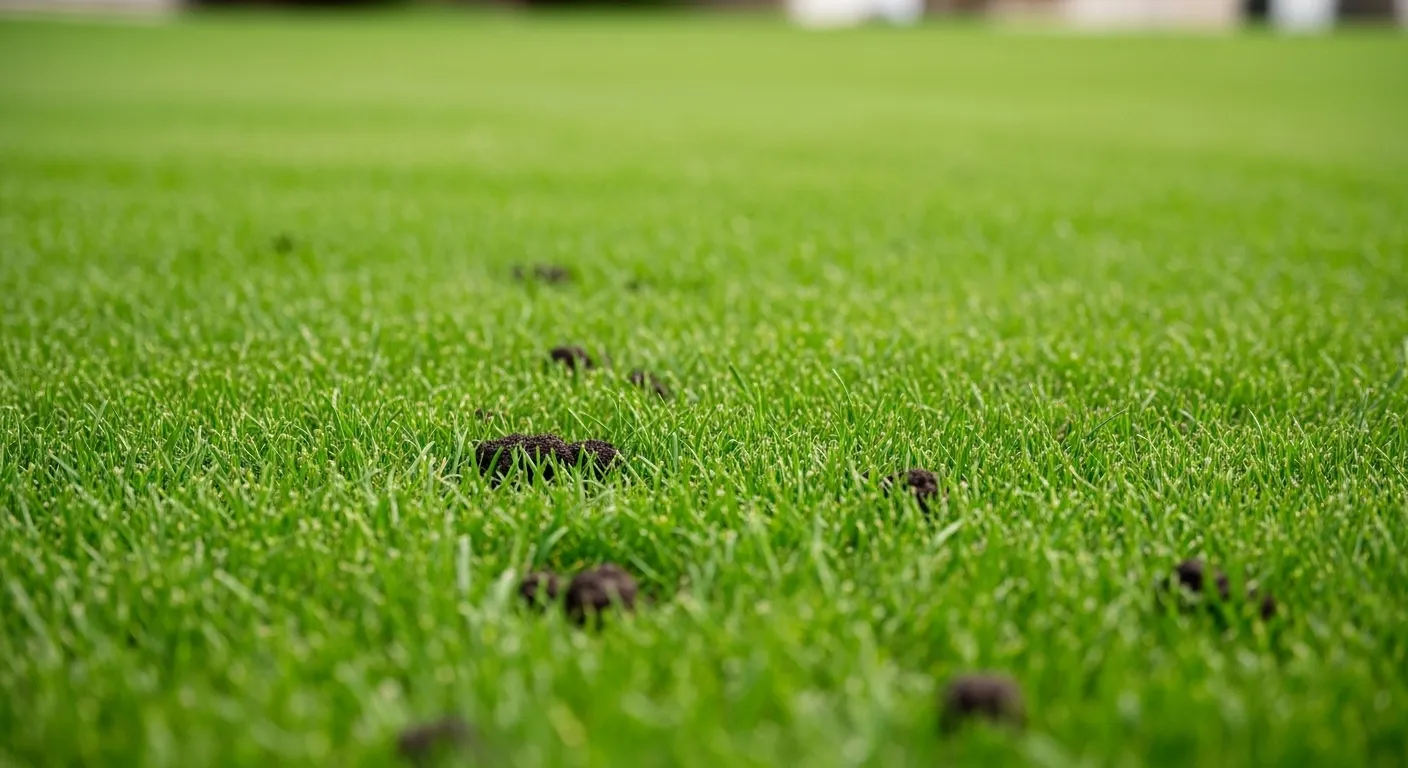
The fix: Core aeration — pulling small plugs from the soil — breaks up compaction and opens channels for water and oxygen to reach root depth. Once a year, typically in fall for cool-season grasses or spring for warm-season varieties, makes a bigger difference than almost any other single action.
After aerating, topdress with a thin layer of compost to improve soil structure and water-holding capacity. The improvement in absorption shows up immediately.
The lawn aeration benefits and methods guide covers timing, DIY vs. professional options, and how to get maximum benefit from a single aeration session.
Quick Lawn Watering Self-Diagnosis
Before adjusting your schedule, answer these five questions:
- Does your soil feel spongy after watering? → You’re overwatering. Skip the next session and apply the screwdriver test.
- Are you watering between 10 AM and 4 PM? → Shift to 6–10 AM immediately. No other change needed.
- Do you use the same schedule in April as you do in July? → Reduce to once weekly in spring and fall.
- Are some lawn areas dry while others look fine? → Run the tuna can test. Coverage is the problem, not schedule.
- Does water pool or run off quickly after irrigation? → Compaction is blocking absorption. Aeration fixes this, not more water.
If watering habits are solid but results are still poor, the problems may be in mowing height, fertilizing timing, or soil pH. The lawn care mistakes beginners make guide covers the full set of variables that affect how grass responds to irrigation.
The Bottom Line
Every mistake on this list is fixable. Most cost nothing — just a change in timing, frequency, or observation. The two highest-impact adjustments you can make starting today: shift watering to early morning, and replace daily light sessions with two to three deep soaks per week. Those two changes alone will improve most lawns within two to three weeks.
Once watering is dialed in, building a lawn that handles heat and drought without going into stress is the logical next step. How to create a drought-resistant lawn covers the grass varieties, soil amendments, and maintenance habits that keep lawns green through dry summers without excessive irrigation.

Leave a Reply