Most studio apartments aren’t too small. They’re just badly organized.
A 350 sq ft studio with clear zones, a functional layout, and furniture that earns its place can feel roomier than a 600 sq ft one-bedroom without those things. The difference is strategy, not square footage.
These 27 hacks cover everything — layout logic, zone separation, multi-functional furniture, vertical storage, and expert-level 2026 upgrades that most renters haven’t tried yet. No filler. No vague advice. Specific, numbered changes you can start this weekend.
Layout & Space Flow
1. Map Your Movement Before Moving Furniture
Before touching a single piece of furniture, walk through your apartment during a normal day. Start at the door. Move to the kitchen, then to where you sit, where you work, where you sleep.
Notice where you pause. Notice what blocks your path.
Those patterns reveal where your zones should actually be. A layout built around how you move is always more functional than one built around what looks symmetrical.
2. Place Your Bed Against the Longest Wall
The bed is the biggest piece of furniture in a studio. Where it sits determines every other layout decision.
The longest wall gives maximum floor depth in front of the bed — which is where your living zone lives. A bed centered in the room bleeds floor space from all four sides. Against the wall, it uses one plane and frees the rest.
If the longest wall has a window, use a low-profile platform headboard that doesn’t block light.
3. Float Furniture 2–4 Inches From Walls
This is counterintuitive but consistent. Pulling furniture slightly away from walls — just 2 to 4 inches — makes a room feel larger, not smaller.
It creates visual breathing room around each piece. Furniture pressed flush against walls reads as crammed storage. A small gap reads as designed space.
Try it with your sofa first. The difference is immediate and requires no new purchases.
4. Create a Dedicated Entry Zone
The 3 sq ft just inside your front door is the most ignored real estate in a studio.
A wall-mounted hook rack, a small bench, and a tray for keys sets up a decompression zone at the threshold. It keeps coats, bags, and shoes from spreading into the living zone the second you walk in.
Without it, that clutter migrates to the sofa, chairs, and floor constantly. For more entryway organization ideas that work in tight spaces, that guide has practical setups at every budget.
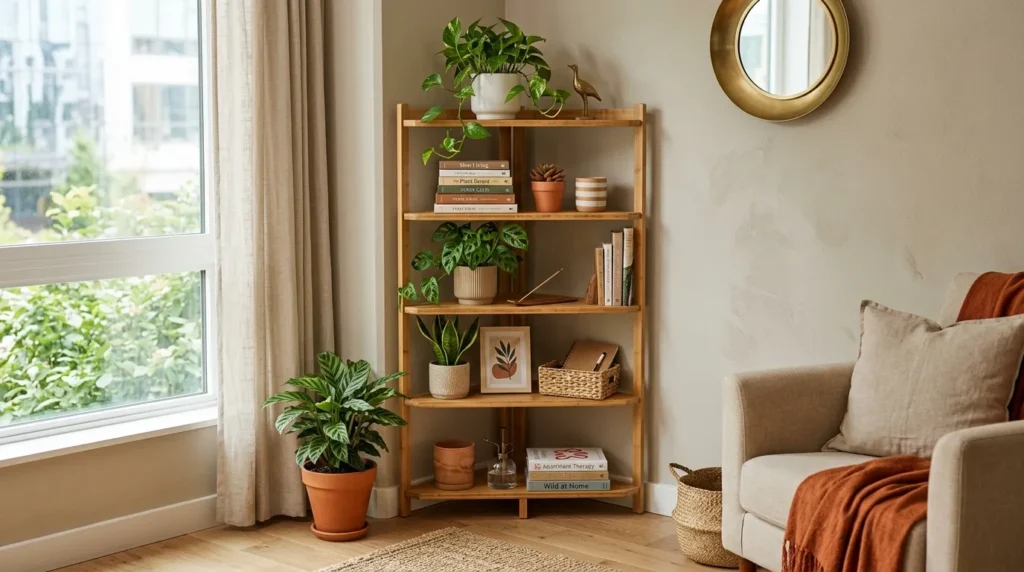
5. Eliminate Dead Corners With Corner Shelving
Most studios have four corners. Most people use zero of them.
A 5-tier corner shelf converts a dead 2 sq ft triangle into functional storage. That’s room for plants, books, small appliances, or display objects — without adding any footprint to the rest of the floor.
Zone Definition Without Walls
6. Use Area Rugs to Anchor Each Zone
An area rug is the most affordable room divider available. A 5×7 under your sofa and coffee table defines your living zone. A rug under the bed anchors your sleeping zone.
The rule: all front legs of the furniture should sit on the rug. A rug too small for the furniture grouping floats awkwardly and makes the arrangement look disconnected.
Keep the same color family across both rugs. Different textures are fine. Clashing colors aren’t.
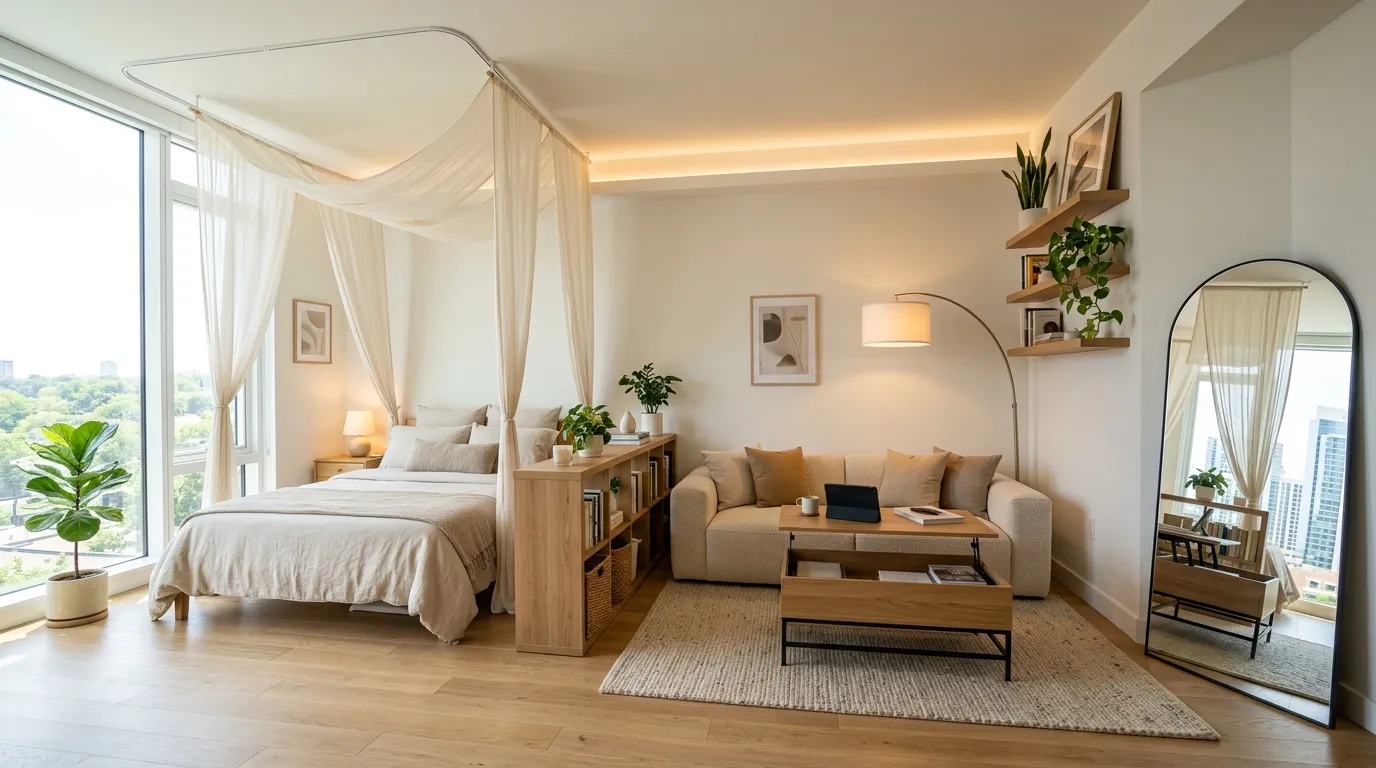
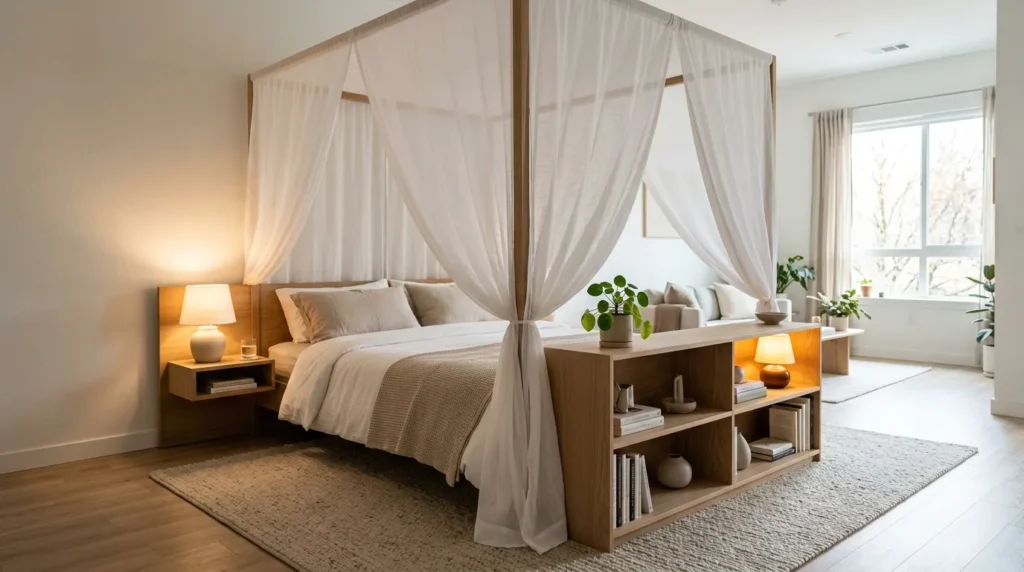
7. Define the Sleep Zone With a Half-Height Bookshelf
A bookshelf between 42 and 54 inches tall acts as a room divider without blocking light or closing off the apartment.
Place it perpendicular to the wall at the foot or side of your bed. It gives the sleeping zone visual privacy while the rest of the space stays open. It adds storage on both sides simultaneously.
This is one of the most efficient solutions if you work from home — visual separation between where you sleep and where you work matters for focus and sleep quality.
8. Hang Curtains Floor-to-Ceiling to Fake a Room
Ceiling-height curtain panels create walls where there are none.
Mount the rod as close to the ceiling as possible. Use panels that reach the floor. Even with the curtains open, the vertical lines pull the eye upward and make the ceiling feel taller. Closed, they separate the sleeping area completely.
Tension rods or ceiling-mounted curtain tracks require no drilling — fully renter-safe.
9. Use a Narrow Console Table as a Room Divider
A slim console table — 10 to 14 inches deep — placed behind your sofa works as a visual boundary between the living zone and whatever sits behind it (usually sleeping or dining).
It also gives you a surface for a lamp, plants, or small decor. That adds visual layering and further signals to the eye that this is a zone boundary.
Keep console height at or below sofa back height. Higher than the sofa interrupts sightlines and makes the space feel cut off.
10. Install a Canopy or Bed Crown to Frame the Sleep Space
A canopy frame or fabric crown above the bed creates a visual sleeping enclosure without walls.
This is a psychological hack as much as a design one. When a sleep zone has a visual frame overhead, the brain registers it as a separate room even in an open-plan space. Freestanding canopy frames install without wall damage — important for renters.
Multi-Functional Furniture That Earns Its Place
11. The Lift-Top Coffee Table
A lift-top coffee table does three things a regular coffee table does not. The surface raises to desk or dining height for working or eating. Underneath the lift panel, hidden compartments hold laptops, chargers, remote controls, and cables.
In a studio, this single piece replaces both a coffee table and a dedicated desk. Cost: $120–$300. Floor space saved: 15–25 sq ft.
12. Storage Ottoman as Coffee Table + Seating + Chest
A large storage ottoman — 18 to 20 inches tall — works as a coffee table, pulls into service as extra seating, and stores throws, pillows, or out-of-season items inside.
Add a tray on top to use it as a stable surface. That small addition makes it feel designed rather than improvised.
If you want to build one to exact dimensions and fabric, a DIY storage ottoman can be completed for under $60 with basic tools.
13. Murphy Bed With Integrated Desk
A Murphy bed is a genuine floor-space recovery tool — not just a small-apartment novelty.
When the bed folds up, your sleeping zone converts to living or working space. Models with integrated desks let the desk fold out as the bed folds in. You lose nothing. You gain back 40–50 sq ft of floor during waking hours.
Quality wall-bed systems run $800–$2,500 installed. Flat-pack versions start around $400. The floor area they recover is typically larger than a second bedroom.
14. Extendable Dining Table
A wall-mounted drop-leaf or compact extendable dining table stays small for daily use and opens up to seat 4 for guests.
Some folding wall-mounted versions take up only 4 inches of wall depth when closed. Fixed dining tables in a studio occupy 12–18 sq ft permanently. A fold-away version recovers that space every day.
15. Modular Sofa
Modular seating — individual sections that reconfigure independently — adapts to any layout change without buying new furniture.
Push sections together for a full sofa. Separate them to open floor space. Rearrange into an L-shape for a corner living zone. This eliminates the “bought a sofa that doesn’t fit the new layout” problem, which is common in studios.
Look for models with under-cushion storage. That adds another 4–6 cubic feet of hidden capacity.
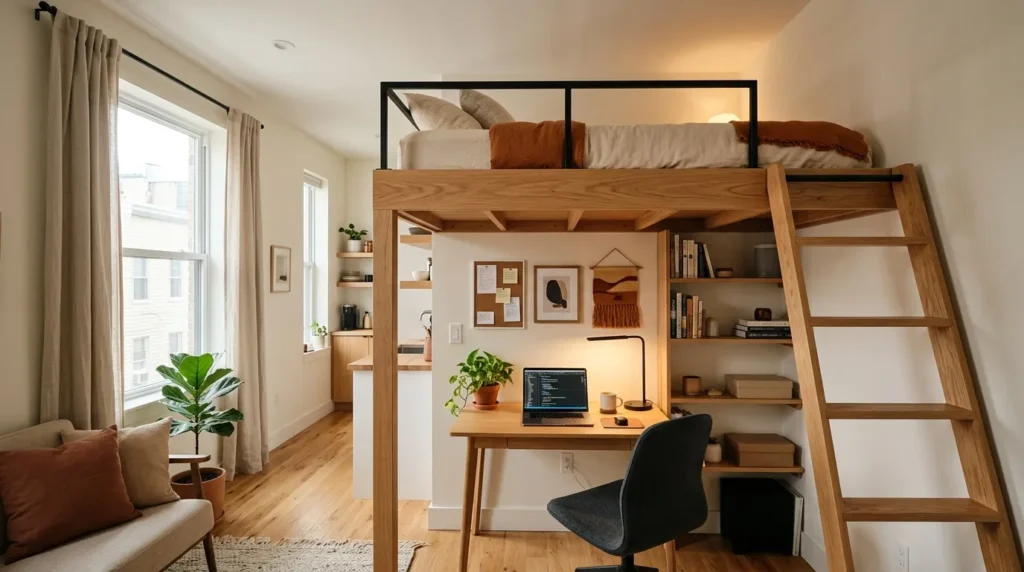
16. Loft Bed With Under-Bed Living Zone
If your ceiling is 9 feet or higher, a loft bed is the most aggressive space-recovery option available.
The requirement: at least 3 feet of clearance above the mattress. Below that threshold, sleeping feels claustrophobic. Above it, you recover 35–50 sq ft of floor for a desk, sofa, or full wardrobe.
Check ceiling height before buying. Pre-1960 buildings in most cities have 10–13 ft ceilings that support this. Newer construction rarely does.
Vertical Space & Wall Storage
17. Mount Shelves Above the 72-Inch Line
Most people install shelves at eye level — around 60 inches — and leave everything above unused.
Shelves between 72 and 84 inches off the floor store items you access less frequently: seasonal items, backup supplies, display objects. They keep floor space completely clear and pull the eye upward, making the ceiling feel farther away than it is.
For renter-safe installation, no-drill wall shelves using adhesive mounts or tension systems now hold 15–25 lbs per bracket reliably — enough for books, plants, and storage boxes.
18. Pegboard Wall Panels for Kitchen or Office Zones
A 24×48-inch pegboard panel converts a blank wall into a reconfigurable storage system you can rearrange without making new holes.
In the kitchen: pots, utensils, and spices. In a home office zone: monitors, cables, headphones, and supplies. Accessories rearrange in seconds as needs change.
Mount the board with 1-inch standoffs so pegboard hooks insert properly. Without the gap, the hooks won’t catch.
19. Floating TV Unit With Hidden Cable Management
A wall-mounted TV plus a floating media shelf recovers the 4–6 sq ft a traditional TV stand permanently occupies.
Run cables through a recessed channel or along the baseboard with cable clips. Visible cables in a small space read as clutter even when everything else is tidy. This one detail matters more in a studio than in any other room type.
20. Magnetic Knife Strip + Wall-Mounted Spice Rack in Kitchen
A magnetic knife strip replaces a knife block that takes up 6 sq inches of counter. A wall-mounted spice rack moves 12–20 jars off the counter completely.
Together, these two changes free up roughly 1 full square foot of counter space. In a 6-foot galley kitchen, that’s significant.
Light, Mirrors & Visual Expansion
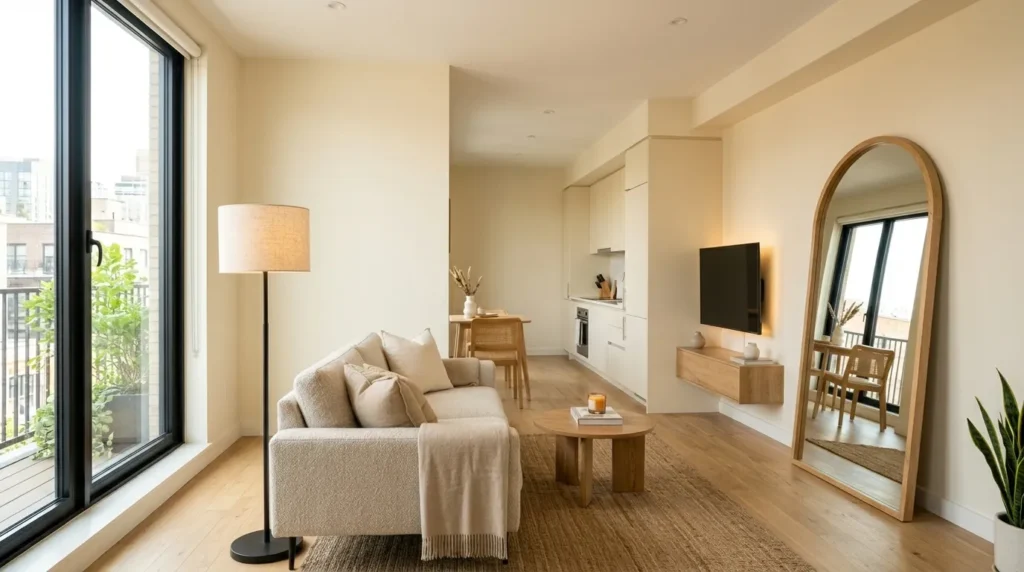
21. Place a Full-Length Mirror Opposite the Main Window
A large mirror directly across from the main window reflects natural light through the entire apartment and creates the visual impression of a second room beyond the frame.
The effect increases when the mirror captures a specific view — a plant grouping, a window, a lamp — rather than a blank wall. Lean it against the wall for renter safety. No mounting required.
One specific note: mirrored furniture (dressers, side tables) doesn’t replicate this effect. Furniture mirrors scatter reflections. A single large floor mirror anchors them.
22. Layer Three Types of Lighting
One overhead light is the default in most studios. It creates flat, shadowless illumination that makes the room feel clinical and smaller than it is.
Three-layer lighting changes that entirely:
- Ambient — overhead pendant or ceiling fixture for general light
- Task — desk lamp, under-cabinet strips, bedside reading light
- Accent — floor lamp, LED strip behind the TV, puck lights under shelves
Use warm white bulbs (2700K–3000K) for ambient and accent layers. Use neutral white (4000K) for task lighting only. Warm light expands perceived space. Cool light flattens it.
Understanding color psychology in home interiors is worth reviewing before committing to bulb temperatures and paint colors — the interaction between light warmth and wall tone is almost always underestimated.
23. Stick to a 3-Color Palette With One Warm Accent
Multiple competing colors in a small space create visual fragmentation. The eye bounces from surface to surface without settling, which makes the room feel busier and smaller than it is.
A 3-color formula works consistently: one dominant neutral at 60%, one secondary tone at 30%, one warm accent at 10%.
Trending 2026 palettes: warm wheat + white + terracotta / soft coastal blue + sand + warm brass / warm grey + cream + sage.
Paint finish matters as much as color. Matte finishes absorb light. Eggshell or satin reflects more of it and is easier to wipe clean. Before buying paint, use the paint coverage calculator to avoid buying too much or running short mid-wall.
Hidden & Underused Storage
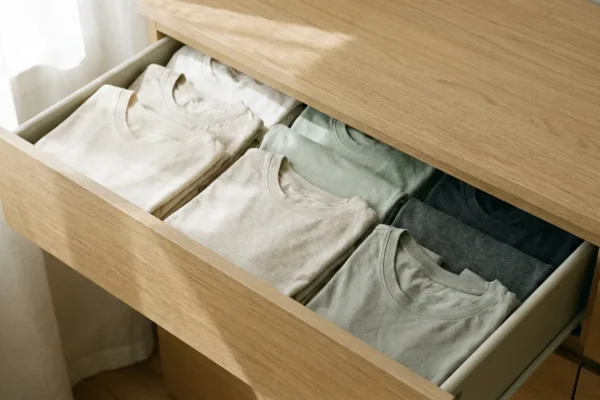
24. Under-Bed Storage With Labeled Flat Bins
A standard bed frame sits 7–12 inches off the floor. At a queen footprint of 60×80 inches, that’s 33 sq ft of storage volume most people leave empty.
Flat, lidded rolling bins work best here. Categorize by type — seasonal clothing, extra bedding, shoes, gift wrap — and label each bin. Clear lids let you identify contents without pulling everything out.
Beds with built-in drawers are even more efficient, but only if you’ll actually maintain the system. Combining under-bed storage with a proper closet organization system for small spaces often eliminates the need for a standalone wardrobe in the main room entirely.
25. Over-Door Organizers in Every Doorway
The back of every door in a studio is unused vertical storage.
An over-door organizer on the bathroom door holds toiletries, hair tools, and medications. One on the closet door holds shoes or accessories. One on the entry door holds bags, umbrellas, and mail.
Each organizer adds 5–7 sq ft of vertical storage without touching a wall or occupying any floor space. Four doors in a studio could recover 20+ sq ft of net storage with no drilling.
2026 Expert-Level Upgrades
26. Smart Lighting Scenes to Switch Between Work and Rest Mode
This is the least-used studio hack on this list and one of the most effective.
Smart bulbs connected to a basic app (Google Home, Apple Home, or Alexa) let you save lighting scenes for different activities. A “work” scene runs bright neutral-white task lighting. A “wind-down” scene dims everything and shifts to warm amber. A “sleep” scene cuts everything except a single low-glow accent.
In a studio where sleeping, working, and relaxing happen in the same room, these transitions act as sensory signals — your brain interprets them the way it would interpret walking from one room into another. They make different activities feel distinct.
Smart bulbs cost $8–$15 each. A 4-bulb starter kit comes in under $50. The impact on sleep quality and focus is documented — light temperature directly affects cortisol and melatonin production.
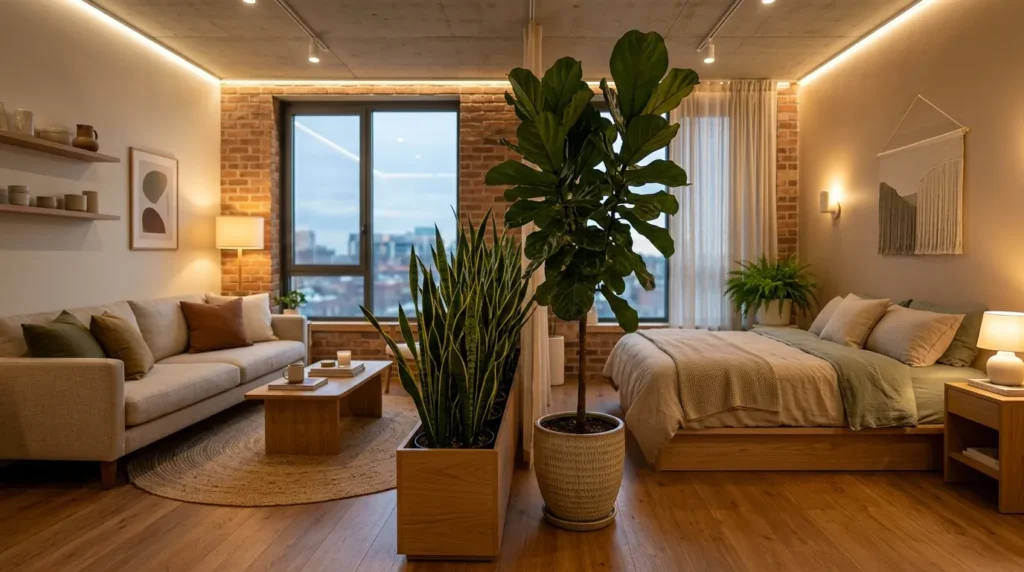
27. Micro-Zoning With Plants as Living Dividers
A row of 3–4 tall plants — snake plants, fiddle leaf figs, or dracaenas at 4–6 feet — creates a soft visual boundary between zones without blocking light, damaging walls, or making the space feel smaller.
Unlike bookshelves or curtains, plants add texture, oxygen, and color simultaneously. They’re also the most flexible divider available. Move them when your layout changes. Rearrange them seasonally.
For studios with limited natural light, low-light plants that thrive in dark rooms are the safest choice — most studio apartments get less light than people expect, and the wrong species fails quickly.
If your studio has a balcony, that square footage counts too. A well-set-up outdoor area adds 40–80 usable sq ft to your living footprint. Cozy balcony makeover ideas walk through exactly how to do that without major expense.
The Sum of These Changes
A studio apartment doesn’t need more square footage. It needs a clearer system.
Start with layout — because no storage system fixes a bad floor plan. Define zones before buying furniture. Then choose furniture that does two jobs instead of one. Then work vertical, address lighting, and add the visual tricks that expand the space without changing its walls.
These 27 hacks don’t need to happen simultaneously. Start with layout and zoning. Five or six targeted changes from this list will make a measurable difference in how the space looks and — more importantly — how it feels to live in every day.
A 300 sq ft studio with these systems working together consistently outperforms a 500 sq ft studio without them. The floor is clear, the zones are readable, and every corner is contributing something.
Leave a Reply