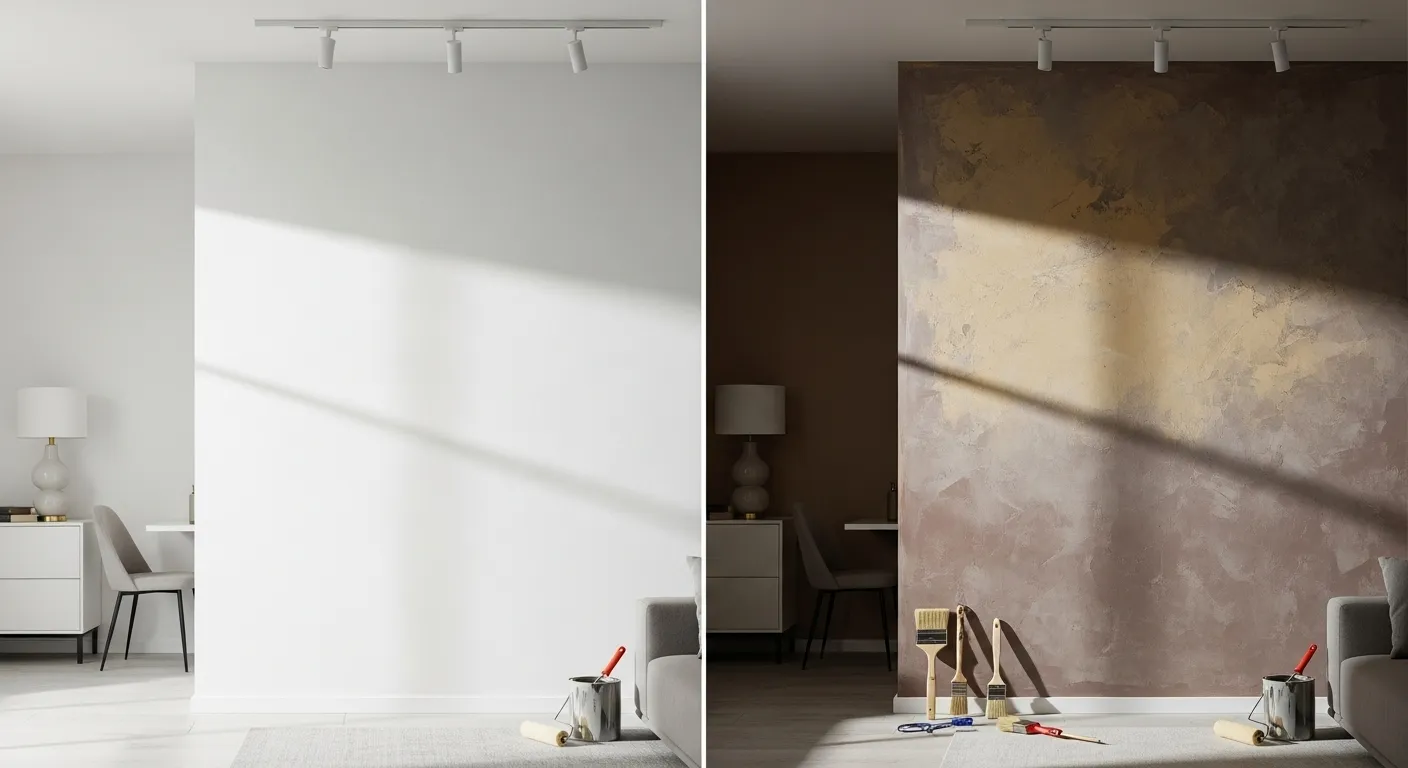
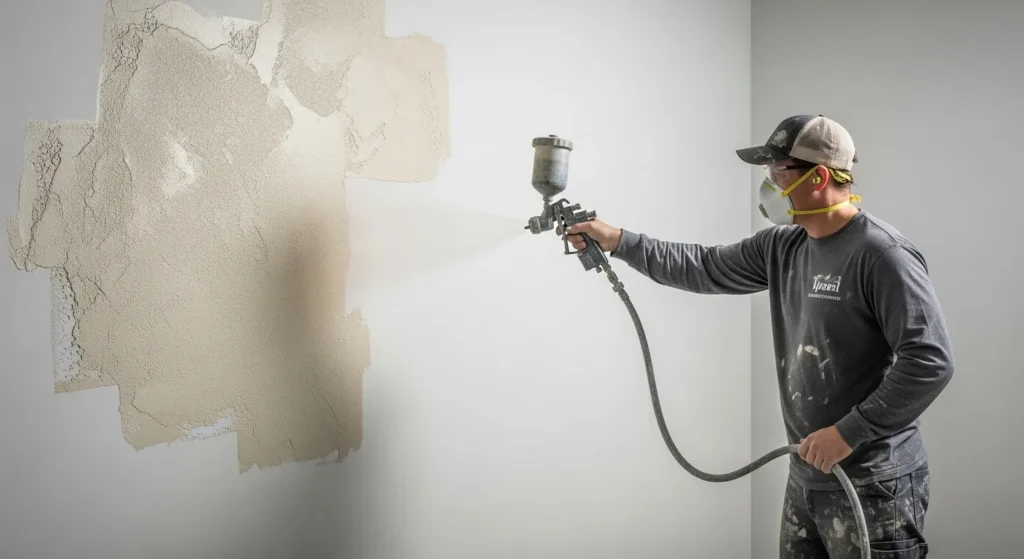
Creating textured walls adds depth, character, and visual interest to any space. These painting techniques help hide imperfections while giving your walls a professional, designer look without hiring expensive contractors.
What Are Textured Wall Painting Techniques?
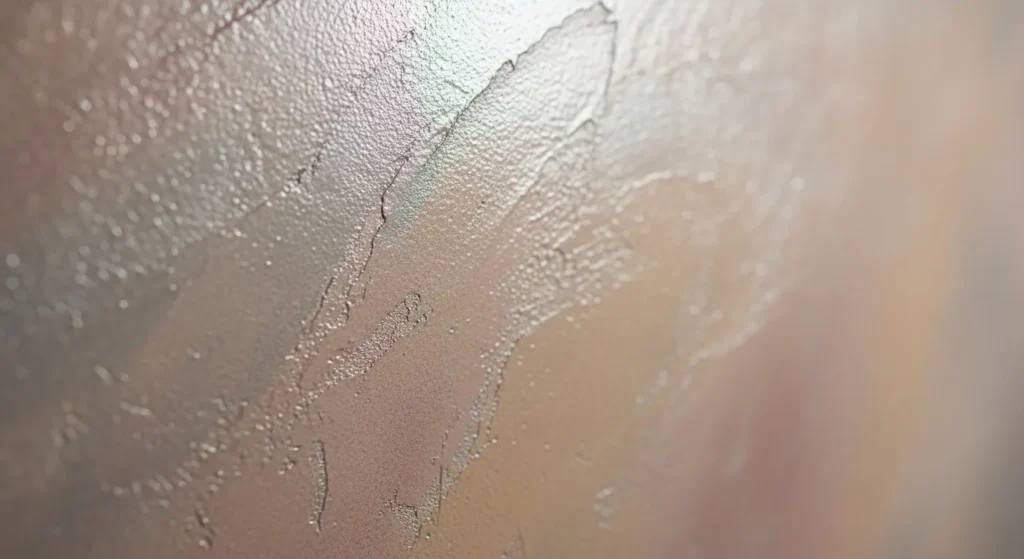
Textured wall painting involves applying paint using special tools, additives, or methods to create raised patterns and three-dimensional effects on your walls. Unlike flat paint applications, these techniques add physical texture that catches light differently throughout the day.

Why Choose Textured Wall Painting?
Textured walls offer several advantages over traditional flat paint:
- Hide minor wall imperfections and cracks
- Add visual depth to small or narrow rooms
- Create focal points without expensive artwork
- Reduce maintenance by camouflaging scuffs and marks
- Increase home value with designer-level finishes
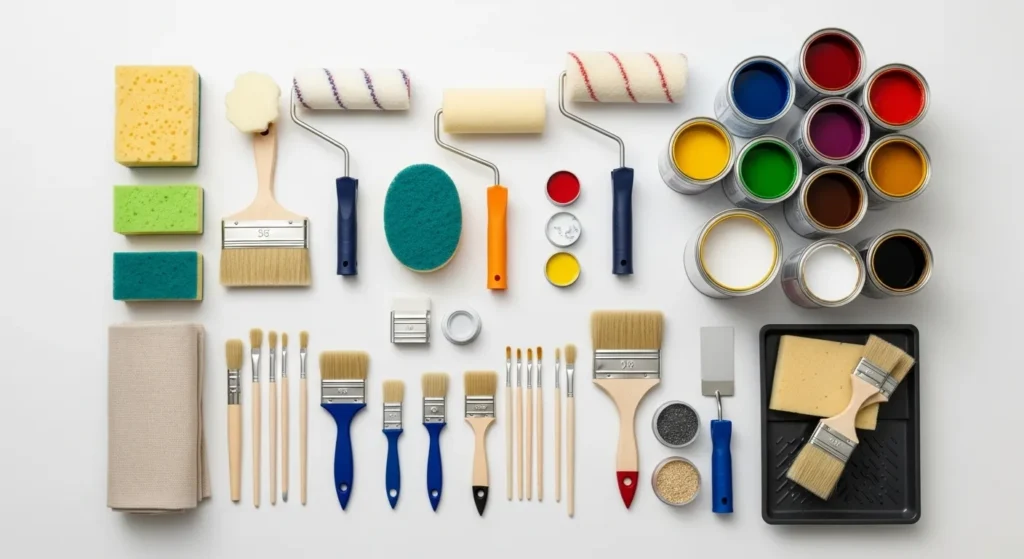
Essential Tools and Materials
Basic Tools You’ll Need
- Paint rollers (various nap lengths)
- Natural sea sponges
- Plastic drop cloths
- Paint brushes (2-4 inches wide)
- Painter’s tape
- Paint trays and liners
Specialty Tools for Advanced Techniques
- Texture rollers with patterns
- Combing tools
- Stippling brushes
- Spray bottles for misting
- Plastic bags for ragging techniques
Paint and Additives
Base Paint Types:
- Latex paint (most common choice)
- Acrylic paint for durability
- Primer (always use on new surfaces)
Texture Additives:
- Sand texture additive
- Popcorn texture compound
- Joint compound for heavy textures
15 Popular Textured Wall Painting Techniques
1. Sponge Painting Technique
Sponge painting creates organic, cloud-like patterns perfect for adding subtle texture.
How to Apply:
- Apply base coat and let dry completely
- Dip natural sponge in contrasting paint color
- Dab excess paint on paper towel
- Lightly press sponge onto wall in random patterns
- Rotate sponge frequently to avoid repetitive marks
Best Rooms: Living rooms, bedrooms, dining areas
2. Color Washing
This technique creates soft, translucent layers that mimic watercolor effects.
Steps:
- Paint wall with base color
- Mix glaze with secondary color (4:1 ratio)
- Apply glaze with large brush in crosshatch patterns
- Soften harsh lines with clean, dry brush
- Work in small sections while glaze remains wet
3. Rag Rolling Technique
Rag rolling produces linear texture patterns with subtle color variation.
Method:
- Apply base coat and allow to dry
- Mix paint with glazing medium
- Apply glaze mixture with roller
- Roll clean rag over wet glaze in straight lines
- Overlap slightly for consistent coverage
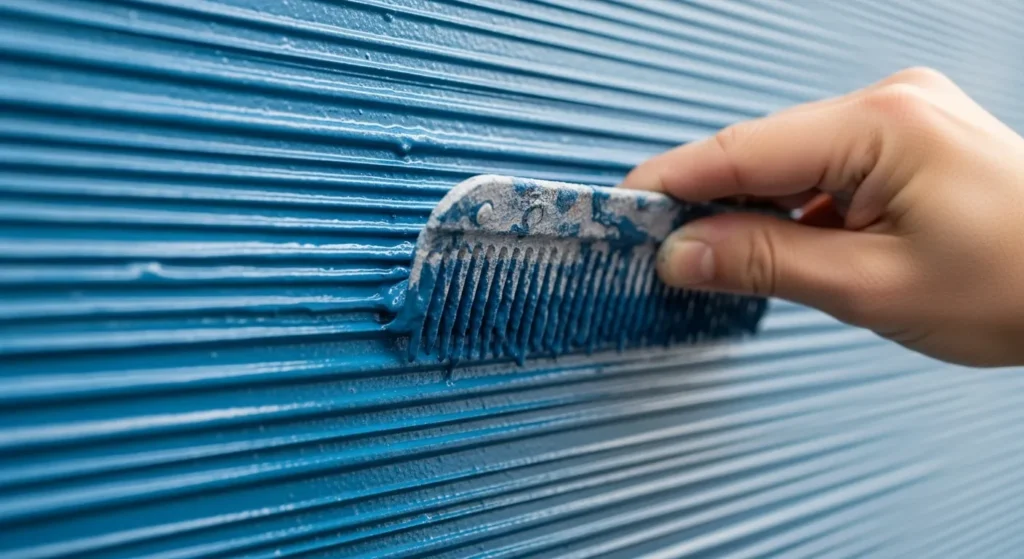
4. Combing Technique
Creates fine, parallel lines that add sophisticated texture.
Process:
- Paint base color and let cure
- Apply contrasting glaze with roller
- Draw combing tool through wet glaze
- Maintain steady pressure for even lines
- Clean comb frequently during application
5. Stippling Method
Produces fine, dotted texture similar to orange peel effect.
Application:
- Roll base paint evenly across wall
- While paint is still wet, lightly press stippling brush perpendicular to surface
- Use consistent pressure across entire area
- Avoid overlapping brush marks
- Work quickly before paint begins to set
6. Dragging Technique
Creates subtle linear texture with sophisticated appearance.
Steps:
- Apply base paint and allow to dry
- Brush on glaze mixture in vertical sections
- Drag dry brush through wet glaze from top to bottom
- Use single, continuous strokes
- Maintain consistent pressure throughout
7. Bagging Technique
Uses plastic bags to create unique, crumpled texture patterns.
Method:
- Paint wall with base color
- While paint is tacky, press crumpled plastic bag into surface
- Lift bag straight up to avoid smearing
- Repeat with fresh bag sections
- Vary bag positioning for natural look
8. Roller Texturing
Simple technique using specialized textured rollers.
Application:
- Apply base coat with standard roller
- Load texture roller with contrasting paint
- Roll over base coat in random directions
- Maintain consistent pressure
- Allow texture to dry before additional coats
9. Brush Texturing
Creates directional patterns using various brush techniques.
Process:
- Apply paint with roller for even coverage
- While wet, brush through paint in desired pattern
- Use long, sweeping motions for subtle texture
- Short, choppy strokes for more dramatic effect
- Work systematically across wall surface
10. Venetian Plaster Effect
Mimics expensive plaster finishes using paint techniques.
Steps:
- Apply base coat in neutral tone
- Mix paint with glazing medium (1:1 ratio)
- Apply thin coats with trowel or putty knife
- Allow each coat to dry completely
- Sand lightly between coats for smoothness
- Apply final coat and burnish for shine
11. Crosshatching Method
Creates woven texture appearance through overlapping brush strokes.
Technique:
- Paint base color and let dry
- Apply glaze with brush in diagonal strokes
- Immediately brush perpendicular strokes over first layer
- Maintain wet edges while working
- Blend harsh transitions with clean brush
12. Feather Dusting
Uses feather duster to create soft, cloud-like textures.
Application:
- Roll base paint evenly
- While paint is wet, lightly dust surface with clean feather duster
- Use gentle, circular motions
- Avoid pressing too hard
- Clean duster frequently during use
13. Cheesecloth Texturing
Creates subtle, organic patterns with soft appearance.
Method:
- Apply base coat with roller
- Bunch cheesecloth into loose ball
- Dab into contrasting paint
- Remove excess on paper towel
- Press lightly onto wall in random patterns
14. Stamp Texturing
Uses purchased or handmade stamps for repeating patterns.
Process:
- Paint wall with base color
- Load stamp with contrasting paint
- Press firmly onto wall surface
- Lift straight up to avoid smearing
- Space stamps evenly for best results
15. Spray Texturing
Creates fine, even texture using spray bottles.
Steps:
- Apply base coat and let dry
- Mix paint with water (1:3 ratio)
- Fill spray bottle with mixture
- Spray wall from 12-18 inches away
- Build up texture with multiple light coats
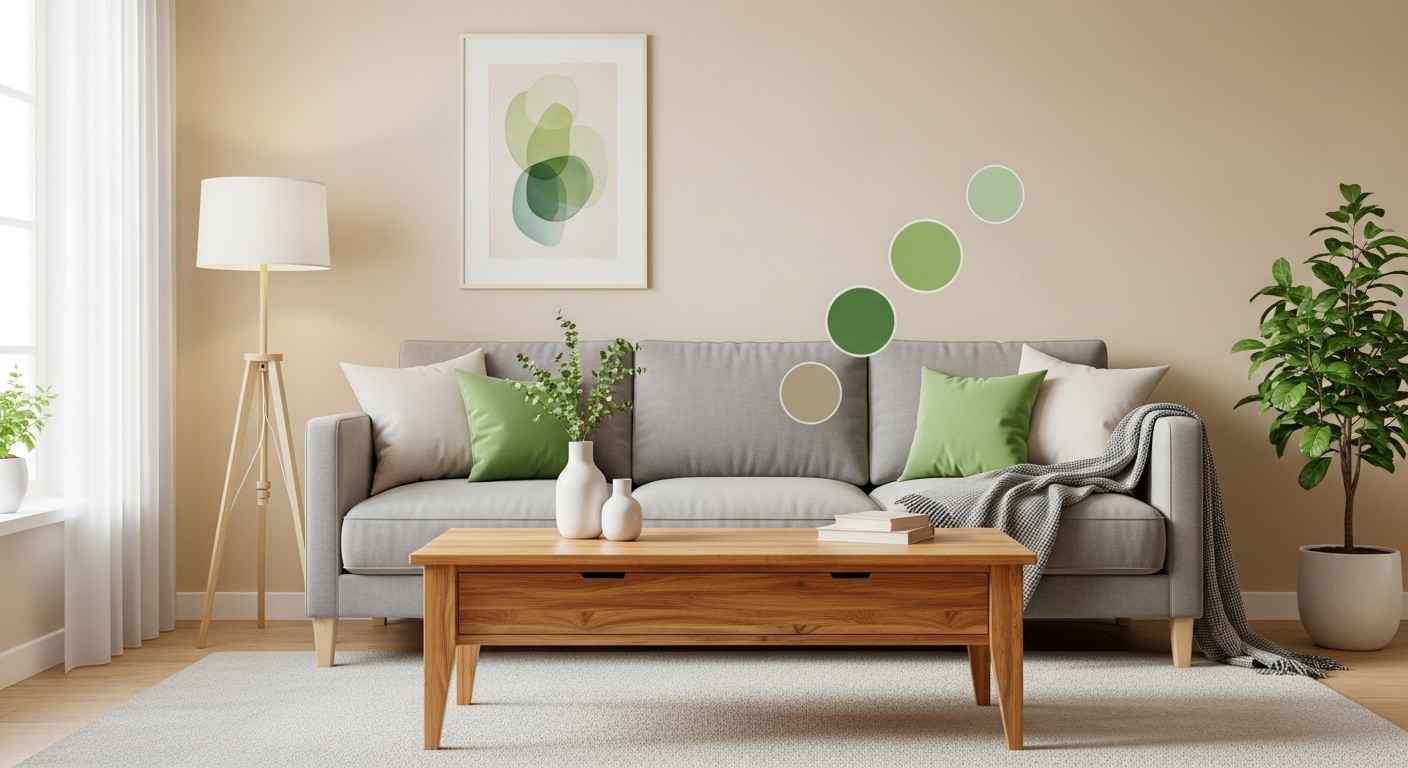
Color Combinations That Work Best
Neutral Combinations
- Warm beige base with cream highlights
- Gray base with white accents
- Taupe foundation with ivory details
Bold Accent Options
- Deep blue base with silver metallic
- Forest green with gold highlights
- Burgundy foundation with copper accents
Modern Color Schemes
- Charcoal base with light gray texture
- Navy blue with white contrast
- Black base with metallic silver
Room-Specific Applications
Living Rooms
Focus on accent walls behind sofas or fireplaces. Use subtle techniques like color washing or sponge painting that won’t overwhelm furniture and decor.
Bedrooms
Choose calming techniques like soft stippling or gentle rag rolling. Avoid high-contrast colors that might interfere with sleep.
Dining Rooms
Dramatic techniques like Venetian plaster or deep color washing create elegant atmosphere for entertaining.
Bathrooms
Use moisture-resistant paints with simple textures like light stippling. Avoid heavily textured surfaces that collect moisture.
Kitchens
Keep textures subtle in food preparation areas. Focus textured treatments on breakfast nooks or dining areas within the kitchen.
Common Mistakes to Avoid
Preparation Errors
- Skipping primer application
- Not cleaning walls thoroughly
- Failing to protect floors and furniture
- Working in poor lighting conditions
Application Problems
- Working too fast with wet techniques
- Using wrong paint consistency
- Not maintaining wet edges
- Applying texture too heavily
Color Selection Issues
- Choosing colors with insufficient contrast
- Not testing samples in different lighting
- Ignoring room size when selecting bold colors
- Mixing incompatible paint types
Professional Tips for Best Results
Before You Start
- Test all techniques on sample boards first
- Purchase 10-15% extra paint for touch-ups
- Remove furniture or cover completely
- Ensure adequate ventilation
- Plan work during moderate weather conditions
During Application
- Work with a partner when possible
- Maintain consistent lighting while working
- Take regular breaks to assess progress
- Keep wet rags nearby for quick corrections
- Document successful color ratios for future reference
Finishing Touches
- Allow full cure time before final assessment
- Remove painter’s tape while paint is slightly tacky
- Clean tools immediately after use
- Store leftover paint properly labeled
- Take photos of finished work for future reference
Cost Breakdown and Budgeting
Basic Technique Costs (per 100 sq ft)
- Paint and primer: $25-40
- Basic tools: $15-25
- Drop cloths and tape: $10-15
- Total: $50-80
Advanced Technique Costs
- Specialty tools: $20-50 additional
- Glazing mediums: $15-25
- Texture additives: $10-20
- Total: $95-175
Money-Saving Tips
- Buy tools during off-season sales
- Purchase paint during store promotions
- Reuse quality brushes and rollers
- Share specialty tools with neighbors
- Mix your own texture additives when possible
Maintenance and Longevity
Cleaning Textured Walls
- Dust regularly with microfiber cloths
- Use soft-bristled brush for deeper textures
- Avoid harsh chemicals that might damage finish
- Spot clean with mild soap solution
- Vacuum with brush attachment for heavily textured surfaces
Touch-Up Procedures
- Keep detailed notes about paint colors and techniques
- Store small amounts of original paint for repairs
- Practice touch-up technique on hidden areas first
- Blend new work into existing texture patterns
- Allow adequate drying time before final assessment
When to Repaint
- Textured walls typically last 5-7 years
- High-traffic areas may need attention sooner
- Watch for color fading in sunny locations
- Address damage promptly to prevent spreading
- Consider refreshing with same technique in updated colors
Frequently Asked Questions
How long does textured paint take to dry? Most textured paint techniques dry to the touch within 2-4 hours, but allow 24 hours before applying additional coats or handling the surface.
Can I paint over existing textured walls? Yes, but you may need to sand high spots and apply primer for best adhesion. Some textures may show through new paint applications.
What’s the easiest technique for beginners? Sponge painting offers forgiving results and requires minimal specialized tools. Practice on cardboard first to develop your technique.
Do textured walls require special cleaning methods? Use soft brushes or microfiber cloths to avoid damaging texture. Vacuum with brush attachments works well for heavily textured surfaces.
How much paint do textured walls use compared to flat paint? Textured applications typically use 15-25% more paint due to increased surface area and multiple coat requirements.
Getting Started with Your First Project
Choose Your First Room
Start with a low-traffic area like a guest bedroom or home office. This gives you practice space without daily exposure to potential mistakes.
Gather Your Supplies
Create a checklist of all needed materials before starting. Having everything ready prevents interruptions during critical application phases.
Practice First
Always test your chosen technique on sample boards or hidden wall areas. This helps you perfect your method and confirm color choices.
Plan Your Timeline
Most textured painting projects take 2-3 days including prep work, application, and drying time. Don’t rush the process for professional results.
Remember that textured wall painting transforms ordinary rooms into spaces with character and visual interest. Start with simple techniques and gradually work up to more complex methods as your skills develop. The investment in time and materials pays dividends in increased home value and personal satisfaction with your living space.
For more home improvement ideas that complement your newly textured walls, check out our guide to affordable backyard makeover ideas under $1000 or discover DIY pallet furniture ideas to save money that pair beautifully with textured accent walls.

Leave a Reply