A tool belt keeps your hands free and tools close during home projects. It saves time and reduces trips to the toolbox. Many DIYers start with basic items and add more as needed. This guide lists key tools, how to set them up, and tips to stay safe. Use it to build a setup that works for you.
Why Use a Tool Belt?
Tool belts make tasks faster. You grab what you need without stopping. They also help with safety by keeping tools secure. For beginners, start light to avoid strain. As you gain skills, carry more. Good organization prevents lost items and clutter.
Key Tools to Carry
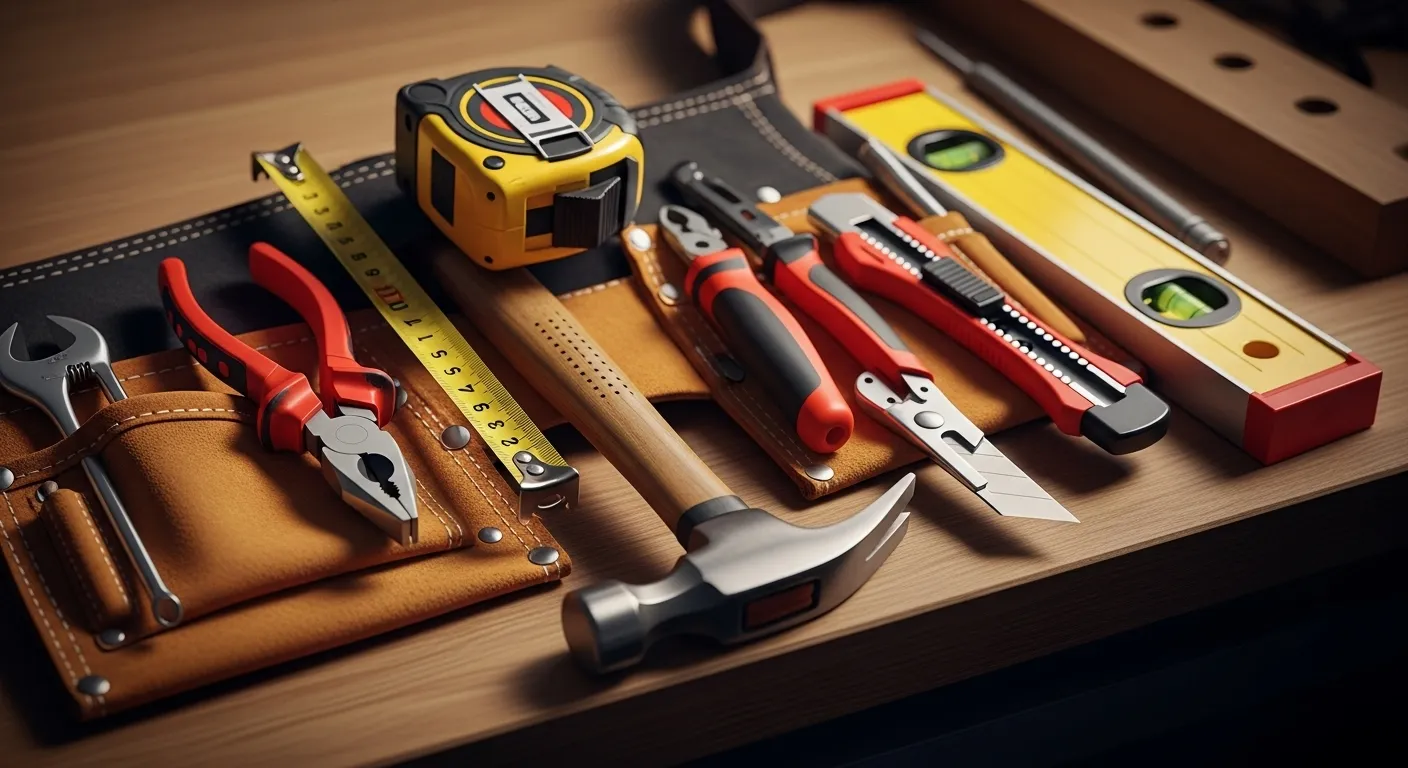
Pick tools based on your common jobs. Focus on items used often. Here are basics that fit most DIY work. Each one has a purpose and fits in standard pockets.
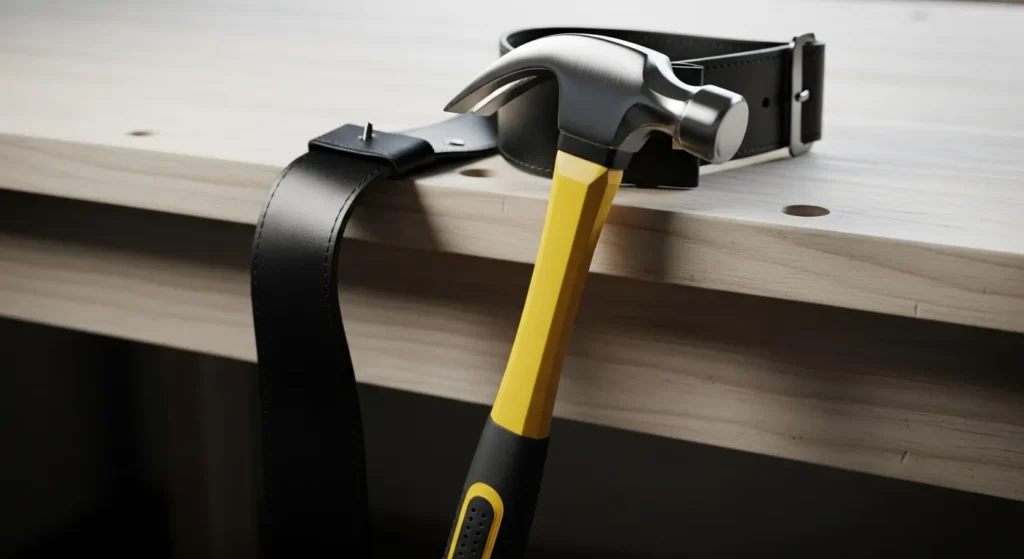
Hammer
A claw hammer pulls nails and drives them in. Choose a 16-ounce model for balance. It handles framing and small fixes.
- Weight: 16 ounces
- Material: Steel head with fiberglass handle
- Use: Nailing boards or removing old fasteners
Tape Measure
Measure lengths fast. A 25-foot tape locks in place and retracts smooth. Clip it to your belt for easy pull.
- Length: 25 feet
- Features: Locking blade and belt clip
- Use: Checking sizes for cuts or fits
Check our guide on diy reclaimed wood table projects for measurement tips.
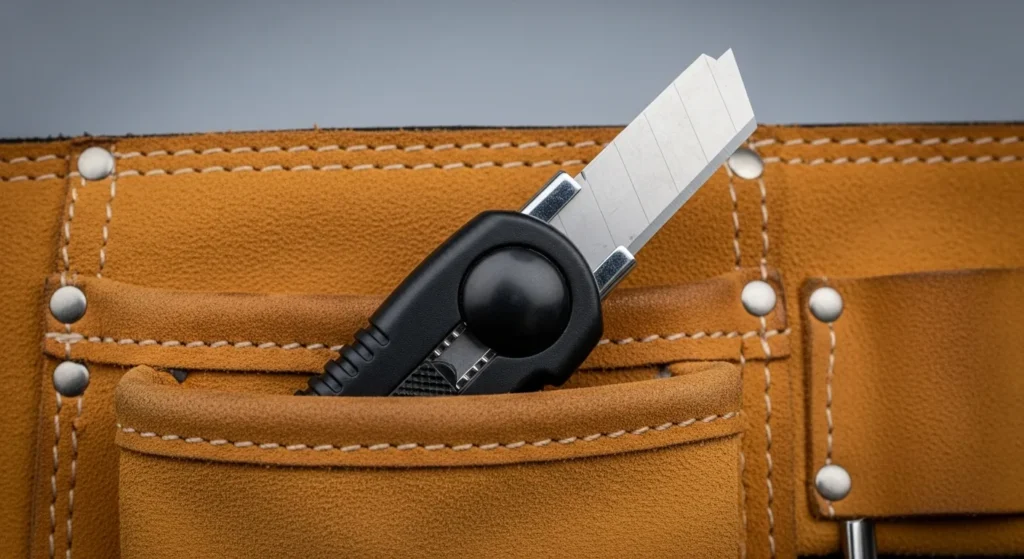
Utility Knife
Cuts materials like drywall or rope. Get one with quick blade change. Keep extra blades in a pocket.
- Blade: Retractable, replaceable
- Use: Scoring surfaces or trimming edges
Pliers
Grip, bend, or cut wires. Slip-joint pliers adjust for different sizes. They work for plumbing or wiring tasks.
- Type: Slip-joint
- Use: Holding nuts or pulling staples
Speed Square
Marks straight lines and angles. A 7-inch model fits small pockets. It checks if corners are square.
- Size: 7 inches
- Material: Aluminum
- Use: Guiding saw cuts or layout
See our tips for painting kitchen cabinets where squares help with alignment.
Chalk Line
Snaps straight lines on floors or walls. Fill it with blue chalk for clear marks. Reel it back after use.
- Length: 100 feet
- Use: Marking long guides for installs
Pencil and Sharpener
Mark wood or walls. Carry two pencils. A carpenter’s pencil stays sharp longer.
- Type: Carpenter’s pencil
- Use: Noting measurements
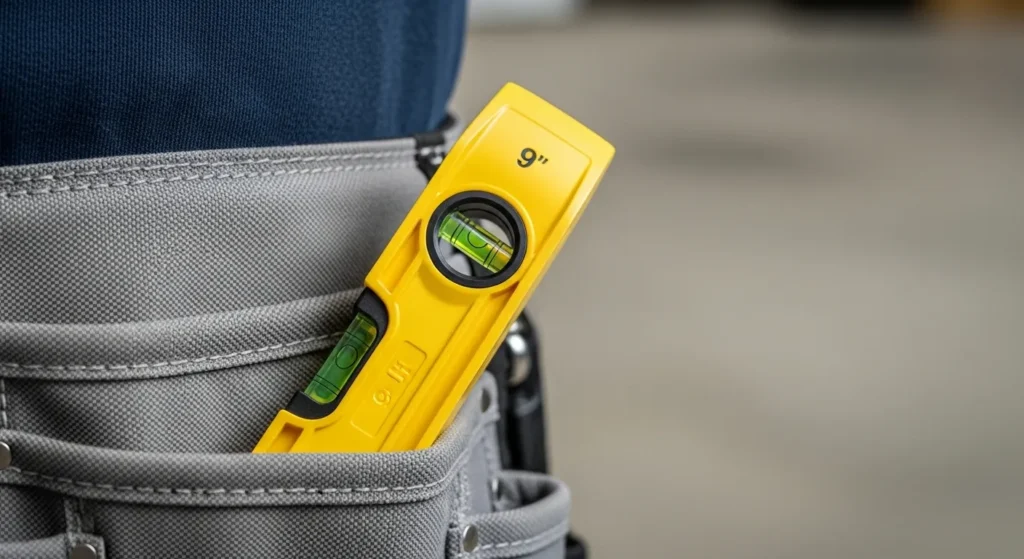
Torpedo Level
Checks if surfaces are even. A 9-inch magnetic one sticks to metal. It fits tight spaces.
- Length: 9 inches
- Features: Magnetic base
- Use: Leveling shelves or pipes
Nail Puller or Cats Paw
Removes bent nails. A small pry bar works too. It saves wood from damage.
- Size: 10 inches
- Use: Extracting fasteners
Multi-Bit Screwdriver
Handles different screws. It has bits for Phillips and flathead. Store bits in the handle.
- Bits: 6-in-1 set
- Use: Driving screws in tight spots
For more on tools, check external site like This Old House for reviews.
How to Organize Your Tool Belt
Place tools you use most on your strong-hand side. Put less common ones opposite. This keeps balance.
- Dominant side: Hammer, tape, utility knife, pliers.
- Other side: Speed square, chalk line, level, pencils.
- Use loops for hammers and hooks for tapes.
- Add pouches for nails or screws.
- Wear the belt at hip level for comfort.
Avoid overload to prevent back pain. Use suspenders if heavy. Turn the belt back when bending low.
Check garage storage systems that work for tool storage ideas at home.
Tips for Choosing a Tool Belt
Look for adjustable size. Pick one with 10-15 pockets. Materials like nylon or leather last long.
- For light work: Canvas apron style.
- For heavy jobs: Leather with suspenders.
- Fit: Measure your waist and add 2 inches.
Check reviews on sites like Bob Vila for current models. Clean it after use to keep it fresh.
Stay Safe and Efficient
Test your setup on small jobs first. Adjust as you go. A good tool belt cuts time and boosts confidence. Start with these basics and build from there. Your projects will go smoother.
For ladder safety, see our best ladders home projects buyers guide. If you work wood, try best sanders smooth finishes guide.

Leave a Reply