Reclaimed wood turns material headed for a landfill into furniture that costs a fraction of retail and looks better than anything in a showroom. Every nail hole, knot, and weathered edge adds something no factory finish can replicate.
These 15 projects cover the full range — from a beginner’s first weekend build to intermediate work with live edge slabs and resin. Each one includes a materials list and step-by-step build instructions. If you’re new to working with wood, start with Projects 1, 2, or 10 — they require only basic tools and no complex joinery. For more beginner woodworking projects and easy DIY ideas, that guide has a solid starting list.
Why Reclaimed Wood Makes Better Tables
Old wood is structurally superior to new lumber in one key way: it has already dried and settled. New kiln-dried lumber still moves with seasonal humidity changes. Wood that spent 40 years in a barn has stabilized. Cupping, warping, and splitting are far less likely.
Cost is the other major factor. A solid hardwood dining table from a furniture store runs $800–$2,500. Building one from reclaimed barn oak costs $80–$180 in materials. The upcycled decor movement has driven demand for this look — but making your own beats buying a mass-produced version every time.
Where to Find Quality Reclaimed Wood
Salvage yards and demolition companies are the most reliable source. Most cities have at least one. Call ahead — inventory changes weekly. Expect to pay $2–$6 per board foot for barn oak or Douglas fir.
Pallet suppliers offer free or near-free material. Most warehouses, garden centers, and distribution hubs give pallets away. Look for the HT stamp (heat-treated) burned into the side. Avoid MB-stamped pallets — those were treated with methyl bromide, a fumigant that is unsafe for indoor furniture.
Online sources like Facebook Marketplace and Craigslist regularly list salvaged wood from house demolitions, old decking projects, and barn teardowns. You can often get large quantities for $0–$50 if you haul it yourself.
You can also repurpose old doors into furniture — the thick solid wood panels in old interior doors make excellent tabletops.
Tools and Materials You’ll Need
Core hand tools:
- Tape measure and speed square
- Hammer and pry bar (for nail removal)
- Clamps (at least 4 medium bar clamps)
- Safety glasses, dust mask, and work gloves
Power tools that matter:
- Circular saw or miter saw — for choosing the right saw for your projects, this guide covers the key differences
- Cordless drill with bits and driver
- Random orbital sander
Joinery aids:
- Kreg pocket hole jig (used in most projects below)
- Figure-8 fasteners (allow the top to move with humidity)
- Wood glue (interior or exterior grade depending on project)
Most projects also use pocket screws (1-1/4″ for thin boards, 2-1/2″ for thick ones) and 80/120/180/220-grit sandpaper. For a full look at the best sanders for smooth results, this sanders guide covers orbital vs. belt vs. detail sanders.
How to Prepare Reclaimed Wood Before Building
Skipping prep is the single biggest mistake beginners make. Rushing straight into cutting leads to split boards, hidden nails that destroy saw blades, and unstable joints.
Step 1: Remove all metal. Use a hammer, pry bar, and pliers. Run a strong magnet over every board to catch buried nails and screws.
Step 2: Inspect for rot and structural damage. Poke soft or discolored areas with a screwdriver. Sound wood resists — rotten wood crumbles. One compromised board can weaken an entire tabletop.
Step 3: Check for lead paint. Wood from pre-1978 structures may have lead paint. Use a lead test swab (available at any hardware store for under $5). If the test is positive, wear an N95 respirator during all sanding — not just a paper dust mask.
Step 4: Dry damp wood before building. Freshly salvaged boards from outdoor structures may hold significant moisture. Stack boards with 1-inch spacers (stickers) between each layer and leave them in a dry space for 2–4 weeks. Building with wet wood causes tabletops to cup or crack within months.
Step 5: Sand in sequence. Start with 60-grit or 80-grit to flatten rough surfaces and remove weathering. Progress through 120, 180, and finish at 220 for an interior table. Skipping grits leaves deep scratches that show through any finish.
The 15 Projects
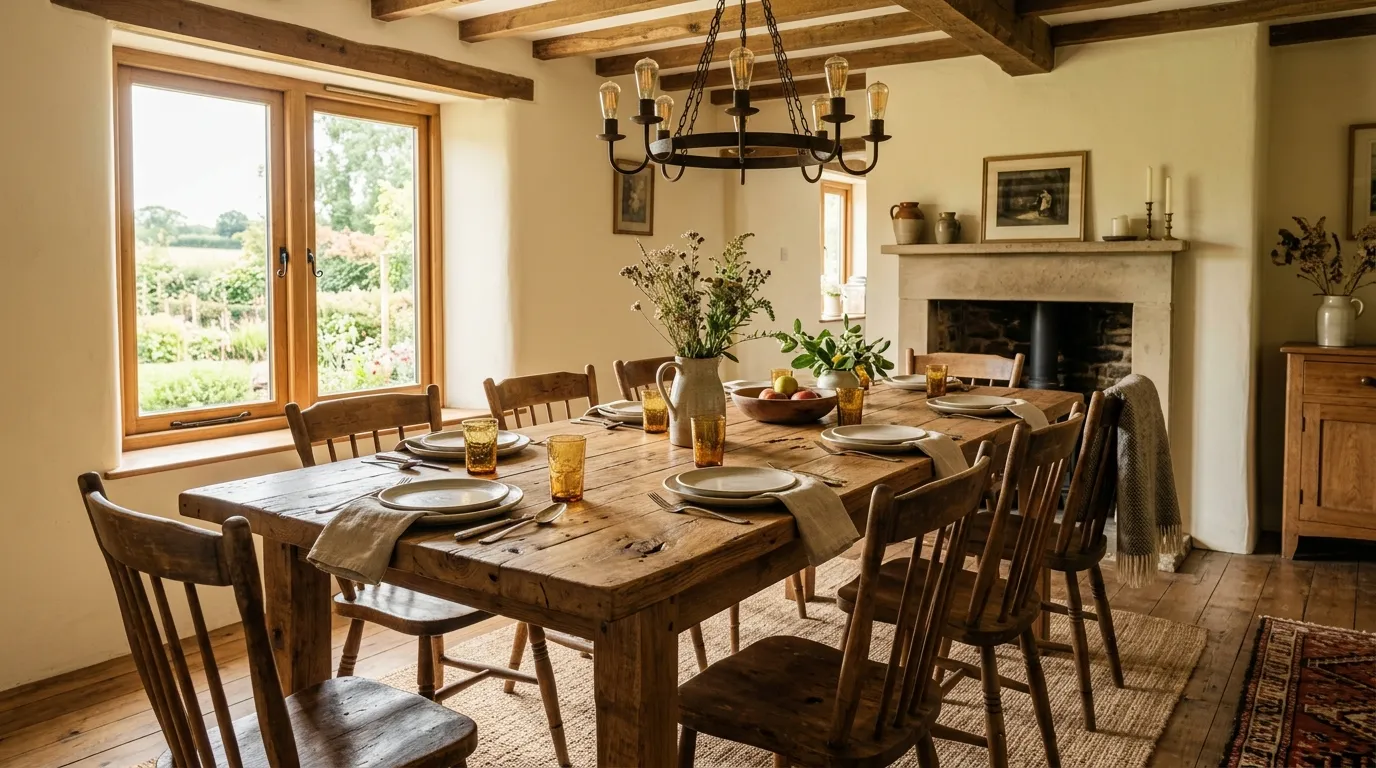
Project 1 — Simple Farmhouse Dining Table
Difficulty: Beginner | Build time: 1–2 days | Seats: 6–8 people | Approx. cost: $80–$150
Materials:
- 6 × reclaimed 2×10 boards, 8 ft long (tabletop)
- 4 × 4×4 posts, cut to 29 inches (legs)
- 2 × 2×6 boards for aprons
- Pocket screws, wood glue, figure-8 fasteners
Steps:
- Remove all hardware from boards and sand from 80-grit to 220-grit.
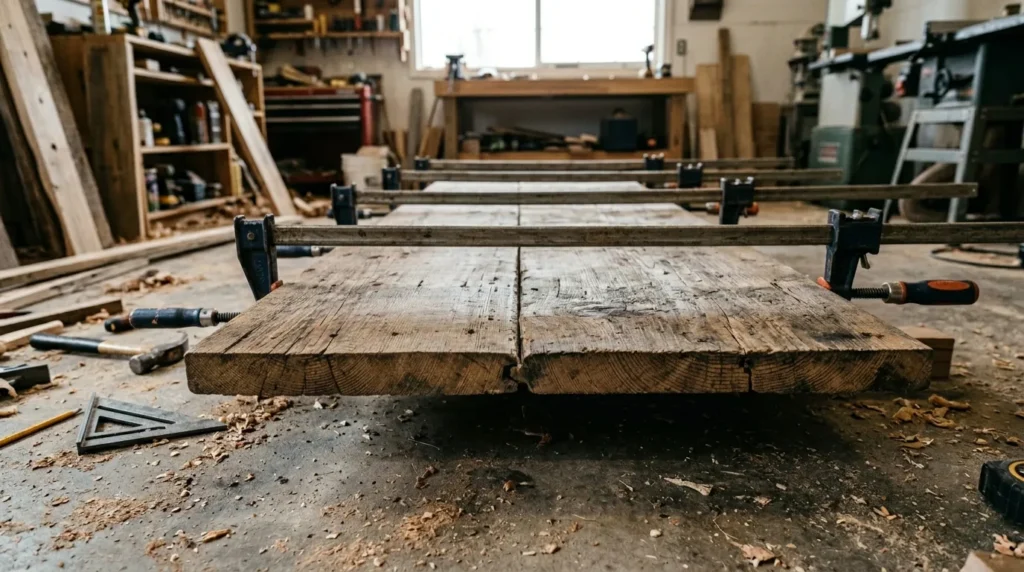
- Arrange the six 2×10 boards face-up, alternating grain direction to reduce cupping. Apply glue to mating edges and clamp together. Let cure 24 hours.
- Cut apron boards to fit between legs with a 1.5-inch offset from each corner.
- Drill pocket holes in the apron ends. Attach aprons to legs with pocket screws and glue. Check square with a speed square before the glue sets.
- Attach the tabletop to the base using figure-8 fasteners — these allow the top to expand and contract seasonally without cracking.
- Sand the assembled table lightly with 220-grit, then apply your chosen finish.
For more rustic farmhouse style ideas to complement this table, this farmhouse decor guide has room-styling ideas under $50.
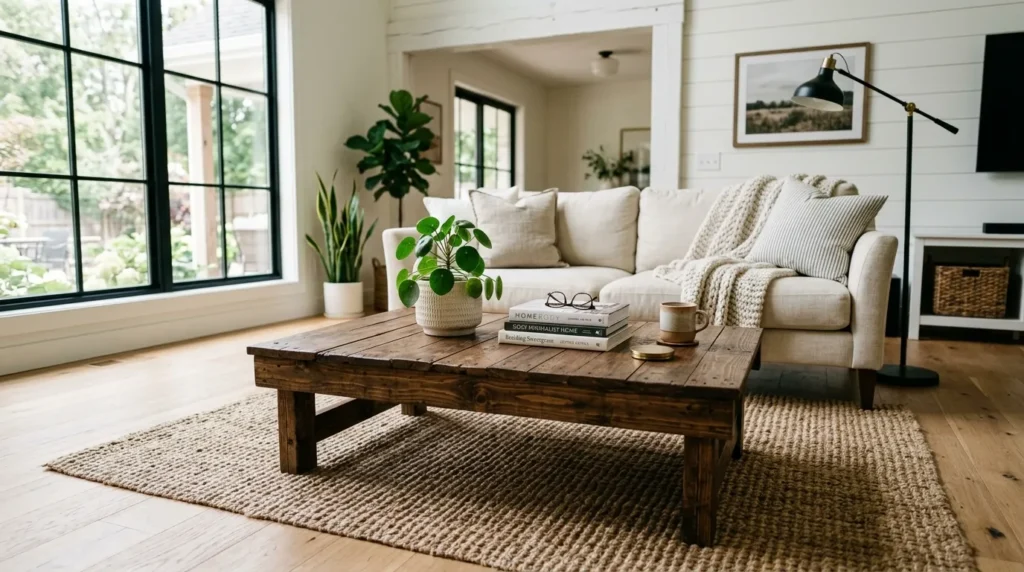
Project 2 — Industrial Coffee Table with Pipe Legs
Difficulty: Beginner | Build time: 3–4 hours | Approx. cost: $40–$90
Materials:
- 1 × thick reclaimed slab, approx. 48×24 inches
- 4 × black iron pipe flanges (3/4-inch)
- 4 × black iron pipe sections, 16 inches long (3/4-inch diameter)
- Metal primer + flat black spray paint
- Clear protective finish for wood top
Steps:
- Sand the slab, fill any large cracks with dark wood filler if preferred, or leave open for character.
- Clean pipe threads and flanges with a degreaser. Apply one coat of metal primer, then two coats of flat black spray paint. Cure 48 hours before installing.
- Mark flange positions on the underside — place them 3 inches in from each corner. Drill pilot holes and attach flanges with 1-inch machine screws.
- Thread pipe sections into flanges. Hand-tighten, then use pliers for one additional quarter-turn.
- Apply two coats of paste wax to the tabletop. Paste wax is ideal for coffee tables because it’s easy to re-apply and cleans up with a damp cloth.
Project 3 — Live Edge Slab Side Table
Difficulty: Intermediate | Build time: 4–6 hours | Approx. cost: $60–$150
Materials:
- 1 × reclaimed live edge slab, 18–24 inches wide
- 3 or 4 hairpin legs (28 inches for standard side table)
- Butterfly/bow tie joints (2–3 per slab if cracks present)
- Danish oil or clear epoxy finish
Steps:
- Inspect the slab for cracks. Any crack more than 6 inches long needs a butterfly joint to stop it spreading. Trace a bow-tie template centered on the crack, rout out the recess 3/8-inch deep, glue in a contrasting hardwood butterfly, and flush it with a hand plane.
- Sand the live edge gently — preserve the natural texture on the edge itself while sanding the flat surface to 220-grit.
- Mark and drill hairpin leg mount holes. Most hairpin legs come with pre-drilled flanges — use wood screws sized to your slab thickness.
- Apply Danish oil with a cloth, let it penetrate 20 minutes, then wipe off the excess. Two coats give solid protection without hiding the wood’s character.
Project 4 — Pallet Wood Coffee Table
Difficulty: Beginner | Build time: 4–5 hours | Approx. cost: $0–$30**
Materials:
- 2 × HT-stamped pallets (same dimensions)
- Sandpaper (80, 120, 220 grit)
- Wood stain or paint (optional)
- 4 × furniture casters (optional, for a rolling version)
Steps:
- Inspect both pallets — reject any with broken slats or soft, discolored wood. Confirm the HT stamp.
- Sand every exposed surface, starting with 80-grit. This step takes time but is essential — pallet boards are rough and may have splinters.
- Stack one pallet directly on top of the other and secure with 2.5-inch screws driven through the top pallet deck boards into the lower pallet frame. Drive screws at 6-inch intervals.
- If adding casters, flip the assembly and attach casters to the corners of the bottom pallet frame.
- Finish with a light stain or two coats of clear wax.
Pallet wood works for far more than tables. The full DIY pallet furniture guide covers benches, shelves, and planters using the same free material.
Project 5 — Outdoor Reclaimed Wood Picnic Table
Difficulty: Beginner | Build time: 1 day | Approx. cost: $60–$120
Materials:
- 4 × 2×10 reclaimed boards, 6 ft (tabletop and seats)
- 4 × 2×6 boards for seat supports
- 2 × 4×4 boards for A-frame legs
- Exterior-grade deck screws
- Exterior finish (Sikkens, Thompson’s WaterSeal, or exterior polyurethane)
Steps:
- Cut A-frame leg pairs at a 60-degree angle top and bottom so they splay outward 24 inches at the base.
- Attach the top 2×10 boards across the legs with 3-inch exterior screws. Leave 1/4-inch gaps between boards for drainage.
- Attach seat boards to the side supports at 17 inches above ground, positioned 12 inches out from the tabletop edge.
- Sand all surfaces to 120-grit — enough for outdoor furniture — and apply two coats of exterior finish.
For more ideas to make the outdoor space work harder, current outdoor furniture trends show which materials and styles are holding up best in real use.
Project 6 — Barn Wood Console Table
Difficulty: Beginner | Build time: 3–4 hours | Approx. cost: $30–$80
Materials:
- 2–3 × reclaimed boards for top, cut to 48×14 inches total
- 4 × tapered furniture legs (pre-made, 28 inches)
- Leg mounting plates and screws
Steps:
- Glue and clamp boards together for the top. Clamp overnight.
- Sand top to 180-grit. Barn wood often has grey oxidized surface — preserve it or sand through to raw wood for a warmer tone.
- Attach leg mounting plates at each corner with the supplied screws. Thread legs in until snug.
- Apply two coats of Danish oil to maintain the natural aged character.
Project 7 — Hairpin Leg End Table
Difficulty: Beginner | Build time: 1–2 hours | Approx. cost: $25–$50
This is the fastest project on the list. One thick board, three legs, and a finish.
Materials:
- 1 × reclaimed board or small slab, approx. 18×18 inches, 2 inches thick
- 3 × 18-inch hairpin legs
- Sandpaper and finishing oil
Steps:
- Sand the board to 220-grit. Leave live edges raw or sand them smooth depending on your preference.
- Mark hairpin leg positions — for 3 legs, place one centered on one short end and two on the opposite end, 3 inches in from each corner.
- Pre-drill and attach legs with the supplied hardware.
- Finish with one coat of tung oil, wiped on and buffed off after 15 minutes.
Project 8 — Trestle Dining Table
Difficulty: Intermediate | Build time: 2 days | Approx. cost: $120–$200
Materials:
- 5 × reclaimed 2×8 boards, 8 ft long (top)
- Trestle base kit (pre-made steel or wood trestle, available online) or build two X-frame trestles from 4×4 posts
- Carriage bolts and hardware
Steps:
- Build or assemble two X-frame trestles 24 inches wide, spaced 48 inches apart down the table length.
- Join tabletop boards with pocket holes and glue. Clamp for 24 hours.
- Flip top and mark trestle positions. Attach with lag screws through the top frame.
- Sand and finish with Osmo Hardwax Oil — one of the most durable interior finishes for dining surfaces.
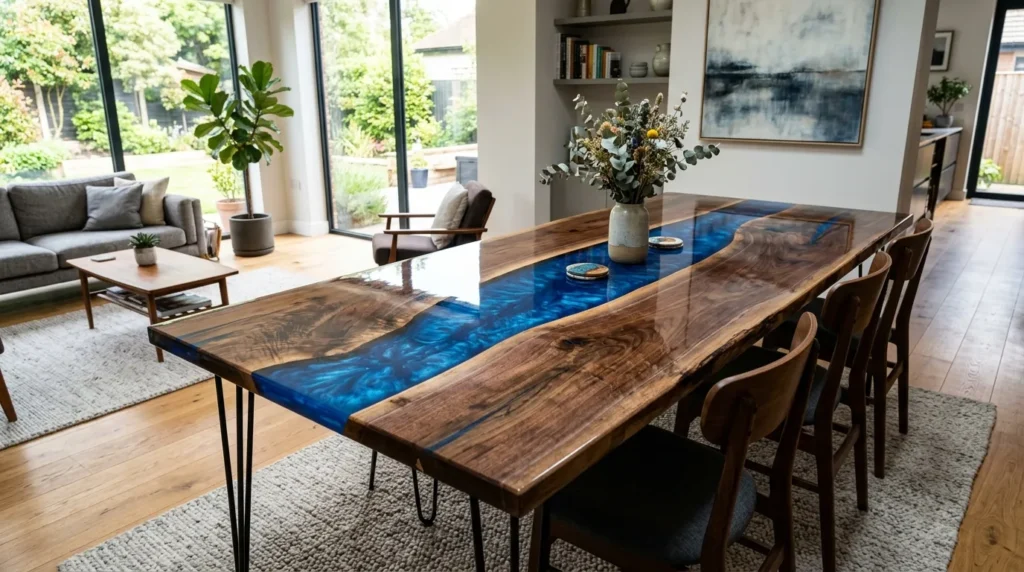
Project 9 — Resin River Table
Difficulty: Intermediate | Build time: 3–4 days (resin cure time) | Approx. cost: $150–$350
Materials:
- 2 × bookmatched reclaimed wood slabs (walnut or oak work best)
- Deep-pour epoxy resin (1–2 gallons depending on river width)
- Pigment (blue, teal, or smoke black)
- Melamine-coated form boards for casting mold
- Hairpin or steel U-frame legs
Steps:
- Build a sealed casting mold from melamine boards. Size it to your desired table dimensions.
- Place the two slabs in the mold with a 4–6 inch gap between them for the river channel.
- Mix resin per manufacturer ratio. Add pigment gradually until desired opacity. Most deep-pour resins require 24–48 hours for first cure.
- Pour in layers — no more than 1.5 inches per pour for most deep-pour resins to prevent heat buildup.
- After full cure (72 hours minimum), remove from mold and sand resin surface from 120 through 1000-grit wet/dry paper for a glass-like finish.
- Attach legs. Apply one coat of resin over the wood surfaces only for final protection.
Project 10 — Stacked Log Side Table
Difficulty: Beginner | Build time: 1–2 hours | Approx. cost: $0–$20
No power tools required.
Materials:
- 1 × cross-section wood slice, 14–18 inches diameter, 2 inches thick (reclaimed log round)
- 3–4 short log rounds (6–8 inches diameter, same height)
- Heavy-duty adhesive or construction epoxy
- Clear exterior finish
Steps:
- Arrange three or four small log rounds on a flat surface in a stable triangular or square pattern.
- Apply construction adhesive to the tops of the small rounds and set the large top slice on them. Let cure 24 hours.
- Apply two coats of clear exterior finish to protect against moisture and prevent bark from loosening.
Project 11 — Scaffold Board Desk/Table
Difficulty: Beginner–Intermediate | Build time: 1 day | Approx. cost: $50–$120
Scaffold boards (typically 225mm × 38mm reclaimed pine) have a raw industrial character and come pre-flattened.
Materials:
- 3–4 × scaffold boards, 6 ft long
- 2 × steel trestle legs or wall-mounted brackets
- Exterior screws and sandpaper
Steps:
- Lay boards side by side and check for level. Scaffold boards are thicker than standard lumber — a hand plane is useful for high spots.
- Screw boards to trestle frames from underneath with 2.5-inch screws at 12-inch intervals.
- Sand to 120-grit — enough to remove splinters while preserving the boards’ raw surface.
- Finish with Danish oil or leave unfinished for a raw industrial look.
Project 12 — Reclaimed Wood + Concrete Top Table
Difficulty: Intermediate | Build time: 3–4 days (concrete cure) | Approx. cost: $80–$180
Materials:
- 4 × reclaimed 4×4 posts for legs (28 inches)
- Reclaimed 2×6 boards for side aprons/frame
- Concrete mix (rapid-set is fine for thin tops)
- Melamine board for casting form
- Fiber reinforcement mesh or rebar
Steps:
- Build the table base — legs and aprons joined with pocket screws and glue.
- Build a melamine casting form for the top, sized to overhang the base by 1 inch on all sides. Make it 1.5–2 inches deep.
- Lay fiber mesh in the form. Mix and pour concrete. Use a vibrating tool or tap the form to remove air bubbles.
- Cure concrete for 48–72 hours under damp burlap.
- Sand concrete with 80, 120, 220, 400-grit wet/dry paper for a smooth finish.
- Seal concrete with a penetrating concrete sealer. Attach top to base with construction adhesive.
Project 13 — Floating Wall-Mounted Fold-Down Table
Difficulty: Beginner | Build time: 2–3 hours | Approx. cost: $20–$60
This project uses one or two reclaimed boards mounted directly to wall studs — ideal for small spaces. For more DIY small space furniture projects, fold-down tables are one of the highest-impact additions for tight rooms.
Materials:
- 1–2 × reclaimed boards, 36×14 inches
- 2 × heavy-duty folding shelf brackets (rated 50+ lbs)
- 3-inch lag screws and wall anchors
Steps:
- Locate wall studs using a stud finder. Mark at 34-inch height (standing desk) or 30 inches (seated).
- Attach folding brackets directly into studs — never drywall anchors alone for a load-bearing surface.
- Set the reclaimed board on the brackets and secure from below with short screws.
- Sand and finish before mounting if access is easier at floor level.
Project 14 — Kids’ Play Table from Pallet Boards
Difficulty: Beginner | Build time: 3–4 hours | Approx. cost: $10–$40
Materials:
- Boards from 1 HT pallet (disassembled)
- 4 × pre-made furniture legs, 18 inches (shorter for a low kids’ table)
- Leg mounting plates
- Non-toxic sanding sealer or milk paint
Steps:
- Disassemble the pallet using a pry bar. Select the straightest, cleanest boards.
- Sand thoroughly — start at 60-grit to remove all roughness, finish at 220-grit. No splinters acceptable on a kids’ table.
- Join boards into a top using pocket holes and glue. Size: 30×24 inches works well for two children.
- Attach leg mounting plates and legs.
- Finish with non-toxic milk paint or a food-safe sanding sealer. Zero-VOC is the better choice for a child’s room.
Project 15 — Reclaimed Wood Sofa Back Table
Difficulty: Beginner | Build time: 2–3 hours | Approx. cost: $30–$70
A sofa table sits flush against the back of a sofa — typically 60–72 inches long, 8–12 inches deep, and 28–30 inches tall to clear a standard sofa arm.
Materials:
- 2–3 × reclaimed boards for top, cut to match sofa length
- 4 × tapered furniture legs, 28 inches
- Leg mounting plates, sandpaper, finish
Steps:
- Join boards for the top — a narrow top like this doesn’t need more than one glue joint.
- Sand to 180-grit. The top of this table gets light use, so 180-grit with one coat of oil finish is sufficient.
- Attach leg mounting plates 2 inches in from each corner.
- Screw in legs until hand-tight plus one additional quarter-turn with pliers.
Finishing Techniques for Reclaimed Wood
The finish you choose changes how the wood looks and how long it lasts. These are the options that actually matter:
Tung oil or Danish oil — penetrates the wood rather than sitting on top. Enhances grain without adding sheen. Best for side tables, consoles, and pieces with light daily use. Apply 2–3 coats, wiping off the excess each time.
Osmo Hardwax Oil — the benchmark for dining table finishes. It’s a German-made hardwax oil that penetrates and hardens within the wood surface. Completely food-safe once cured. One coat covers more than expected and is far easier to repair than film finishes — just sand and re-apply in the worn area.
Polyurethane (water-based) — the most durable film finish. Best for high-traffic dining tables. Apply 3 coats with light 220-grit sanding between coats. Water-based versions dry in 2–3 hours and have very low odor.
Paste wax — ideal for coffee tables that need occasional refreshing. Apply, let dry to a haze, buff off. Re-apply every 6–12 months.
Lime wash or whitewash — thin white paint applied and partially wiped off before drying. Creates the pale, bleached barn wood look. Use flat white latex paint diluted 1:1 with water.
If you’re concerned about chemical exposure, particularly in kitchens or kids’ rooms, eco-friendly paint and finish options covers low-VOC and zero-VOC alternatives in detail.
Cost Breakdown by Project Type
| Project type | Materials cost | Approx. retail equivalent |
|---|---|---|
| Pallet coffee table | $0–$30 | $300–$600 |
| Farmhouse dining table | $80–$150 | $800–$2,000 |
| Industrial coffee table | $40–$90 | $400–$900 |
| Live edge side table | $60–$150 | $300–$800 |
| Resin river table | $150–$350 | $1,200–$4,000 |
| Outdoor picnic table | $60–$120 | $500–$1,200 |
Before starting any larger build, use the Home Renovation Budget Planner to track your total material spend across multiple projects.
Common Mistakes to Avoid
Building with wet wood. Moisture content above 15% causes tabletops to warp, crack, and pull joints apart. Buy a wood moisture meter — they cost $15–$30 — and don’t build until boards read below 12%.
Skipping the magnet test. One buried nail will destroy a $40 circular saw blade in seconds. Run a strong rare-earth magnet over every board before cutting.
Gluing end grain to end grain. End grain absorbs glue and creates weak joints. Always orient boards so face grain meets face grain at glued joints.
Not allowing for wood movement. Tabletops expand and contract across their width as humidity changes. A 36-inch wide pine top can move 1/4 inch seasonally. This is why figure-8 fasteners or elongated screw slots matter — rigid attachments cause tops to split.
Over-sanding character marks. Nail holes, worm tracks, and saw marks are what make reclaimed wood worth using. Sand enough to make the surface clean and smooth to the touch, not enough to erase its history.
Safety Rules for Reclaimed Wood Projects
Reclaimed wood carries risks that fresh lumber doesn’t. A few rules keep you safe throughout every project on this list.
Always wear eye protection when cutting or sanding — old wood is unpredictable and pieces can separate. An N95 respirator (not a paper dust mask) is the minimum for sanding reclaimed lumber. Old paint, wood treatments, and mold spores all become airborne. For a detailed breakdown of the right protective equipment for each tool type, this safety gear guide for DIYers is a practical starting point.
Work outdoors or in a ventilated space for cutting and heavy sanding. Keep a first aid kit in the workshop — reclaimed wood has sharper, more irregular edges than new lumber.
Leave a Reply