
Your garbage disposal stopped working. Maybe it’s humming. Maybe it’s completely dead. Either way, the sink isn’t draining and dinner cleanup is on hold.
The good news: most jams are fixable in under 10 minutes with a single tool — or no tools at all. You don’t need a plumber for this. You just need to follow the right steps in the right order.
Here’s exactly how to do it.
First — Diagnose the Symptom
Not all disposal problems are the same jam. The sound it’s making — or not making — tells you which fix to use.
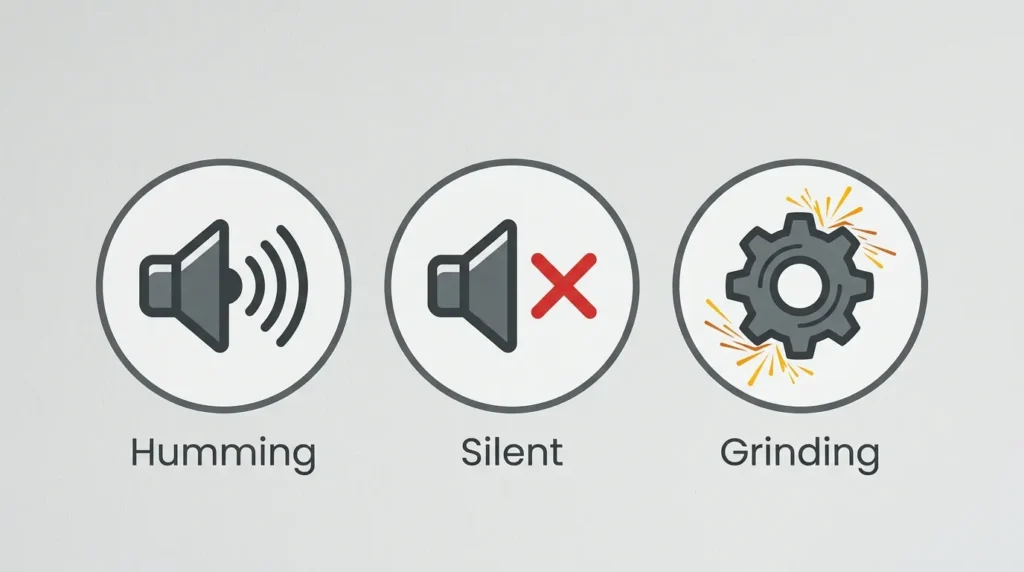
It’s Humming But Not Spinning → It’s Jammed
This is the most common scenario. The motor is getting power and trying to run, but something is blocking the flywheel from turning. You’ll hear a low hum for a few seconds, then a click — that’s the thermal overload protector cutting off the motor to prevent burnout.
This needs the hex wrench fix. Skip ahead to Step 3.
It’s Completely Silent → Reset Button or GFCI Issue
No hum at all means no power is reaching the motor. The thermal overload protector has tripped, or the GFCI outlet the disposal is plugged into has tripped. Neither one means the unit is broken. Before assuming the worst, review basic electrical safety tips for homeowners — GFCI tripping is a built-in protection feature, not a sign of damage.
Start at Step 4.
It’s Making a Grinding or Rattling Noise → Foreign Object Inside
If it’s running but grinding on something hard, a utensil, bottle cap, or bone fragment got past the splash guard. Don’t keep running it. Cut the power and clear the chamber first.
Start at Step 1.
What Causes a Garbage Disposal to Jam
The flywheel and impeller blades sit inside the grinding chamber. When something stops them from spinning freely, the motor stalls and the thermal overload trips.
The most common causes:
Fibrous foods. Celery, artichoke leaves, corn husks, asparagus, and onion skins create stringy fibers that wrap around the impeller shaft. They don’t grind — they tangle.
Hard objects. Fruit pits, small bones, bottle caps, and broken glass are common culprits. They wedge between the impeller and the grinding ring and lock the flywheel completely.
Grease and fat. Grease doesn’t cause an immediate jam, but it hardens in the grinding chamber over time and slows the impeller. Combined with food debris, it creates thick buildup that eventually seizes the unit.
Overloading. Stuffing too much food at once doesn’t give the grinding chamber time to clear. The debris packs tight and stalls the motor.
Tools You’ll Need
- ¼-inch hex (Allen) wrench — This is the standard size for almost all residential disposals. InSinkErator units ship with a small wrenchette that fits this same socket. Check the drawer under your sink — it may already be there. If not, a standard ¼-inch hex key set is an inexpensive addition to any home toolkit.
- Flashlight or phone torch
- Tongs or needle-nose pliers — For removing debris. Never use your fingers.
- Rubber gloves — Optional but recommended.
That’s it. No special plumbing tools required.
How to Fix a Jammed Garbage Disposal — Step by Step

Step 1 — Cut the Power Completely
Turn the wall switch off. Then unplug the disposal from the outlet under the sink. If you can’t reach the plug, flip the circuit breaker for the kitchen at your electrical panel.
Do not skip this. The disposal’s motor can restart unexpectedly. There is no safe way to work inside a live disposal. This same rule applies any time you’re doing hands-on home repairs and maintenance — power off before you touch anything.
Step 2 — Clear Debris with Tongs
Grab your flashlight and look down into the drain opening. Remove the rubber splash guard if it’s in the way — most are designed to pull straight off for cleaning.
Use tongs or needle-nose pliers to remove any visible debris. Pull out bone fragments, glass, utensils, or anything solid. Don’t fish blindly. Look first, then remove.
Never put your hand inside the disposal, even with the power off. The impeller blades are not razor-sharp, but the grinding ring is abrasive and the chamber edges can cut.
Step 3 — Use the Hex Wrench on the Flywheel
Look at the bottom center of the disposal unit under your sink. You’ll see a small hex-shaped socket. This is the flywheel turning hole.
Insert your ¼-inch hex wrench into the socket. Turn it back and forth — left, right, left, right — working it until the flywheel moves freely in both directions. You’ll feel resistance at first, then it will loosen as the jam clears.
If it won’t budge at all, don’t force it. Try the back-and-forth motion with steady pressure for about 30 seconds, then stop. Check the grinding chamber again with your flashlight. Something may still be lodged against the impeller.
Once the flywheel spins freely with the wrench, the jam is mechanically cleared. Remove the wrench before moving to the next step.
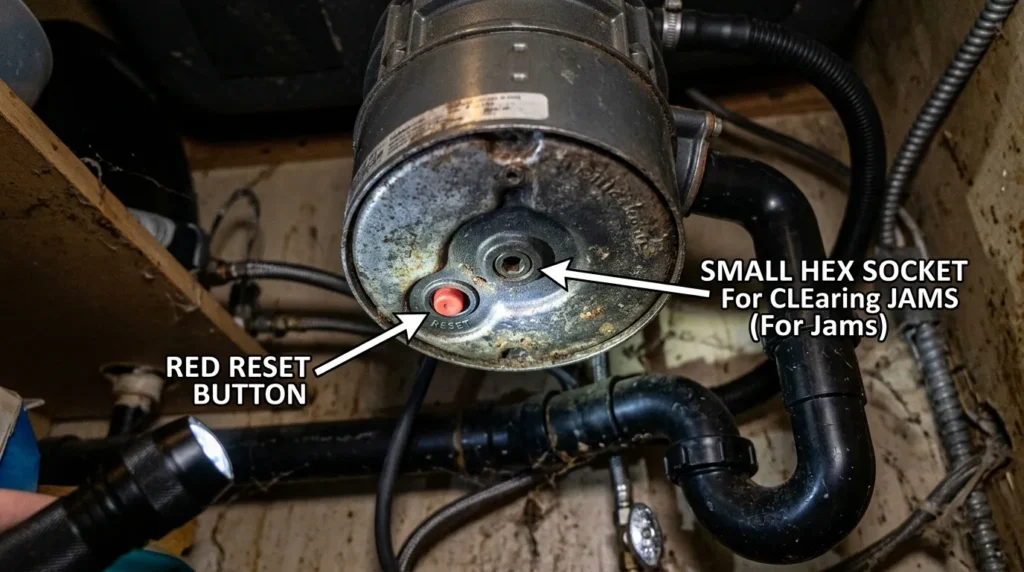
Step 4 — Press the Reset Button
Look at the underside of the disposal housing. There’s a small button, usually red, sometimes black. That’s the thermal overload protector.
If the button is popped out, press it in firmly until you feel a click. If it doesn’t click, the motor is still too hot. Wait 15 minutes and try again. Running the motor while it’s overheated is one of the fastest ways to burn it out permanently.
If the button won’t stay in at all, the motor may have failed. At that point, replacement is likely cheaper than repair.
Step 5 — Check the GFCI Outlet
If you pressed the reset button and the disposal still won’t respond, go to the outlet it’s plugged into under the sink. Look for a GFCI (Ground Fault Circuit Interrupter) outlet — it has two small buttons in the center labeled RESET and TEST.
Press RESET. If it clicks in and holds, that was the problem. Power to the disposal was cut at the outlet, not at the disposal itself. If you find loose or unresponsive outlets elsewhere in the kitchen, it’s worth reading up on how to fix loose electrical outlets — they’re often connected to the same GFCI circuit.
If you don’t have a GFCI outlet under the sink, check your electrical panel for a tripped breaker labeled DISPOSAL or KITCHEN. Reset it by flipping it fully off, then back on.
Step 6 — Restore Power and Test
Plug the disposal back in. Turn the wall switch on.
Run cold water at full pressure first — before you flip the disposal on. Then turn on the disposal and let it run for 30 to 60 seconds. Cold water helps flush loosened debris through the drain and prevents heat buildup in the motor.
If it runs smoothly, you’re done.
If it hums and trips again immediately, there’s still an obstruction in the grinding chamber. Repeat Steps 1 through 3 with more attention to debris removal.
Still Jammed? What to Try Next
If you’ve gone through all six steps and the disposal still won’t run or keeps tripping:
Try a wooden broom handle or wooden spoon. Insert it into the drain opening and push against one of the impeller blades to manually rotate the flywheel from above. This can dislodge debris that the hex wrench couldn’t clear from below. Remove the wooden tool before restoring power.
Run ice cubes through it after clearing. Fill the chamber with ice and a cup of coarse salt, then run the disposal with cold water. The ice chips away residue on the grinding ring and helps knock loose any remaining buildup. This is a valid maintenance step, not just a myth.
Check the drain line. Sometimes what looks like a jam is actually a clog in the drain line beneath the disposal. If water is backing up even after the disposal runs freely, the blockage is downstream. That’s a drain clog, not a disposal jam. The same slow-drain troubleshooting approach used to unclog a toilet without chemicals often applies to kitchen drain lines — start with a plunger before reaching for anything stronger.
When to Call a Plumber
Call a licensed plumber if:
- The reset button won’t stay engaged after the unit has cooled for 15+ minutes
- You can smell burning from the motor
- The unit leaks from the body of the housing (not just a connection)
- The flywheel won’t turn at all even after clearing all visible debris
- You’ve cleared the jam three or more times in the past 30 days
Repeated jamming that isn’t explained by specific foods or objects usually signals worn impeller blades or a failing motor bearing. That’s not a DIY repair. Building a habit of seasonal plumbing maintenance can catch early warning signs — including sluggish disposal performance — before they turn into a full breakdown.
When to Replace Instead of Repair
The 10-year rule: Garbage disposals have an average lifespan of 8 to 12 years. If yours is over 10 years old and jamming frequently, replacement is usually smarter than repair.
Signs it’s time to replace:
- Motor makes a loud humming or grinding noise even when not jammed
- Persistent leaking from the motor housing or seals
- Frequent resets required — more than once per month
- Repair cost exceeds 50% of a new unit’s price
New mid-range disposals run $100 to $300 for the unit. InSinkErator and Moen are the two most reliable brands in the US market — a InSinkErator Evolution Compact ¾ HP Garbage Disposal is a solid mid-range pick that fits most standard sink openings. Installation runs $100 to $200 if you hire someone, or it’s a straightforward DIY swap if you’re comfortable under a sink. If you’re considering broader kitchen updates at the same time, the kitchen remodel cost estimator can help you plan the full scope without guessing.

How to Prevent Garbage Disposal Jams
Never put these in your disposal:
- Fibrous vegetables — celery, artichokes, corn husks, asparagus, onion skins
- Grease, oil, or fat — hardens inside the grinding ring and drain
- Starchy foods — pasta, rice, potato peels expand with water and clog
- Coffee grounds — clump into a dense paste that blocks the drain
- Bones and fruit pits — too hard for residential grind rings
- Eggshells — the membrane wraps around the impeller shaft
Run cold water before, during, and after. Cold water keeps grease solid so it grinds and flushes instead of coating the chamber. Run water for 15 seconds after you turn off the disposal to clear the drain line. Low water pressure can interfere with this flushing action — if your kitchen tap has weak flow, check out this guide on fixing low water pressure before assuming the disposal is the problem.
Feed food in small amounts. Don’t dump a whole cutting board of trimmings at once. Run small batches and let the chamber clear between each.
Clean it monthly. Drop a handful of ice cubes and a tablespoon of coarse salt in, run it for 30 seconds with cold water. Do this once a month and you’ll significantly reduce jam frequency and odor. This kind of routine falls naturally into a broader home heating and appliance maintenance checklist — small monthly habits prevent the big repairs.
Final Word
Most garbage disposal jams come down to three fixes: a hex wrench on the flywheel, debris removal with tongs, and a reset button press. If you’ve done all three and the unit is under 10 years old, it should run. If it keeps jamming, something is wrong with the unit — not your technique. At that point, a plumber or a new unit is the right call.
If you’re tackling other kitchen plumbing issues while you’re under the sink, the guide on fixing a running toilet is worth bookmarking — it’s one of the most common DIY plumbing fixes that homeowners delay longer than they should.


Leave a Reply