
Water features bring life to any outdoor space. The sound of flowing water creates a peaceful atmosphere while attracting birds and beneficial insects to your garden. You don’t need expensive contractors or complex plumbing to add this magic to your backyard.
These DIY projects range from simple 30-minute builds to weekend projects. Most use common materials from hardware stores and require basic tools you likely already own.
Why Add a Water Feature to Your Backyard?
Water features offer multiple benefits beyond their visual appeal. They mask unwanted noise from traffic or neighbors, creating a natural sound barrier. The moving water also increases humidity around plants, helping them thrive in dry climates.
Studies show that water sounds reduce stress and improve mental well-being. Even a small fountain can transform your outdoor space into a relaxation zone.
Planning Your DIY Water Feature Project
Choose the Right Location
Pick a spot where you’ll enjoy the water feature most. Consider these factors:
- Visibility from indoors – Place it where you can see it from windows
- Electrical access – Most pumps need power, so stay within 50 feet of outlets
- Level ground – Saves time and ensures proper water flow
- Shade balance – Some sun prevents algae, but full sun increases evaporation
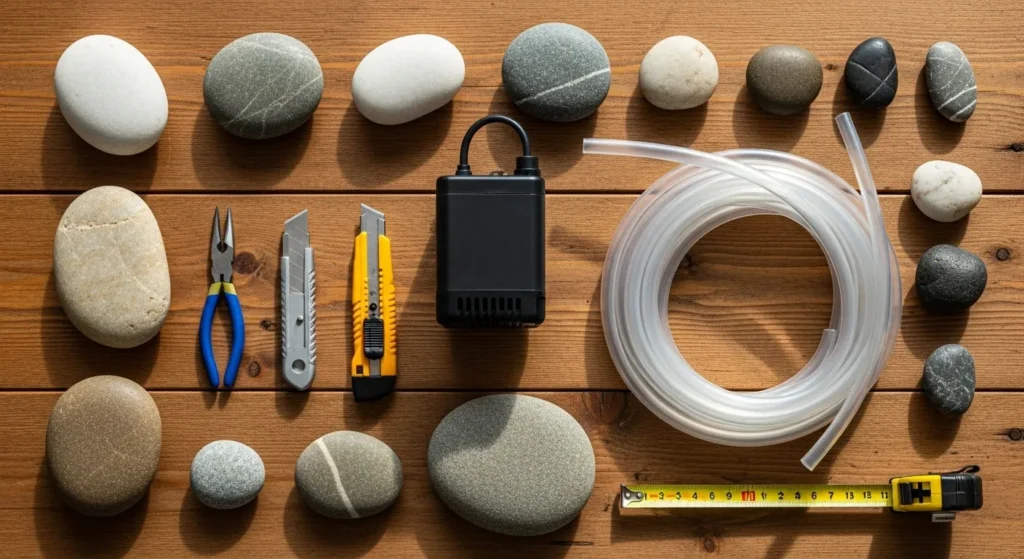
Essential Tools and Materials
Basic tools work for most projects:
- Shovel or spade
- Level
- Measuring tape
- Drill with bits
- Garden hose
- Rubber gloves
Common materials include:
- Submersible pump (200-400 GPH for small features)
- Flexible tubing
- Waterproof sealant
- Stones, pebbles, or decorative elements
- Liner or pre-formed basin
Quick 1-Hour Water Features
Container Fountain
Transform any large pot into a bubbling fountain. This project costs under $50 and takes about an hour.
Materials needed:
- Large glazed pot (no drainage holes)
- Small submersible pump
- 2 feet of flexible tubing
- River rocks or pebbles
- Decorative element for water spout
Steps:
- Place pump in pot bottom
- Thread tubing up through decorative element
- Connect tubing to pump
- Add rocks around pump, leaving tubing accessible
- Fill with water and plug in pump
The water cycles continuously, creating gentle bubbling sounds. Choose pots that complement your existing outdoor decor.
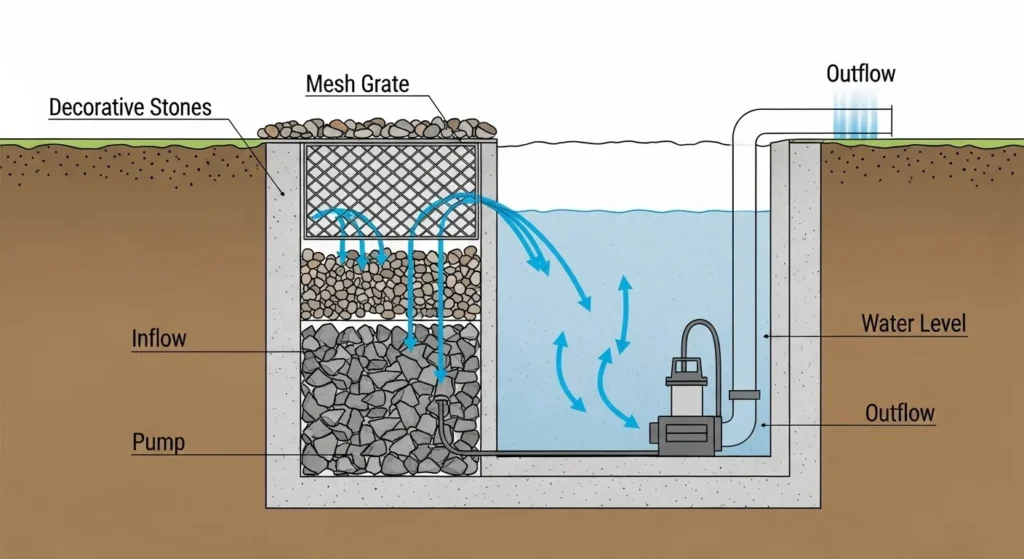
Disappearing Water Feature
This modern design shows water appearing from nowhere and vanishing into the ground. It’s safe around children and uses minimal water.
Materials:
- Large plastic tub or basin
- Rigid mesh grate
- Decorative rocks
- Pump and tubing
- Landscape fabric
Construction:
- Dig hole slightly larger than basin
- Install basin flush with ground level
- Place pump inside basin
- Cover with mesh grate
- Hide grate with decorative stones
- Run tubing to water source (rock, sculpture, or spout)
Water appears to disappear magically while actually recycling through the hidden basin below.
Weekend Water Feature Projects
Natural Stone Waterfall
Create a cascading waterfall using stacked stones. This project takes 1-2 days but creates a stunning focal point.
Planning the design:
- Sketch your waterfall before starting
- Plan 3-5 tiers for best visual effect
- Each tier should be 6-12 inches lower than the previous
Materials:
- Flat stones of varying sizes
- Pond liner
- Submersible pump (400-800 GPH)
- Sand for leveling
- Flexible tubing
Construction process:
- Excavate the area – Dig basin at bottom, create terraced levels
- Install liner – Use single piece when possible, overlap seams by 6 inches
- Position stones – Start from bottom, work upward
- Test water flow – Adjust stone positions for even cascading
- Conceal pump and tubing – Hide behind largest stones
The key is making water flow evenly across each stone tier. Small adjustments to stone position make big differences in water pattern.
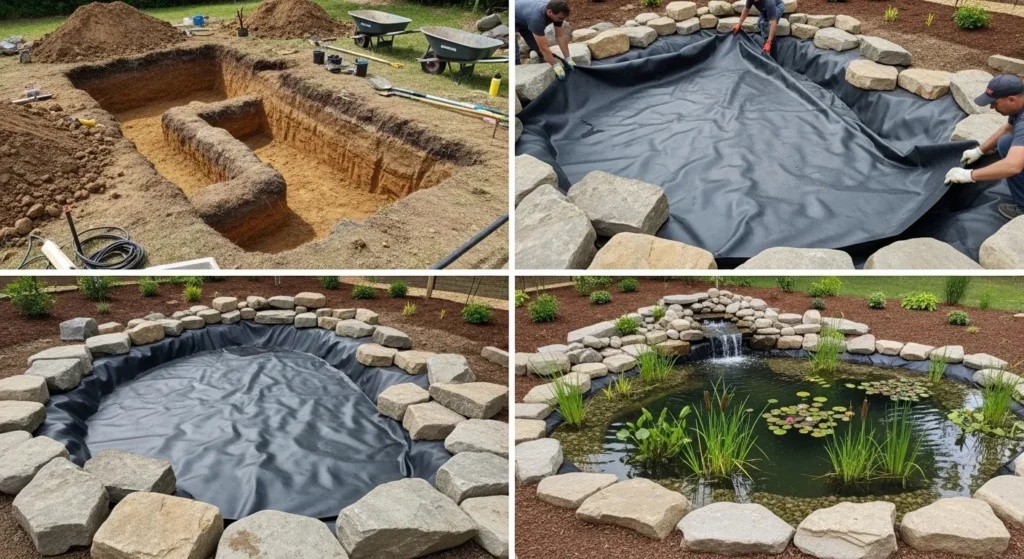
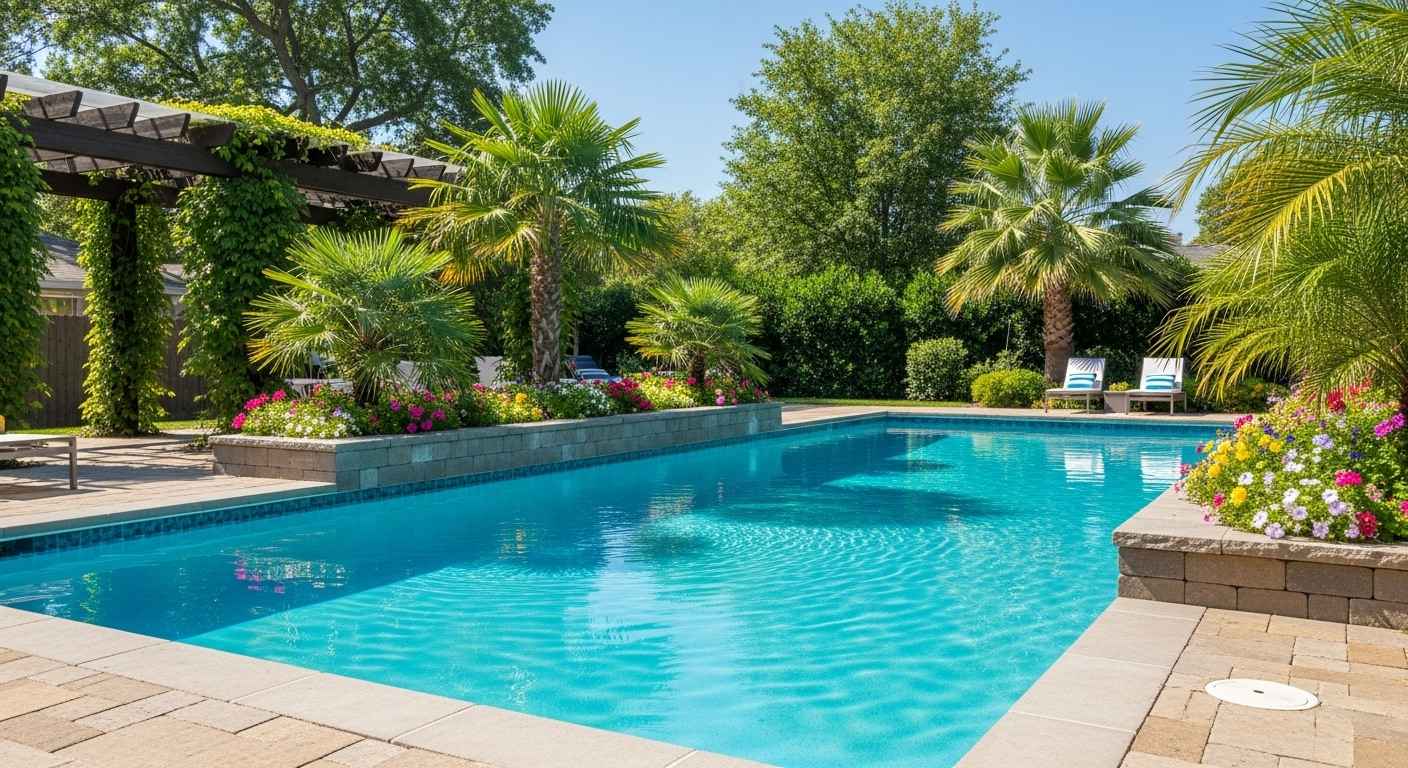
Pond with Fountain
A small pond adds significant value to your property while providing habitat for wildlife.
Size recommendations:
- Minimum 4×6 feet for fish
- 18-24 inches deep for year-round use
- Shallow edges for wildlife access
Step-by-step construction:
- Mark and excavate – Use spray paint to outline, call utilities before digging
- Remove roots and rocks – Smooth all surfaces
- Add sand base – 2-inch layer protects liner
- Install liner – Fold corners neatly, anchor with stones
- Add filtration – Combine pump with biological filter
- Fill slowly – Prevents liner shifting
Allow 2-4 weeks for biological balance before adding fish. This natural process establishes beneficial bacteria that keep water clear.
Solar-Powered Bird Bath Fountain
Eco-friendly option that operates without electrical connections. Perfect for remote garden areas.
Components:
- Wide, shallow basin
- Solar panel with battery backup
- Small pump designed for solar use
- Decorative center piece
Setup:
- Choose basin 2-3 inches deep maximum
- Position solar panel for maximum sun exposure
- Connect pump to solar panel
- Add pump to basin center
- Arrange decorative elements around pump
Solar pumps work best in full sun locations. Battery backup models continue operation during cloudy periods.
Advanced DIY Water Features
Stream Through Garden Beds
Create a meandering stream that flows through planted areas. This project requires more planning but integrates beautifully with landscaping.
Design principles:
- Plan gentle curves, not straight lines
- Vary width from 12-18 inches
- Include shallow areas and small pools
- Plant moisture-loving plants along edges
Construction:
- Layout stream path – Use garden hose to visualize flow
- Excavate carefully – Maintain consistent grade for water flow
- Install liner system – Use EPDM rubber for durability
- Create natural edges – Vary stone sizes and placement
- Add plants – Choose species that tolerate wet conditions
The stream should drop 1-2 inches every 10 feet to maintain good water flow. Test with garden hose before final installation.
Multi-Level Fountain
Dramatic tiered fountain using large containers of different sizes.
Container selection:
- Choose 3-4 containers in graduated sizes
- Ensure all are watertight
- Pick materials that weather well outdoors
Assembly:
- Drill connection holes – Use step bit for clean cuts
- Stack largest to smallest – Center each level carefully
- Install pump in base – Size pump for total height
- Connect levels with tubing – Hide connections behind decorative elements
- Test and adjust – Fine-tune water flow to each level
This design works well with ceramic pots, metal containers, or stone basins. Each level can have different decorative elements.

Maintenance and Troubleshooting
Keeping Water Clear
Clean water requires proper balance of filtration, circulation, and biological activity.
Weekly tasks:
- Remove debris with net
- Check water levels and top off as needed
- Clean pump intake if flow decreases
Monthly maintenance:
- Test water chemistry if keeping fish
- Trim aquatic plants
- Clean fountain heads and remove mineral buildup
Seasonal care:
- Spring: Deep clean and restart systems
- Summer: Monitor for algae growth
- Fall: Remove leaves promptly
- Winter: Winterize pumps in freezing climates
Common Problems and Solutions
Low water flow:
- Check for clogged pump intake
- Clear debris from tubing
- Verify pump is fully submerged
Green water (algae):
- Reduce direct sunlight with plants or shade
- Add beneficial bacteria
- Install UV sterilizer for persistent problems
Pump noise:
- Ensure pump sits on firm, level surface
- Check that water level covers pump completely
- Replace worn pump parts
Leak detection:
- Add food coloring to isolate leak location
- Check liner punctures and seam failures
- Inspect plumbing connections
Most issues stem from inadequate maintenance or seasonal changes affecting water chemistry.
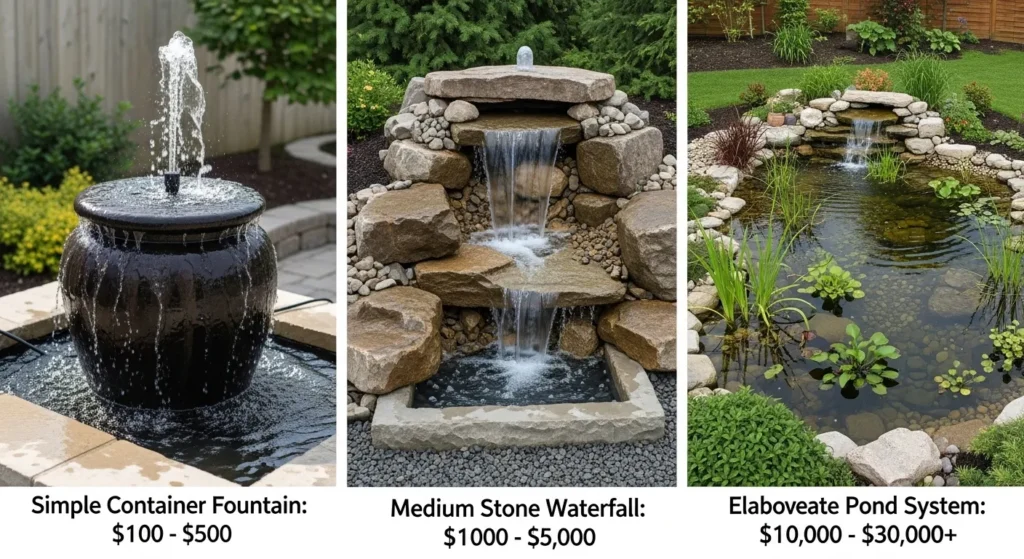
Cost Breakdown by Project Type
Budget-Friendly Options (Under $100)
- Container fountain: $30-75
- Solar bird bath: $50-90
- Simple disappearing fountain: $60-95
These projects use readily available materials and require minimal tools.
Mid-Range Projects ($100-500)
- Small waterfall: $150-350
- Garden pond: $200-450
- Multi-tier fountain: $175-400
More materials and larger pumps increase costs but create more dramatic results.
Premium Features ($500+)
- Large pond with filtration: $500-1,500
- Extensive stream system: $750-2,000
- Custom stone waterfall: $600-1,800
These projects rival professionally installed features at fraction of the cost.
Safety Considerations
Water and electricity require careful handling. Follow these safety guidelines for all projects:
Electrical Safety
- Use GFCI outlets for all water feature connections
- Keep electrical connections above water level
- Use outdoor-rated extension cords when needed
- Install dedicated circuits for permanent features
Child and Pet Safety
- Choose features without standing water for homes with small children
- Install barriers around deep water features
- Ensure all edges are smooth and secure
- Consider motion-sensor lighting for nighttime safety
Structural Safety
- Check local codes for pond depth restrictions
- Call utility marking services before digging
- Ensure stone structures are stable and properly supported
- Install proper drainage to prevent water damage
Plant Selection for Water Features
Aquatic Plants
Floating plants:
- Water lilies for coverage and blooms
- Water hyacinth for rapid growth
- Water lettuce for natural filtration
Marginal plants:
- Cattails for vertical interest
- Iris for colorful flowers
- Pickerel rush for wildlife attraction
Moisture-Loving Perimeter Plants
- Hostas for shade areas
- Astilbe for feathery textures
- Ferns for natural woodland feel
- Ligularia for dramatic foliage
Plant 30-50% of water surface for optimal balance. This provides fish habitat while controlling algae naturally.
Enhancing Your Water Feature
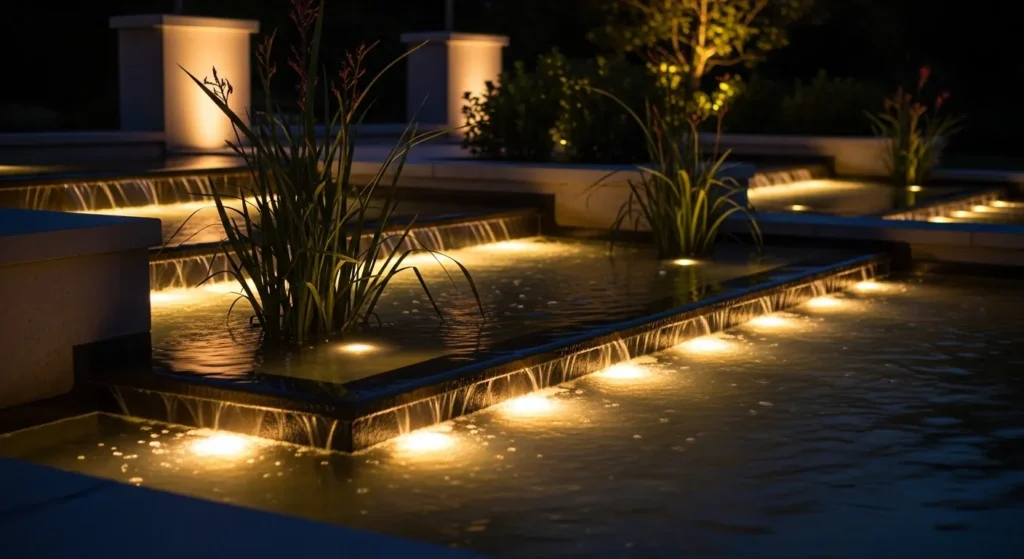
Lighting Options
Submersible LED lights:
- Create dramatic nighttime effects
- Choose color-changing options for versatility
- Install on separate switches for control
Landscape lighting:
- Highlight surrounding plants
- Add path lighting for safety
- Use spotlights to accent stone features
Sound Enhancement
- Adjust water flow for desired sound level
- Add baffles to increase gurgling sounds
- Position stones to create varied water patterns
- Install multiple small spouts instead of one large flow
Seasonal Decorations
- Float candles for evening ambiance
- Add seasonal plants in containers
- Include weather-resistant sculptures
- Change stone arrangements for visual variety
Winterizing Your Water Feature
Cold climate considerations prevent damage from freeze-thaw cycles.
Preparing for Winter
November tasks:
- Remove pumps and store indoors
- Add pond heater if keeping fish
- Install netting to catch falling leaves
- Trim back aquatic plants
December preparation:
- Drain shallow features completely
- Add floating objects to prevent solid ice formation
- Cover delicate stone elements
- Disconnect and store flexible tubing
Spring Startup
March activities:
- Inspect liner for winter damage
- Clean and test pumps before reinstalling
- Remove winter covers and protective materials
- Gradually restart circulation systems
April tasks:
- Add beneficial bacteria to restart biological filtration
- Begin regular maintenance schedule
- Replace any damaged components
- Plan seasonal plant additions
This cycle maintains feature longevity while protecting your investment during harsh weather.
Troubleshooting Guide
Water Loss Issues
Evaporation vs. leaks:
- Mark water level and monitor for 24 hours
- Normal evaporation: 1/4 inch daily in hot weather
- Faster loss indicates leak
Finding leaks:
- Let water level stabilize at leak point
- Inspect liner at that level carefully
- Check all plumbing connections
- Look for wet soil around feature edges
Pump Problems
Reduced flow:
- Clean pump intake screen
- Check for kinked tubing
- Verify proper pump size for head height
- Replace worn impeller parts
Complete pump failure:
- Test electrical connections with multimeter
- Check GFCI breaker status
- Inspect cord for damage
- Consider pump age and replacement needs
Water Quality Issues
Cloudy water:
- Usually indicates new pond syndrome
- Add beneficial bacteria
- Reduce fish feeding temporarily
- Check filtration capacity
Foul odors:
- Sign of anaerobic conditions
- Increase water circulation
- Remove decaying organic matter
- Consider adding aeration
Most problems resolve with proper diagnosis and targeted solutions rather than complete system replacement.
Conclusion
DIY water features add beauty, tranquility, and value to your outdoor space without professional installation costs. Start with simple projects to build confidence, then tackle more complex features as your skills develop.
The key to success lies in proper planning, quality materials, and regular maintenance. Even basic features provide years of enjoyment when properly constructed and cared for.
Remember to check local building codes before starting large projects, and always prioritize safety when working with water and electricity. With patience and attention to detail, you can create a stunning water feature that enhances your backyard for years to come.
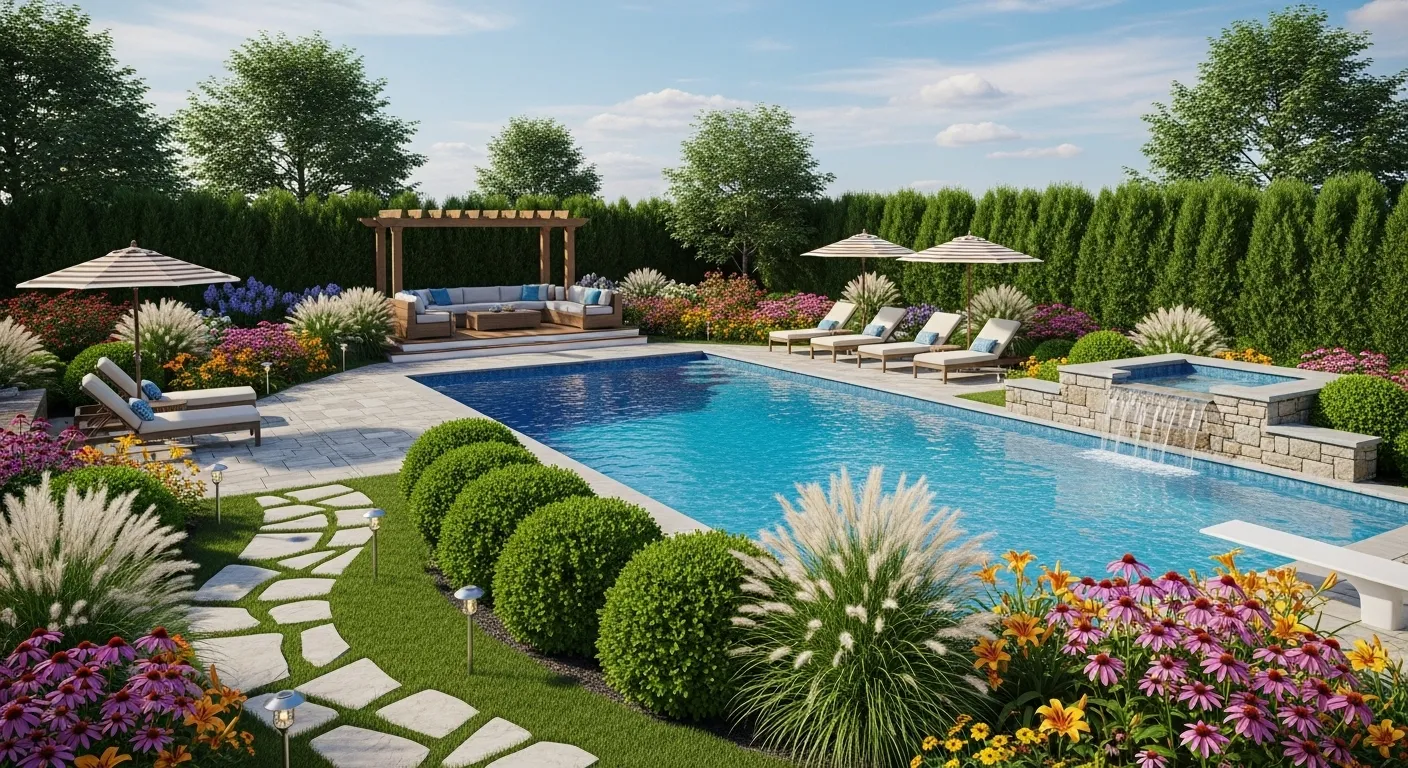
Your affordable backyard makeover project becomes even more impressive with a custom water feature as the centerpiece. Combined with the right grass types for your climate and current outdoor furniture trends, your DIY water feature will transform your yard into a personal retreat.
Leave a Reply