
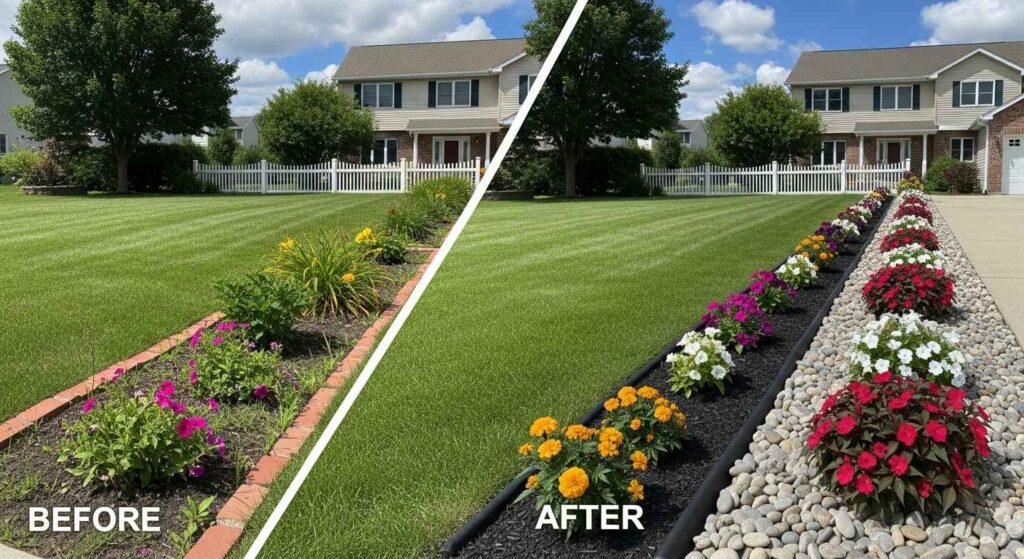
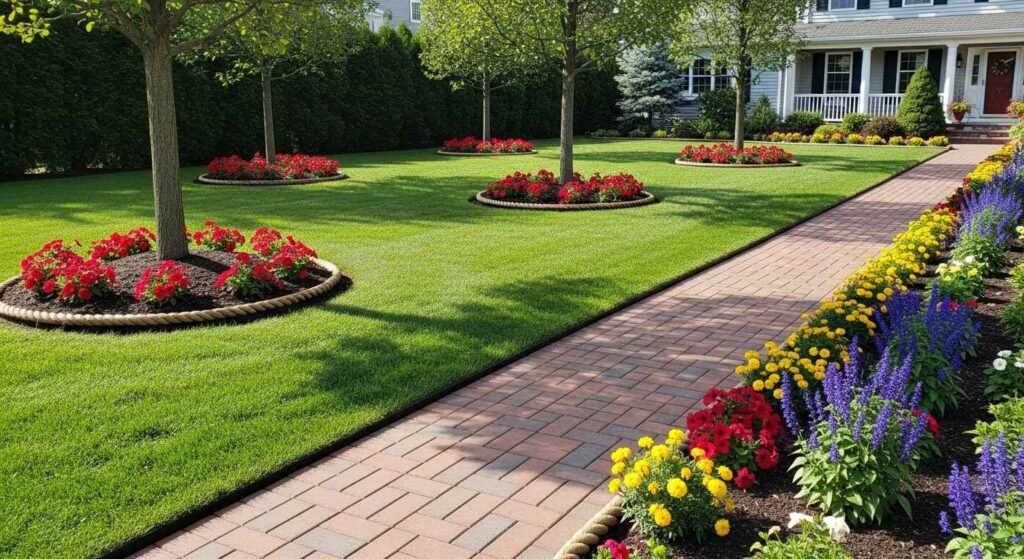
Creating clean, defined borders around your lawn doesn’t have to cost hundreds of dollars. These budget-friendly edging solutions will give your yard a professional look without the professional price tag.
Why Lawn Edging Matters More Than You Think
Proper lawn edging serves three main purposes: it prevents grass from spreading into flower beds, keeps mulch and soil contained, and creates visual boundaries that make your yard look intentional and well-maintained. Garden edging constructs the framework of your garden and helps define boundaries around trees and garden beds.
The average homeowner spends between $1,000-$3,000 on professional landscaping edging. But with the right materials and techniques, you can achieve similar results for less than $200 total.
15 Budget-Friendly Lawn Edging Ideas
1. Plastic Strip Edging ($15-25 for 100 feet)
Plastic edging is a budget-friendly option that offers flexibility and ease of installation, ideal for beginners in landscaping. Black plastic strips bend easily around curves and create clean lines between grass and garden beds.
Installation steps:
- Dig a shallow trench 4 inches deep
- Insert plastic edging with stakes every 3 feet
- Backfill with soil to hide the trench
Best for: Curved garden beds, temporary solutions, first-time DIYers Lifespan: 3-5 years with UV-resistant varieties
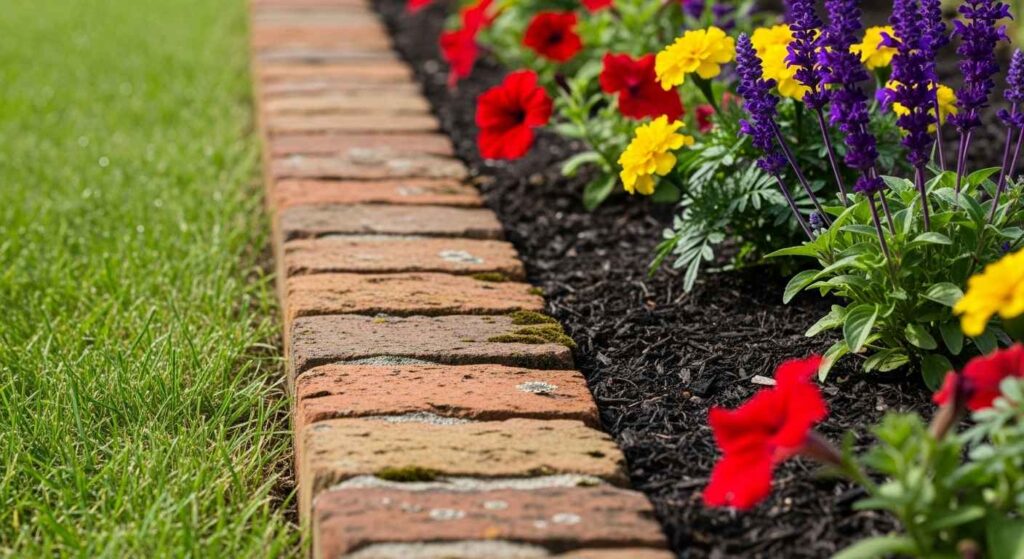
2. Recycled Brick Edging ($20-40)
Reclaimed red clay bricks can often be found going for cheap on online marketplaces and make fabulous accents to a garden. Check construction sites, demolition projects, or Facebook Marketplace for discounted bricks.
Installation process:
- Level the ground and create a shallow base
- Lay bricks end-to-end or at angles
- Fill gaps with sand or soil
- Tap level with a rubber mallet
Cost breakdown: $0.25-$0.50 per brick (need about 80 bricks for 50 feet)
3. Landscape Timber Borders ($25-35)
Landscape timbers are a cost-effective method of edging that are often pressure-treated to prevent rotting. Standard 8-foot timbers cost $8-12 each at home improvement stores.
Installation tips:
- Cut timbers to desired lengths with a circular saw
- Secure with 12-inch landscape spikes every 4 feet
- Pre-drill holes to prevent splitting
- Stain or paint for weather protection
4. Stone and Rock Borders ($30-50)
Collect stones from your property or purchase bulk river rock for $30-40 per ton. Large stones and rubble can often be picked up cheaply, and neighbors may give away leftover landscaping materials for free.
Three stone edging styles:
- Single row: Line up similar-sized stones
- Stacked border: Create low walls 2-3 stones high
- Mixed sizes: Combine large anchor stones with smaller fill rocks
5. Rope Edging ($20-30)
Thick rope with U-shaped garden pegs creates a nautical-themed border that’s simple yet smart-looking. This works particularly well for coastal or cottage-style gardens.
Materials needed:
- 1/2 inch thick manila or synthetic rope
- Metal U-stakes every 2 feet
- Wire cutters for trimming

6. Treated Wood Planks ($25-40)
Cedar or pressure-treated pine boards create straight, clean lines perfect for modern landscapes. One-inch thick boards cost $3-5 per linear foot.
Pro installation tips:
- Choose boards 4-6 inches wide
- Treat cut ends with wood preservative
- Angle cuts slightly underground for stability
- Apply exterior stain every 2-3 years
7. Concrete Pavers ($35-50)
Standard concrete pavers offer durability and clean lines. Simply dig a trough around the edge of your lawn with the same width as the edging bricks, then lay them on top of builders sand.
Installation process:
- Excavate 2 inches deeper than paver thickness
- Add 1 inch of sand base
- Level with a screed board
- Place pavers and fill joints with sand
8. Recycled Glass Bottles ($10-20)
Old glass bottles anchored firmly into the ground make an eye-catching border for garden paths or flower beds. Beer bottles work particularly well due to their uniform size.
Creative bottle arrangements:
- Uniform color: Use all brown or green bottles
- Rainbow effect: Mix different colored glass
- Alternating heights: Vary bottle depths for visual interest
9. Metal Strips ($40-60)
Steel or aluminum edging strips provide the cleanest, most professional appearance. Metal edging is great for front yards and increases curb appeal and property value.
Installation advantages:
- Nearly invisible when installed properly
- Bends around any curve
- Lasts 15-20 years
- Professional appearance
10. Woven Hazel Fencing ($30-45)
Weaving garden edging using twigs and branches like hazel creates lovely results for cottage garden styles. Purchase pre-made panels or create your own from pruned branches.
DIY weaving steps:
- Install vertical stakes every 12 inches
- Weave horizontal branches in alternating pattern
- Trim ends for neat appearance
- Replace sections as they weather
11. Railroad Ties ($45-70)
Used railroad ties provide rustic charm and excellent durability. Each 8-foot tie costs $15-25 and handles multiple flower bed sections.
Safety considerations:
- Choose untreated ties for vegetable gardens
- Wear gloves when handling
- Pre-drill to prevent splitting
- Check local regulations on treated tie disposal
12. Seashell Borders ($25-35)
Seashells available from craft stores at affordable prices create decorative borders perfect for coastal-themed gardens. Large conch shells or mixed shell varieties work best.
Design ideas:
- Graduated sizes: Large shells as anchors, smaller ones as fill
- Color coordination: Match shells to flower colors
- Pattern creation: Alternate shell types for visual rhythm
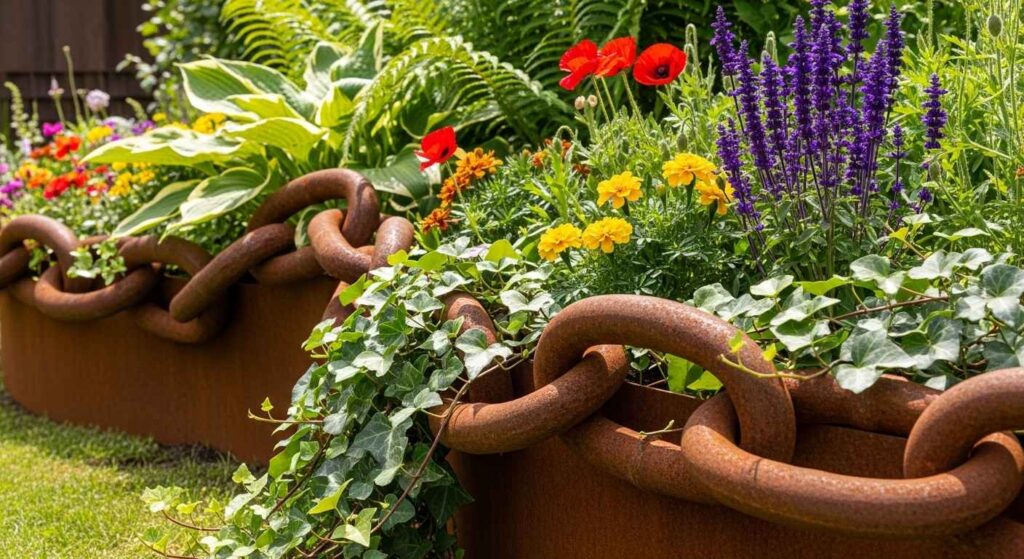
13. Chain Link Edging ($35-50)
Heavy-duty chains can be layered to bring an industrial vibe to your plot, creating appealing contrast with soft planting. Look for rusted chains on online marketplaces for authentic weathered appearance.
14. Vinyl Record Edging ($15-30)
Old vinyl records make a fun statement in vegetable gardens, channeling personality into plots with eclectic style. Garage sales and thrift stores often sell damaged records cheaply.
Creative applications:
- Music theme gardens: Pair with plant labels made from old CDs
- Retro vegetable plots: Perfect for quirky kitchen gardens
- Art installation borders: Create patterns with different record sizes
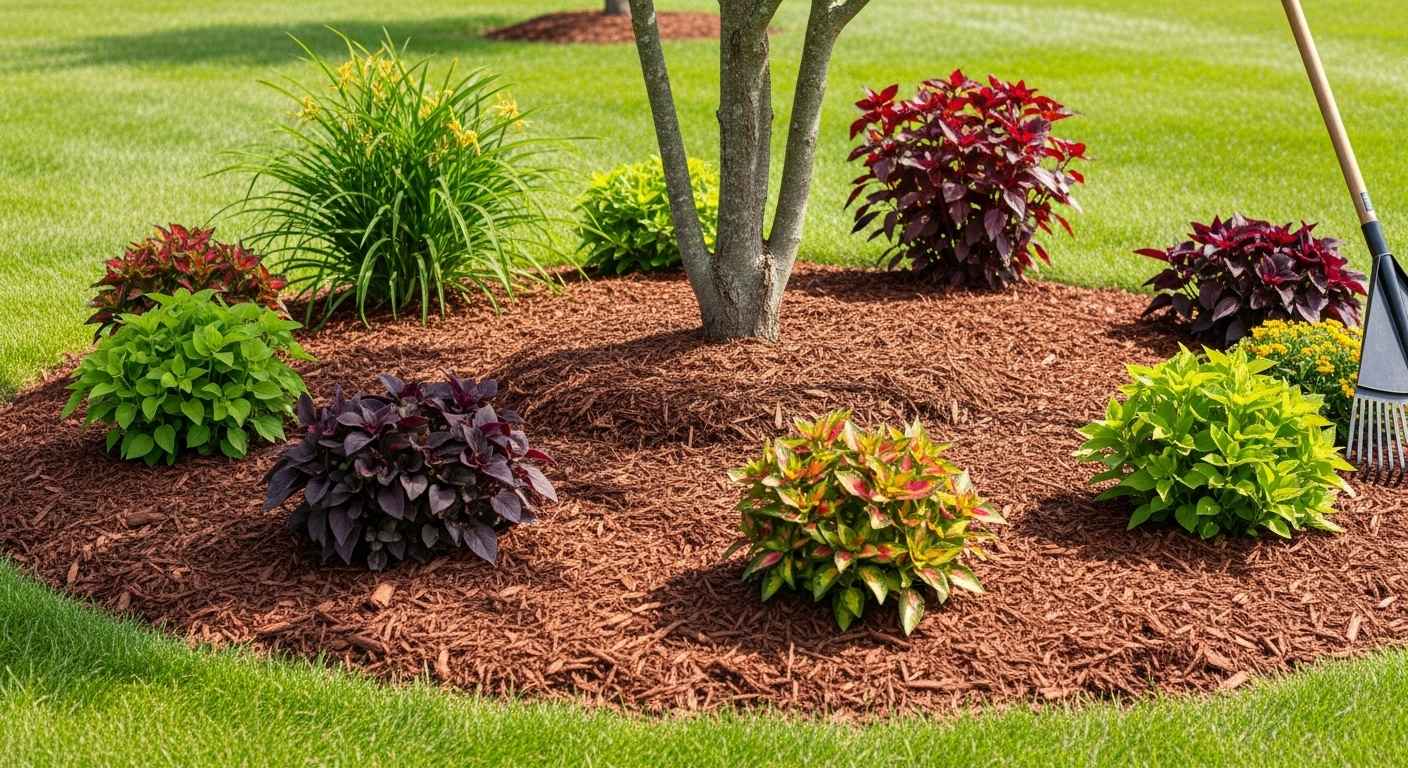
15. Natural Log Borders ($20-40)
Cut fallen branches or small logs into uniform lengths for rustic woodland-style edging. This works especially well around trees and in shaded garden areas.
Preparation steps:
- Remove bark to prevent insect problems
- Cut logs 12-18 inches long
- Treat cut ends with wood preservative
- Bury 1/3 of each log for stability
Installation Tips That Save Time and Money
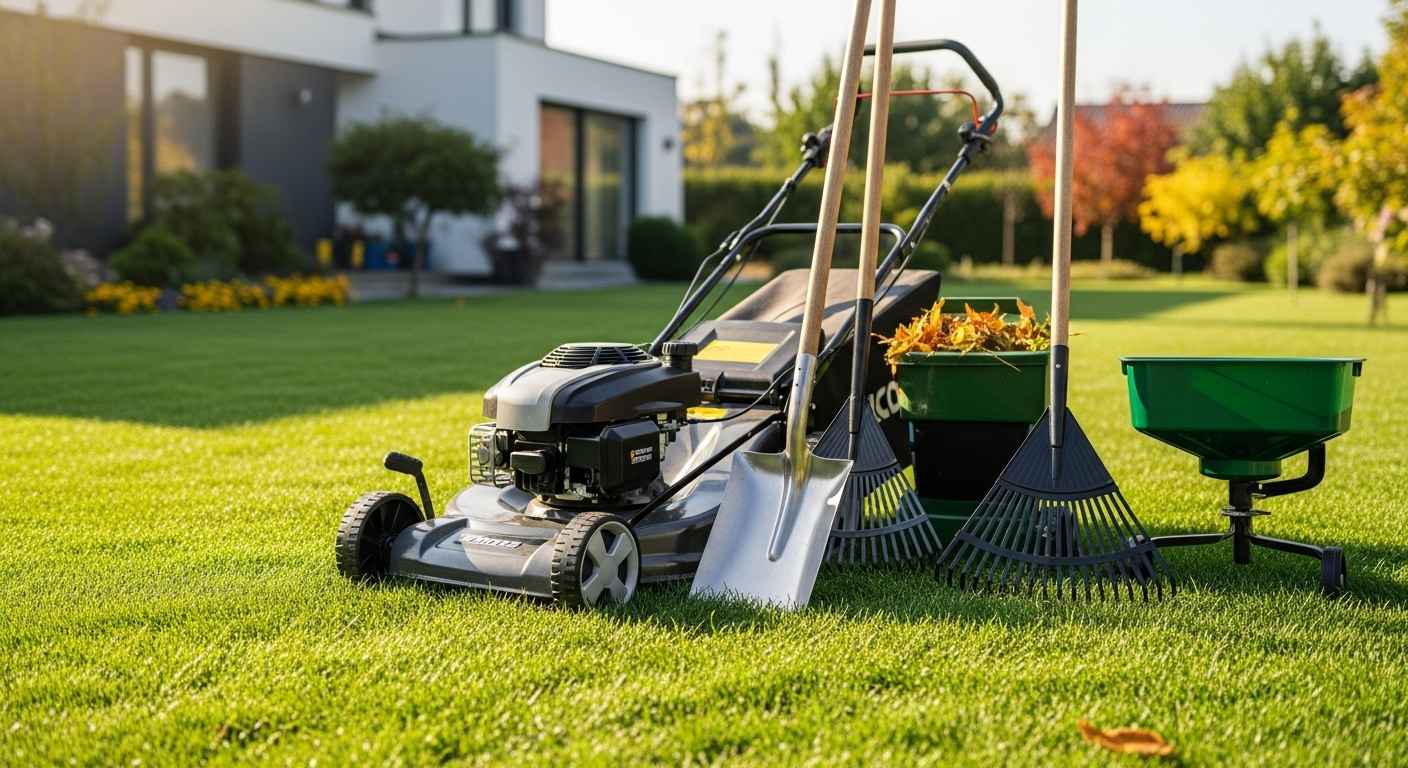
Essential Tools (Under $50 total)
- Trenching shovel or edging spade ($15-20)
- String line and stakes for straight edges ($5-8)
- Rubber mallet for leveling ($10-15)
- Hand tamper for compacting soil ($12-18)
Professional Installation Techniques
Create perfectly straight lines:
- Mark edges with spray paint
- Use a string line as your guide
- Dig trenches 1 inch deeper than material height
- Add sand base for stability
Handle curves properly:
- Use flexible materials like plastic or rope
- Mark curves with garden hose first
- Cut rigid materials into shorter segments
- Maintain consistent depth around bends
Common Installation Mistakes to Avoid
- Insufficient depth: Edging should sit 2-3 inches below ground level
- Poor drainage: Always slope away from structures
- Inadequate spacing: Leave expansion gaps for concrete materials
- Skipping base preparation: Compact soil and add sand for stability
Maintenance Requirements by Material
Low-Maintenance Options (1-2 hours annually)
- Stone and brick: Occasionally reset displaced pieces
- Metal strips: Clean debris from joints
- Concrete pavers: Re-sand joints every 2 years
Medium-Maintenance Options (3-4 hours annually)
- Wood borders: Apply stain/sealant every 2-3 years
- Plastic edging: Replace UV-damaged sections
- Chain edging: Check for rust and reposition
Higher-Maintenance Options (5+ hours annually)
- Natural materials: Replace weathered pieces
- Woven fencing: Repair loose weaving
- Rope edging: Replace when frayed
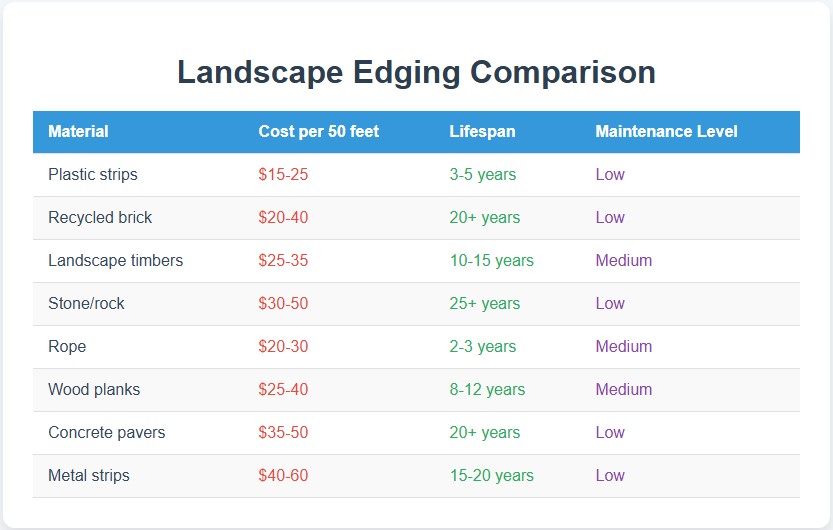
Cost Comparison Chart
Seasonal Installation Calendar
Spring (March-May)
- Best time for most installations
- Ground workable but not waterlogged
- Plants dormant, easier to work around
Summer (June-August)
- Good for quick installations
- Avoid extremely hot days
- Water newly disturbed areas
Fall (September-November)
- Excellent for permanent installations
- Cooler working conditions
- Allows settling before winter freeze
Winter (December-February)
- Limited to mild climate zones
- Good planning and shopping time
- Order materials for spring installation
Design Ideas That Maximize Visual Impact
Color Coordination Strategies
Monochromatic approach:
- Match edging color to house trim
- Use varying shades of same color family
- Create sophisticated, cohesive appearance
Contrast method:
- Dark edging against light-colored mulch
- Light stone against dark soil
- Creates dramatic definition
Combining Materials for Custom Looks
Two-tier systems:
- Low stone base with metal strip top
- Provides height variation and visual interest
- Combines durability with clean lines
Mixed texture borders:
- Alternate smooth and rough materials
- Creates rhythm and movement
- Adds visual complexity
Troubleshooting Common Problems
Grass Growing Through Edging
Solutions:
- Install 6-inch deep barriers
- Use pre-emergent herbicide along edges
- Maintain 2-inch clearance between grass and edging
Edging Shifting or Settling
Prevention methods:
- Compact soil base thoroughly
- Install materials below frost line
- Use landscape fabric underneath loose materials
Water Drainage Issues
Fix approaches:
- Grade soil away from structures
- Add drainage gravel under edging
- Create slight slope in installation
Budget Planning Guide
$50 Budget Projects
- Plastic strip edging for 100 linear feet
- Rope edging with stakes for curved bed
- Recycled brick border for small garden area
$100 Budget Projects
- Mixed stone and timber combination
- Metal strip edging for front yard beds
- Concrete paver walkway edging
$200 Budget Projects
- Complete front yard edging with multiple materials
- Raised bed borders with landscape timbers
- Professional-grade metal edging system
Where to Find Discounted Materials
Free Sources
- Construction site surplus
- Neighbor demolition projects
- Municipal tree trimming programs
- Craigslist “free” section
Discount Retailers
- End-of-season sales at garden centers
- Building supply outlet stores
- Facebook Marketplace bulk lots
- Habitat for Humanity ReStores
Bulk Purchase Savings
- Split large orders with neighbors
- Buy directly from quarries for stone
- Purchase full pallets of pavers
- Coordinate group purchases through social media
Professional vs. DIY: When to Call Experts
DIY-Friendly Projects
- Plastic and rope edging
- Loose stone borders
- Basic timber installation
- Recycled material projects
Consider Professional Help For
- Extensive grading requirements
- Complex drainage solutions
- Large-scale concrete installation
- Structural retaining wall needs
The cost difference: Professional installation typically costs $3-8 per linear foot, while DIY projects cost $0.30-$1.20 per linear foot for materials only.
Final Thoughts
Creating beautiful lawn edges doesn’t require a massive budget or professional installation. With careful material selection and proper installation techniques, you can achieve professional-looking results for a fraction of the cost.
Start with one small section to practice your technique before tackling larger areas. Take before and after photos to document your progress and share your success with neighbors who might want to coordinate group material purchases.
Remember that even simple plastic edging installed correctly will look better than expensive materials installed poorly. Focus on clean lines, proper depth, and adequate base preparation for the best long-term results.
Your lawn edging project will provide years of beauty and functionality while adding value to your property. Choose materials that match your garden style, climate conditions, and maintenance preferences for the best long-term satisfaction.
Related articles you might find helpful for your home improvement projects: 7 Genius DIY Hacks to Banish Stubborn Stains Fast and Closet Organization Ideas for Small Spaces.
Leave a Reply