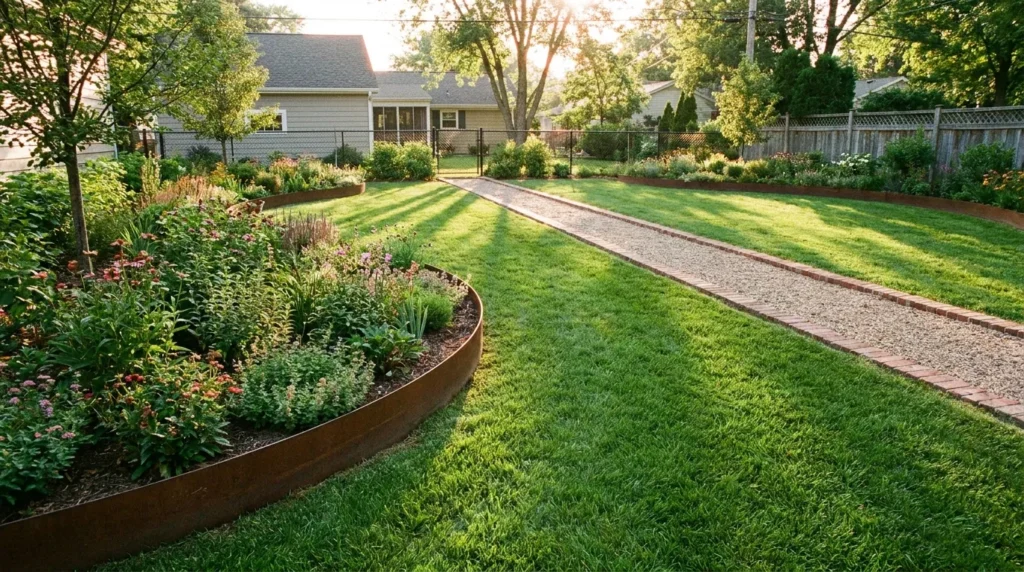
Messy lawn edges are one of those things that drag down an otherwise decent yard. It doesn’t matter how green your grass is or how well you’ve planted your flower beds — without a clean border, everything looks unfinished.
The good news: edging is one of the fastest, cheapest improvements you can make. Most of these ideas cost $50 or less in materials. A few cost nothing at all. The difference between cheap edging that looks cheap and cheap edging that looks expensive comes down to one thing: installation quality. We’ll cover both.
What Actually Makes Lawn Edging Look Expensive
Before picking a material, understand what creates the “high-end” look. It’s not the material itself — it’s how it’s installed.
Five things that separate polished edging from amateur edging:
- Flush installation. The top of your edging sits level with or just above the soil. Nothing leans, tips, or sticks up unevenly.
- Consistent height across the entire run. Even a 1-inch variation across 20 feet looks messy.
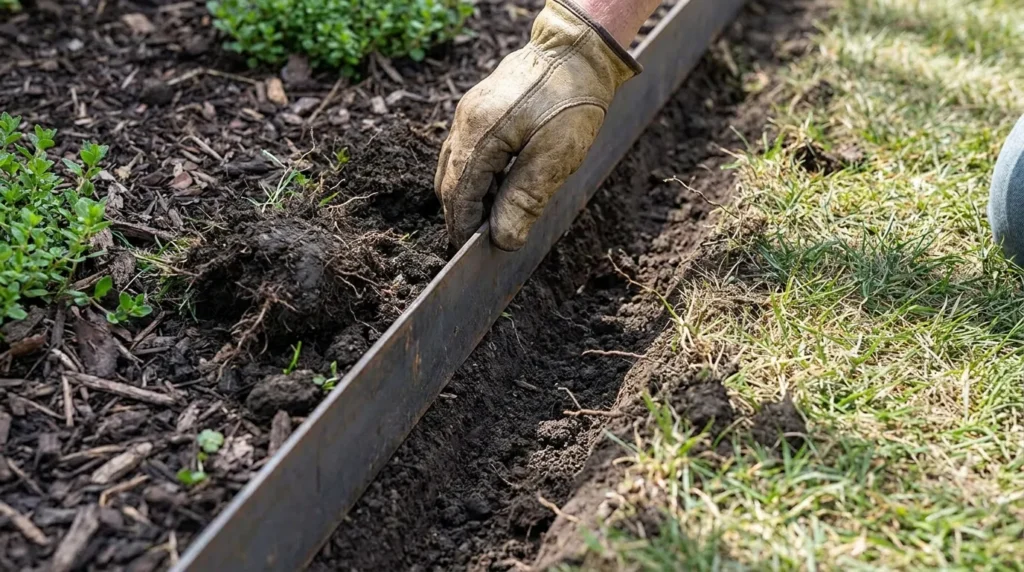
- A clean trench underneath. Cut a 3–4 inch trench before installing anything. It keeps edging from shifting and defines the line before the material even goes in.
- No visible stakes or connectors. Drive stakes below grade. Tuck connectors into the soil.
- Material continuity. Use one material per section. Mixing brick with plastic with stone on the same run looks chaotic.
Get those five things right and almost any material in this list will look intentional and professional.
The 15 Best Cheap Lawn Edging Ideas Under $50
1. Steel or Aluminum Strip Edging
Cost: ~$25–$35 for 20 ft
This is what professional landscapers use. Thin steel or aluminum strips sit almost invisible at grade level and create an arrow-straight or smoothly curved line that looks razor-sharp. Once installed, the edging virtually disappears while doing all the visual work.
Steel holds up for 20+ years. Aluminum won’t rust in wet climates. Both flex enough for gentle curves. If you want one material that consistently looks more expensive than its price tag, this is it.
Best for: Any yard style. Especially effective along driveways, walkways, and formal beds. Install time: 1–2 hours for 20 ft. Difficulty: easy.
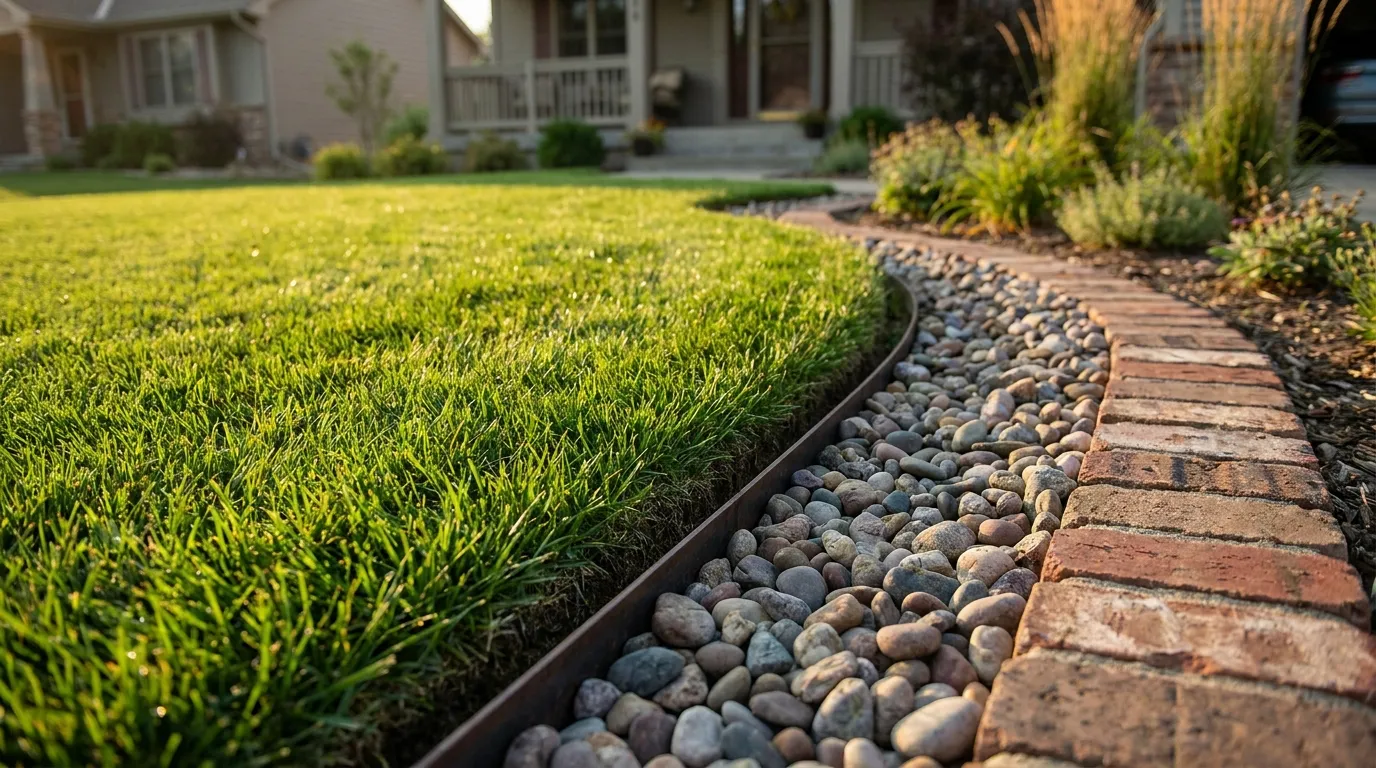
2. Reclaimed Brick (Flat-Lay or Soldier Course)
Cost: $0–$20 salvaged / ~$0.50–$0.80 per brick new
Reclaimed bricks have an aged, heritage look that newer materials can’t replicate. Lay them flat for a low, wide border or stand them upright in a “soldier course” for a taller, more structured edge. When you’re using salvaged brick, the imperfections work in your favor.
If you go with new brick, standard clay bricks can be laid in an afternoon with no mortar and minimal prep. Set them with holes facing down to prevent soil from eroding through.
Best for: Traditional, cottage, and formal garden styles. Straight runs and very gentle curves only. Install time: 2–3 hours. Difficulty: easy.
3. Hand-Cut Trench Edge (Zero Cost)
Cost: $0
A V-shaped trench cut along a bed with a flat spade or half-moon edger creates a surprisingly crisp line. No materials needed. The technique is simple: cut straight down 4 inches, then angle the cut back toward the bed to create a small channel that separates grass from soil.
The catch is maintenance. Without a physical barrier, grass creeps back within 3–4 weeks. Re-cut 3–4 times per season. If you’re on a very tight budget and don’t mind the upkeep, this delivers a genuinely polished result for nothing.
Pairing the cut trench with mulch gives you the clean visual while extending the time between re-cuts. Our mulching tips guide for a healthy yard covers what mulch types hold their shape best against edges.
Best for: Any bed style. Budget: zero. High maintenance. Install time: 1 hour. Difficulty: easy.
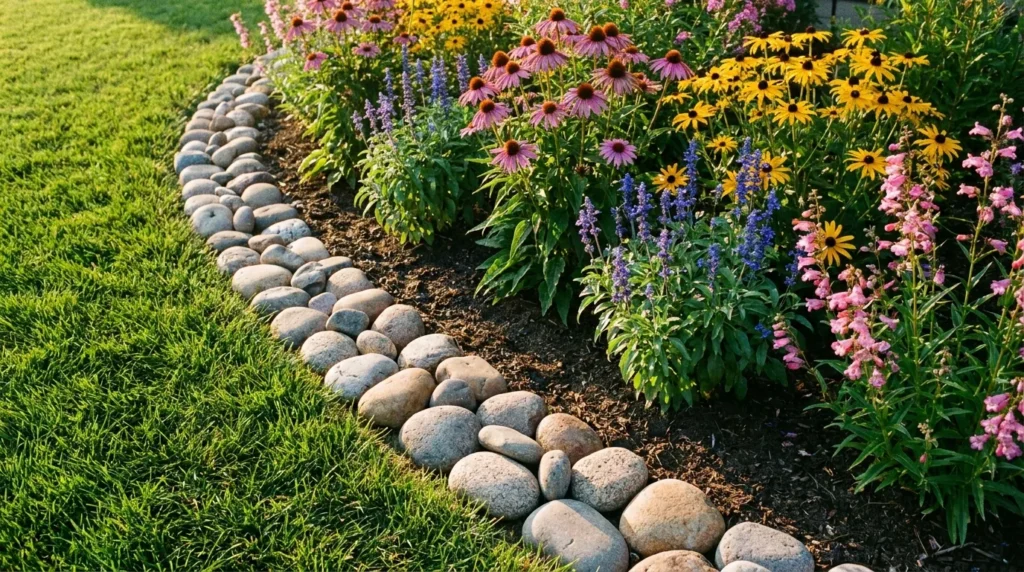
4. Natural Stone or River Rock Border
Cost: $15–$40 for a 10-ft section (free if sourced from your property)
River rock and flat fieldstone create a natural, organic edge that works in almost any outdoor setting. Collect them yourself from a nearby property or purchase bags from a hardware store. Stack them for a raised wall effect or line them in a single row for something flatter and more minimal.
No mortar needed for a single-row installation. Just set stones in a shallow trench so they anchor firmly and can’t be knocked loose by a mower or trimmer.
Best for: Cottage gardens, woodland settings, informal beds. Install time: 2–4 hours. Difficulty: easy.
5. Composite Bender Board
Cost: ~$30–$45 for 20 ft
Composite bender board is made from recycled wood fiber and plastic. It flexes for curves, never warps or splinters, and holds its shape in freeze-thaw cycles far better than solid timber. It’s one of the better long-term values on this list — rated for 10–15 years with zero maintenance.
Install it the same way as steel edging: trench, stake, backfill. The stakes are included in most kits.
Best for: Curved beds, modern landscapes, low-maintenance setups. Install time: 1–2 hours. Difficulty: easy.
6. Pressure-Treated Timber Strips
Cost: ~$10–$25 per 8-ft board
A 2×4 or 2×6 pressure-treated board makes a bold, structured edge for raised beds and straight formal borders. It’s thick enough to hold back soil, wide enough to double as a low seating edge around a garden, and cheap enough to run the entire perimeter of a bed for under $50.
Seal all cut ends with wood preservative before installation to slow rot. Drive rebar stakes through pre-drilled holes to anchor boards firmly.
If you enjoy working with reclaimed and salvaged timber, the DIY reclaimed wood projects guide has sourcing tips that apply here too.
Best for: Raised beds, vegetable gardens, straight formal edges. Install time: 2–3 hours. Difficulty: moderate.
7. Concrete Pavers Used as Edge Soldiers
Cost: ~$1–$2 per paver
Standard concrete pavers — the same ones used for patios and paths — look completely different when you set them vertically in a trench as “soldier” edging. The result is a uniform, contemporary border that holds its shape permanently. No mortar. No maintenance. Extremely durable.
Source pavers from a home improvement store or salvage yard. Leftover pavers from other projects work perfectly. If you’re planning a patio alongside your edging, the patio cost estimator can help you budget both in one pass.
Best for: Modern, formal, and geometric garden styles. Install time: 2–4 hours. Difficulty: moderate.
8. Upright Log or Log Round Edging
Cost: $0–$15 if self-sourced
Cut logs into 6–10 inch sections and set them upright, side by side, in a trench. Partially buried, they stay in place without stakes. The look is rustic, natural, and genuinely distinctive — nothing looks more “found” than raw wood rounds from your own property or a neighbor’s felled tree.
Treat the buried ends with wood preservative to extend the lifespan past the typical 3–5 years of untreated wood. Consider using pallets as a free timber source — our DIY pallet furniture ideas guide walks through breaking them down and salvaging usable wood.
Best for: Cottage gardens, woodland and naturalistic landscapes. Install time: 2–3 hours. Difficulty: easy.
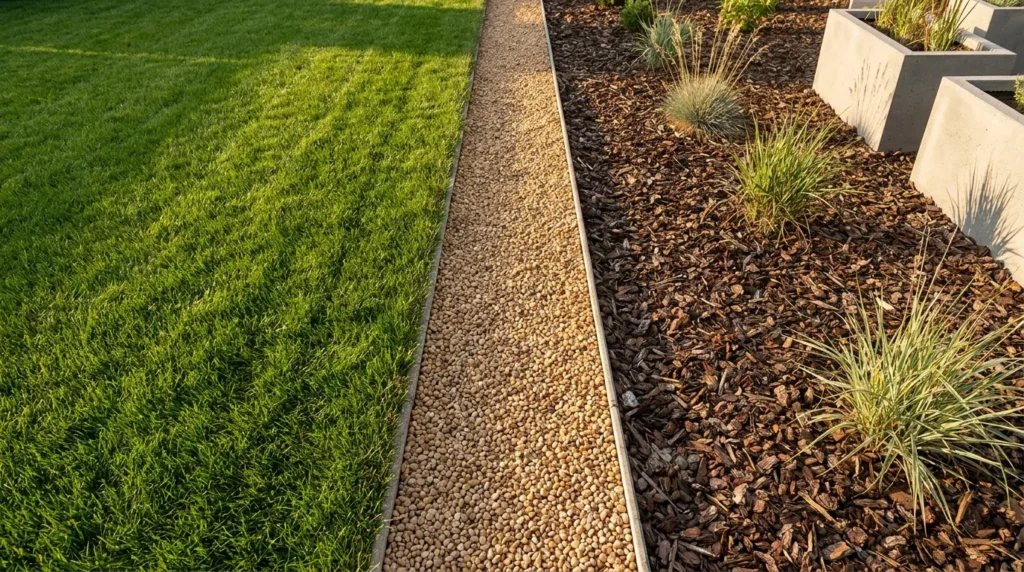
9. Gravel Trench Edge
Cost: ~$10–$30 for a pea gravel fill
A 4–6 inch wide trench filled with pea gravel creates a crisp visual separation between lawn and bed while functioning as a drainage channel. It’s low maintenance, looks genuinely sharp in modern settings, and the gravel rarely needs replacing — just occasional raking.
Use landscape fabric underneath to prevent weeds from growing up through the gravel. Before you buy, use the gravel calculator to figure out exactly how much you need based on your trench dimensions.
Best for: Modern, minimalist, and xeriscape garden styles. Install time: 2–3 hours. Difficulty: easy.
10. Corten (Weathering) Steel Strips
Cost: ~$40–$50 for a short run
Corten steel is the edging material you see in high-end landscaping magazines and expensive residential projects. It starts silver-grey and oxidizes over the first year into a deep, warm rust-brown patina. After that, it stabilizes and never corrodes further.
It’s the most expensive material on this list but still lands under $50 for a short section. The visual payoff is significant. Used even in a small feature area, it reads as considered and premium.
Best for: Contemporary, architectural, and desert-inspired garden styles. Install time: 1–2 hours. Difficulty: easy.
11. Repurposed Terracotta Pipe Sections
Cost: $0–$10
Old terracotta pipes can be cut into 4–6 inch sections and set tightly side by side in a trench. The result has a Mediterranean, slightly sculptural quality that sets it apart from any off-the-shelf edging. Source pipes from salvage yards, demolition sites, or online marketplace listings.
Best for: Mediterranean, cottage, and eclectic garden styles. Install time: 2–3 hours (including sourcing). Difficulty: easy.
12. Flexible Black Plastic Edging
Cost: ~$15–$20 for 50 ft
Plastic edging is the most affordable option you can buy at any hardware store. Once installed with the stake tops buried below grade, it’s nearly invisible — the only thing you see is the clean line it creates. It bends easily for curved beds, comes in 50-ft rolls, and requires no cutting.
It won’t win any aesthetic awards on its own, but paired with a tight mulch border, it creates a neat finish that reads as intentional.
Best for: Curved beds, vegetable gardens, invisible barrier applications. Install time: 1 hour. Difficulty: very easy.
13. Woven Branch (Wattle) Edging
Cost: $0 if you have flexible branches
Wattle edging uses flexible green branches — willow, hazel, dogwood — woven in and out of upright stakes pushed into the ground. It takes some patience but no tools and no money. The result looks deliberately handcrafted in a way that plastic and even stone can’t match.
Best for: Cottage, rustic, and naturalistic gardens. Install time: 3–4 hours. Difficulty: moderate.
14. Reclaimed Roofing Slate
Cost: $0–$20 salvaged
Slate pieces set vertically in a trench create one of the sharpest, most architectural-looking edges possible. The thin profile and natural texture contrast beautifully with lawn grass. Sourced from a salvage yard or building demolition, it costs almost nothing.
Best for: Contemporary and cottage garden styles. Works on straight and curved runs. Install time: 2–3 hours. Difficulty: easy.
15. Solar Path Lights as Edge Markers
Cost: ~$20–$40 for 8–10 units
Solar stake lights placed at regular intervals along a bed edge define the border day and night. During the day, the stakes mark the edge. After dark, they outline the bed with warm light that genuinely transforms front yard curb appeal.
This option works best as an accent alongside a physical edging material — stake lights 18–24 inches apart along a steel or brick edge, for example. On their own, the gaps between stakes don’t fully define the border.
For more ideas on using lighting to lift your outdoor space, the cozy outdoor lighting ideas guide covers budget-friendly setups that work across different yard sizes.
Best for: Front yards, walkway borders, evening curb appeal. Install time: 30 minutes. Difficulty: very easy.
Which Edging Works for Curves vs. Straight Runs?
| Edging Material | Straight Runs | Curved Beds |
|---|---|---|
| Steel / Aluminum Strip | ✅ Excellent | ✅ Good |
| Composite Bender Board | ✅ Excellent | ✅ Excellent |
| Flexible Black Plastic | ✅ Good | ✅ Excellent |
| Brick (Flat-Lay) | ✅ Excellent | ⚠️ Limited |
| Concrete Pavers (Soldier) | ✅ Excellent | ⚠️ Limited |
| Pressure-Treated Timber | ✅ Excellent | ❌ Straight only |
| River Rock / Natural Stone | ✅ Good | ✅ Excellent |
| Log Rounds | ✅ Good | ⚠️ Limited |
| Roofing Slate | ✅ Good | ✅ Good |
| Gravel Trench | ✅ Good | ✅ Good |
| Wattle Branch | ✅ Good | ✅ Excellent |
How to Make Any Cheap Edging Look Professional
The material matters less than the execution. Follow these steps on any edging project and the result will look clean regardless of what you spent.
Dig a trench first. Always. Even for materials that claim to be “no-dig,” a 3–4 inch trench improves alignment, stability, and the finished appearance.
Use a string line or garden hose to mark the edge. Freehand installation creates wandering, inconsistent lines. Take 10 minutes to mark the run before you dig.
Keep consistent height. Set your first stake or piece, then use it as a reference for every subsequent piece. A small level helps on longer runs.
Backfill and tamp tightly. Loose soil around edging lets it shift in the first rain. Press soil firmly against both sides.
Seal or treat wood before installation. Pressure-treated timber is rot-resistant but not rot-proof. Sealing cut ends adds years.
Edge after mowing. Trimming after a fresh cut gives you the cleanest result because the grass is at a uniform height and the difference between lawn and bed is most visible.
For a full picture of how edging fits into your yard’s overall look, the lawn mowing patterns and curb appeal guide pairs well with this one — the two together make a real difference in how the yard reads from the street.
Edging Materials Ranked by Durability
If you’re only doing this once and want it to last, this ranking helps you pick:
- Natural stone / river rock — indefinite (won’t degrade)
- Concrete pavers — 20–30 years
- Corten / weathering steel — 20+ years
- Aluminum strip — 15–20 years
- Steel strip (galvanized) — 15–20 years
- Reclaimed brick — 10–20 years
- Composite bender board — 10–15 years
- Pressure-treated timber — 5–10 years
- Flexible plastic edging — 3–7 years
- Gravel trench — 2–3 years (top up annually)
- Cut trench (no material) — seasonal (re-cut every 4–6 weeks)
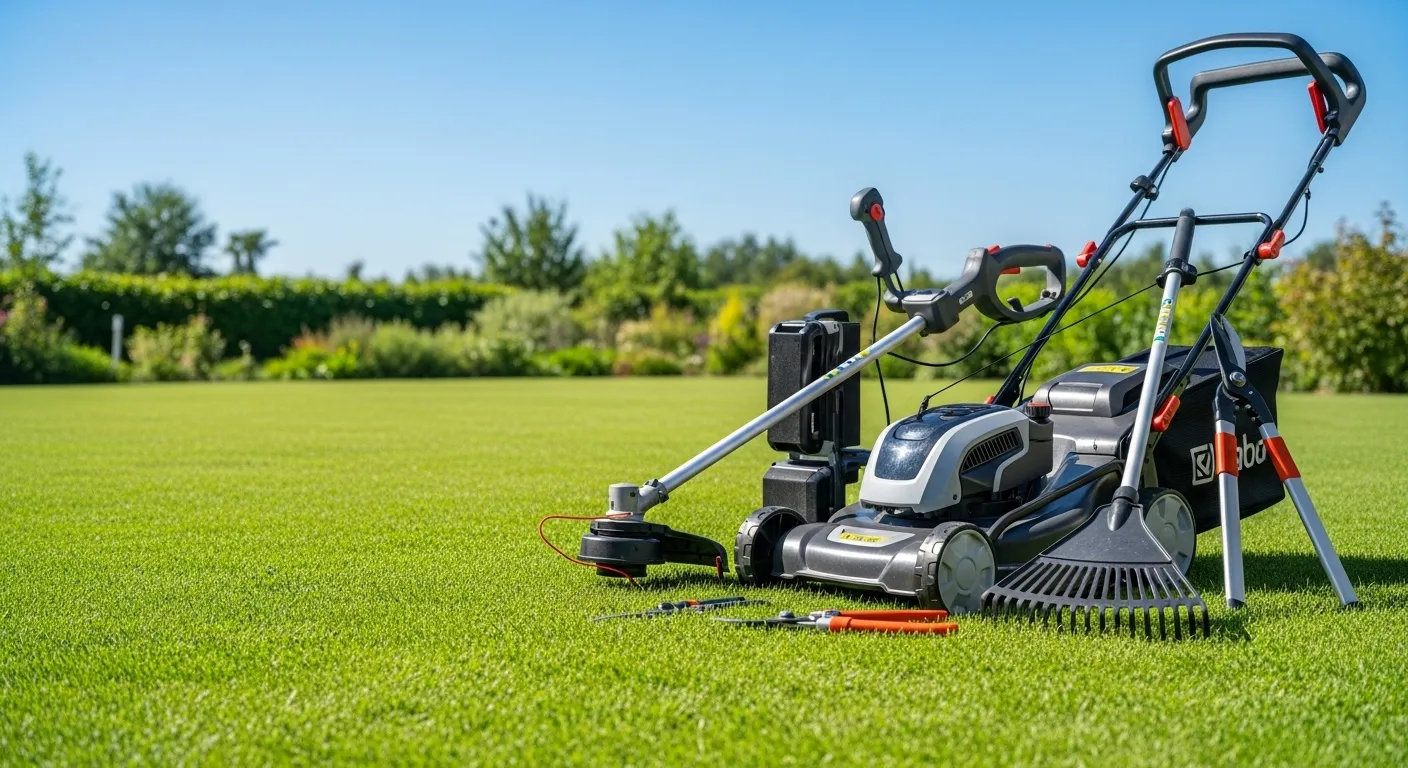
Tools You Need (Most Already in Your Garage)
You don’t need special equipment for any of these projects.
- Flat-edged spade or half-moon edger — for cutting the trench
- Rubber mallet — for driving edging without cracking it
- String line + two stakes — for marking straight runs
- Garden hose — for laying out curved runs before you dig
- Measuring tape — for calculating linear footage before buying materials
- Landscape fabric pins — needed for gravel trench projects
- Work gloves — for handling cut metal, slate, and brick
If you’re missing anything, the must-have gardening tools for beginners covers the basics that cover most lawn and garden projects without overspending on tools.
Final Thoughts
Lawn edging is one of the fastest ways to make a yard look like someone actually takes care of it. A clean line between grass and bed does more visual work than almost any other single landscaping task.
The $50 budget is real. Steel strip edging, composite bender board, brick, and stone all land inside it. The cut trench costs nothing. The materials in this list aren’t compromises — they’re what working landscapers use on actual projects.
Pick one idea, dig the trench, and get it done this weekend. The difference in your yard’s appearance will be immediate.
If you’re ready to take the wider yard further, the affordable backyard makeover ideas guide is the logical next step — it covers patios, planting, and outdoor structure on a real budget.

Leave a Reply