Building a table from reclaimed wood gives you a unique piece of furniture with character that store-bought tables simply can’t match. These projects work for beginners and experienced woodworkers alike, using materials that would otherwise end up in landfills.
Whether you need a dining table, coffee table, or side table, reclaimed wood offers beautiful grain patterns and a story behind every board. Plus, you’ll save hundreds compared to buying similar pieces from furniture stores.
What Makes Reclaimed Wood Special
Reclaimed wood comes from old buildings, barns, fences, and pallets that are carefully dismantled instead of demolished. This wood has unique characteristics you can’t find in new lumber.
Benefits of Using Reclaimed Wood
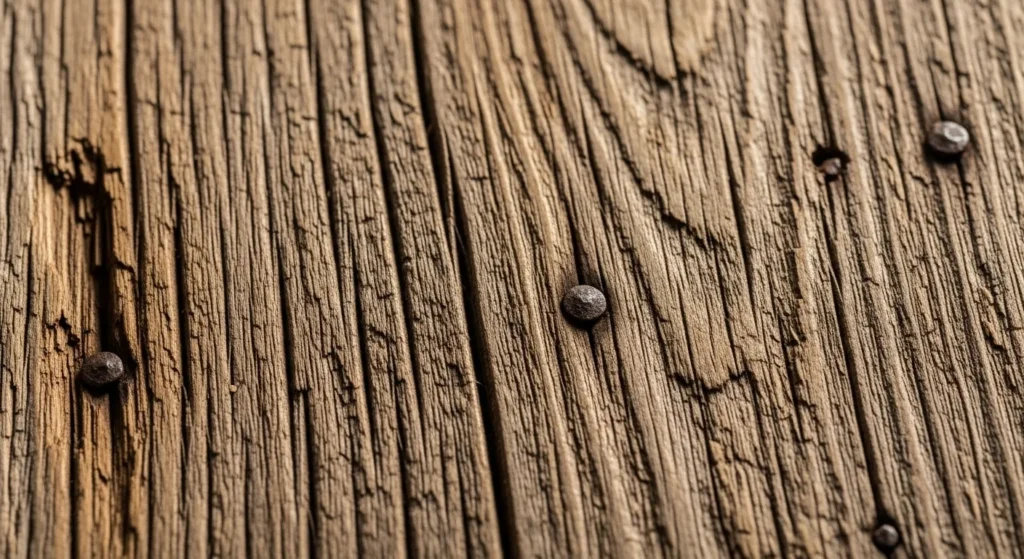
Character and History: Each board tells a story through nail holes, weathering marks, and natural aging that creates instant vintage appeal.
Environmental Impact: Reusing old wood reduces demand for new lumber and keeps materials out of landfills.
Cost Savings: Reclaimed wood often costs less than premium new hardwoods while offering superior character.
Stability: Old wood has already dried and settled, making it less likely to warp or crack over time.
Unique Grain Patterns: Decades of weathering create grain patterns and coloring impossible to replicate in new wood.

Where to Find Quality Reclaimed Wood
Salvage Yards and Demolition Companies
Most cities have salvage operations that carefully remove wood from old buildings. Call ahead to see current inventory and pricing.
Specialty Reclaimed Wood Dealers
These businesses specialize in sourcing, cleaning, and preparing reclaimed wood. Expect higher prices but better quality control.
Online Marketplaces
Facebook Marketplace, Craigslist, and specialty websites often have individuals selling reclaimed materials from their own projects.
Pallet Sources
Many businesses give away used pallets. Look for heat-treated (HT) stamps rather than chemically treated ones for safety.
Barn Wood Dealers
Rural areas often have dealers specializing in authentic barn wood with the most character and history.
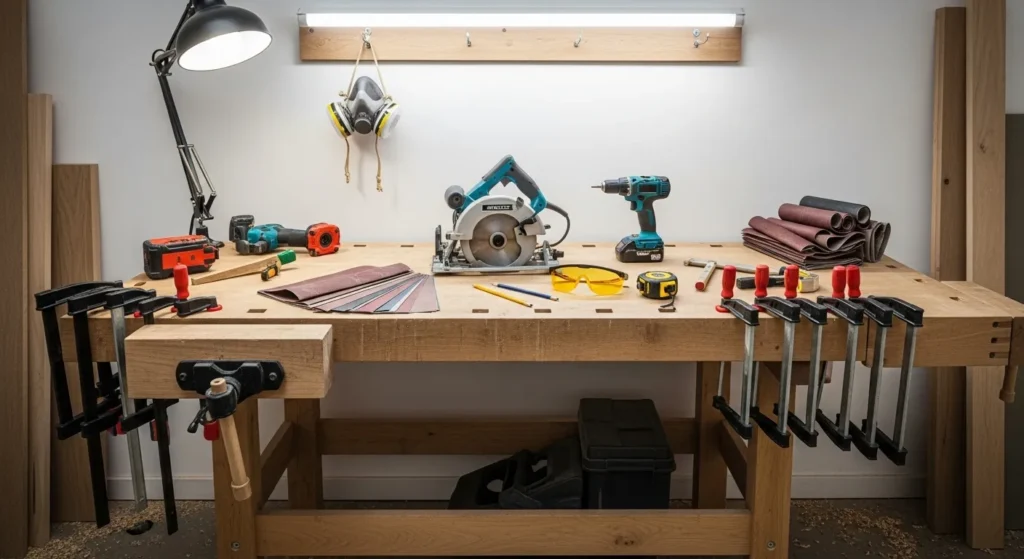
Essential Tools for Reclaimed Wood Projects
Basic Hand Tools
- Tape measure and pencil
- Hand saw or circular saw
- Drill with bits
- Sandpaper (80, 120, 220 grit)
- Clamps
- Safety glasses and dust mask
Power Tools That Speed Work
- Random orbital sander
- Pocket hole jig
- Router (optional but helpful)
- Miter saw for precise cuts
- Nail gun for assembly
Safety Equipment
Always wear safety glasses when cutting or sanding reclaimed wood. Use dust masks since old wood may contain lead paint or other contaminants.

Project 1: Simple Farmhouse Dining Table
This beginner-friendly project uses basic joinery techniques and creates a sturdy table that seats 6-8 people.
Materials Needed
- 6 pieces of 2×10 reclaimed lumber (8 feet long) for tabletop
- 4 pieces of 4×4 reclaimed posts for legs
- 2 pieces of 2×8 lumber for aprons
- Wood screws and pocket screws
- Wood glue
- Finish of your choice
Step-by-Step Instructions
Step 1: Prepare the Wood Sand all pieces starting with 80-grit, then 120-grit, finishing with 220-grit. Remove any nails or metal hardware first.
Step 2: Create the Tabletop Arrange the 2×10 boards with best grain facing up. Apply wood glue to edges and clamp boards together. Let dry 24 hours.
Step 3: Build the Base Cut 4×4 posts to 29 inches for standard table height. Cut apron pieces to fit between legs with pocket holes for attachment.
Step 4: Assembly Attach aprons to legs using pocket screws and wood glue. Attach completed base to tabletop using figure-8 fasteners to allow wood movement.
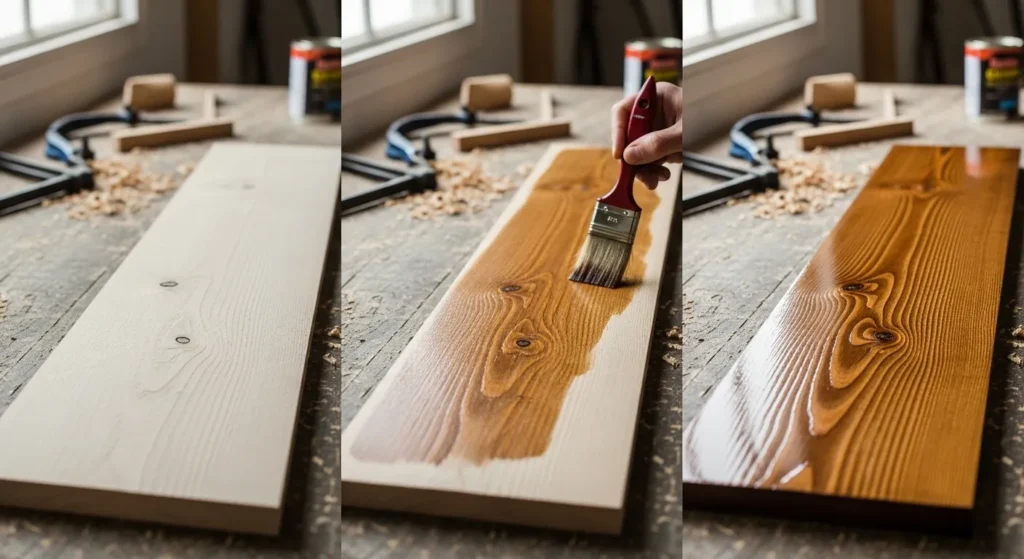
Step 5: Finish Apply your chosen finish following manufacturer’s instructions. Popular options include polyurethane for durability or tung oil for natural look.
Project 2: Industrial Coffee Table with Metal Legs
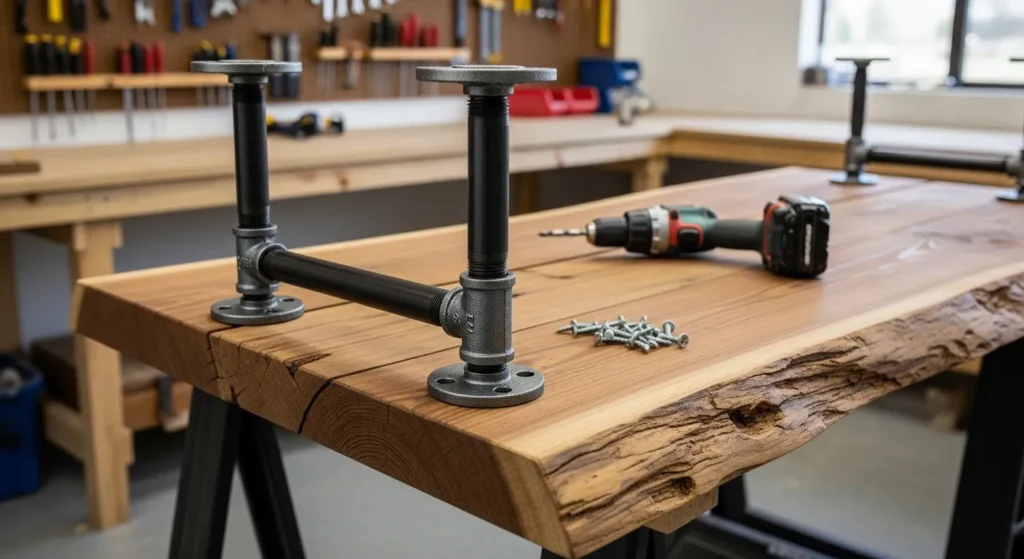
Combine reclaimed wood with metal pipe legs for a modern industrial look that works in contemporary spaces.
Materials Needed
- 1 piece of thick reclaimed wood slab (48×24 inches)
- 4 black iron pipe flanges
- 4 pieces of 16-inch black iron pipe
- Screws for attaching flanges
- Metal primer and black paint
- Clear protective finish for wood
Construction Process
Step 1: Prepare the Slab Sand the reclaimed wood slab smooth. Fill any large cracks with wood filler if desired, or leave for character.
Step 2: Prepare Metal Legs Clean pipe threads and flanges. Apply metal primer, then black paint. Let cure completely.
Step 3: Attach Legs Mark flange locations on underside of slab. Drill pilot holes and attach with appropriate screws.
Step 4: Final Finishing Apply protective finish to wood surface. Paste wax works well for coffee tables that need frequent cleaning.

Project 3: Live Edge Side Table
Live edge tables preserve the natural edge of the tree, creating organic shapes perfect for accent pieces.
Selecting Live Edge Slabs
Look for slabs with interesting edge patterns and minimal cracking. Some checking is normal and adds character, but avoid pieces with splits that go deep into the usable area.
Construction Tips
Support the Natural Edge: Use butterfly joints or metal brackets to prevent cracks from spreading.
Choose Appropriate Bases: Hairpin legs, wooden trestles, or metal frames all work well with live edges.
Emphasize the Grain: Clear finishes show off natural wood patterns better than stains.
Project 4: Pallet Wood End Table
Transform free pallets into useful furniture with this simple project perfect for beginners.
Choosing Safe Pallets
Only use pallets marked “HT” (heat treated). Avoid any marked “MB” (methyl bromide) as these contain harmful chemicals.
Disassembly Techniques
Safe Removal: Use a pry bar and hammer to carefully separate boards without damage.
Nail Removal: Pull nails completely or countersink and fill holes for smooth surfaces.
Board Selection: Choose the best boards for visible surfaces, use damaged pieces for internal structure.
Project 5: Reclaimed Wood Picnic Table
Build outdoor furniture that withstands weather while showcasing beautiful weathered wood character.
Weather Protection
Even though reclaimed wood has survived years outdoors, proper finishing extends its life significantly.
Outdoor Finishes: Use marine-grade polyurethane or penetrating oil finishes designed for exterior use.
Drainage: Design joints and surfaces to shed water rather than trap it.
Hardware: Use stainless steel or galvanized fasteners to prevent rust stains.
Finishing Techniques for Reclaimed Wood
Surface Preparation
Remove Old Finishes: Strip paint or stain if you want natural wood appearance. Some projects look better with aged finishes left intact.
Fill or Feature Holes: Decide whether to fill nail holes and cracks or leave them as character features.
Final Sanding: Always finish with fine grit (220) for smooth surfaces that accept finish evenly.
Finish Options
Natural Oils: Tung oil and linseed oil penetrate wood for natural protection that’s easy to maintain.
Polyurethane: Provides durable surface protection ideal for tabletops that see heavy use.
Wax Finishes: Give soft sheen and feel but require regular maintenance.
Milk Paint: Creates authentic aged appearance while providing some protection.

Common Challenges and Solutions
Dealing with Warped Boards
Minor Warping: Clamp boards flat while glue dries, moisture and pressure often correct slight bends.
Severe Warping: Rip wide boards into narrower strips, joint edges, and reglue for stable surfaces.
Prevention: Store wood flat with weight on top before starting projects.
Removing Embedded Metal
Detection: Use metal detectors designed for woodworking to find hidden nails and screws.
Removal: Drill out stubborn fasteners rather than forcing them out and damaging wood.
Safety: Always check for metal before running boards through planers or jointers.
Matching Wood Colors
Natural Variation: Embrace color differences as part of reclaimed wood’s character.
Color Matching: Use wood stain to even out dramatic color differences if uniform appearance is desired.
Arrangement: Test different board arrangements before final glue-up to find most pleasing combinations.
Cost Breakdown and Budgeting
Typical Project Costs
Simple Coffee Table: $75-150 depending on wood source and hardware choices Dining Table: $200-500 for materials, significantly less than comparable new furniture End Tables: $25-75 each, perfect starter projects
Money-Saving Tips
- Source free pallets from local businesses
- Buy rough lumber and mill it yourself if you have access to tools
- Purchase hardware in bulk for multiple projects
- Team up with other makers to buy larger quantities
Safety Considerations
Lead Paint Awareness
Wood from buildings constructed before 1978 may contain lead paint. Test suspicious finishes or have professionally stripped if concerned.
Dust Protection
Always wear appropriate dust masks when sanding reclaimed wood. Some species can cause respiratory irritation.
Structural Integrity
Inspect reclaimed wood carefully for rot, insect damage, or structural weaknesses before using in load-bearing applications.
Styling Your Reclaimed Wood Tables
Complementary Decor Styles
Farmhouse: Pair with Mason jar lighting and vintage accessories Industrial: Combine with metal accents and Edison bulb fixtures
Modern Rustic: Balance rough wood with clean, simple accessories Traditional: Use formal place settings and classic centerpieces
Room Integration Tips
Consider your existing furniture when planning reclaimed wood projects. The wood’s character should complement, not compete with other pieces.
For ideas on integrating your new table with your overall decor, check out our guide on accent wall design ideas to create cohesive room designs.
Maintenance and Care
Daily Care
- Use coasters to prevent water rings
- Clean spills immediately to prevent staining
- Dust regularly with microfiber cloth
For detailed cleaning guidance, see our best microfiber cloths guide for proper table maintenance.
Long-term Maintenance
Annual Inspection: Check for loose joints or hardware that needs tightening Refinishing: Plan to refresh finish every 3-5 years depending on use Repair: Address small damage promptly to prevent larger problems
Advanced Project Ideas
Expanding Tables with Reclaimed Wood
Build tables with removable leaves using traditional woodworking joints and hardware for special occasions.
Mixed Material Projects
Combine reclaimed wood with concrete, metal, or glass for contemporary designs that highlight the wood’s natural beauty.
Built-in Solutions
Design reclaimed wood tables that integrate with existing cabinetry or room features for custom appearances.
Working with Different Wood Species
Common Reclaimed Species
Pine: Soft, easy to work, takes stain well Oak: Hard, durable, prominent grain patterns Chestnut: Dense, naturally rot-resistant Barn Wood: Mixed species, maximum character
Species-Specific Tips
Each wood type has unique characteristics affecting how it cuts, sands, and accepts finishes. Research your specific wood before starting.
Building Multiple Tables as a Set
Design Consistency
Maintain visual connection between pieces while allowing for size variations needed for different functions.
Material Coordination
Source all wood from the same batch when possible for color and character consistency across multiple pieces.
Construction Efficiency
Build similar components for all pieces simultaneously to save time and ensure consistency.
Professional Finishing Tips
Grain Enhancement
Raising the Grain: Lightly dampen wood before final sanding to raise grain fibers, then sand smooth for glass-like finish.
Color Pop: Apply thin coat of finish, sand lightly, then apply final coats for maximum grain clarity.
Hardware Selection
Choose hardware that complements the wood’s character. Antique or weathered finishes often work better than bright, new-looking pieces.
Troubleshooting Common Problems
Uneven Table Surfaces
Causes: Warped wood, uneven cuts, poor glue-up technique Solutions: Use cauls during glue-up, check cuts with straightedge, plane or sand high spots
Wobbly Tables
Causes: Uneven leg lengths, loose joints, twisted base Solutions: Check all measurements, tighten hardware, use adjustable feet
Finish Problems
Bubbles: Sand smooth and recoat in thinner layers Brush Marks: Use high-quality brushes or switch to wiping techniques Uneven Color: Apply stain more consistently or use gel stains for better control
Creating Custom Designs
Measuring Your Space
Always measure your space carefully before starting any table project. Account for chair clearance and traffic flow around the table.
Design Sketching
Draw your design to scale before cutting wood. This helps identify potential problems and ensures proper proportions.
Template Making
Create templates from cardboard or thin wood for complex shapes or repeated elements.
Building for Different Room Sizes
Small Spaces
Focus on multi-functional designs like drop-leaf tables or nesting sets that maximize utility without overwhelming the space.
For additional small space ideas, check our small patio design inspiration for layout tips that apply indoors too.
Large Rooms
Bigger spaces can handle substantial tables that become focal points. Consider extending dining tables or large coffee tables with storage.
Seasonal Project Planning
Best Times to Build
Spring: Good weather for outdoor finishing work Summer: Excellent drying conditions for wood and finishes
Fall: Indoor projects perfect for preparing holiday furniture Winter: Time for planning and wood sourcing for spring builds
Organizing Your Workshop
Efficient workshop organization speeds project completion and improves results. Plan storage for lumber, tools, and hardware before starting major projects.
For comprehensive organization strategies, see our time-saving organization systems guide.
Conclusion
Reclaimed wood table projects offer the perfect combination of environmental responsibility, cost savings, and unique beauty. Whether you build a simple coffee table or an elaborate dining set, you’ll own furniture with character that tells a story.
Start with simple projects to build confidence, then tackle more complex designs as your skills develop. The satisfaction of creating beautiful, functional furniture from materials that might otherwise be wasted makes every project worthwhile.
Remember that mistakes become learning opportunities, and imperfections often add to reclaimed wood’s natural character. Your finished table will be a one-of-a-kind piece that reflects both the wood’s history and your craftsmanship.
Looking to complete your DIY furniture collection? Explore our DIY pallet furniture ideas for more money-saving projects that complement your reclaimed wood tables.
