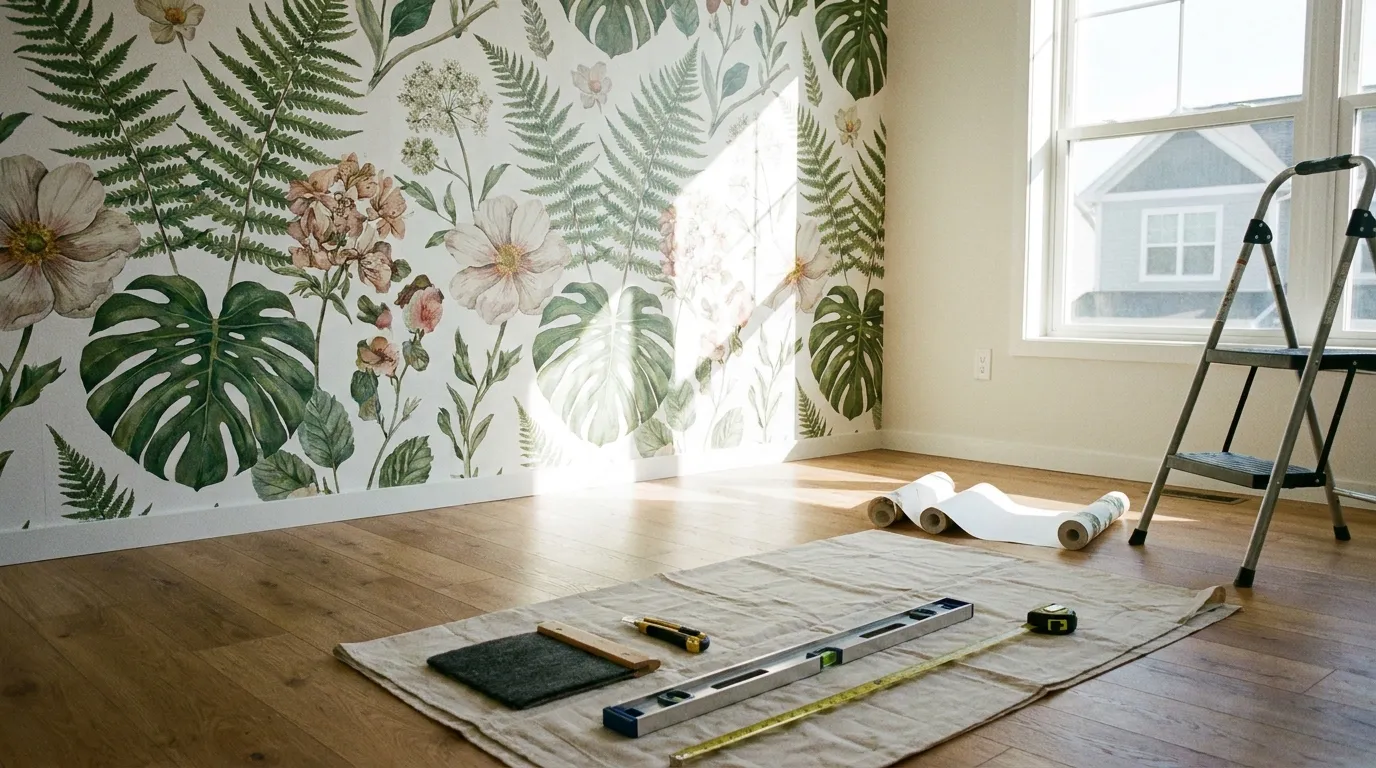
Professional wallpaper installation runs between $316 and $821 in labor alone. For a standard 12×12 bedroom, that number climbs past $1,200 once you add materials, wall prep, and removal fees for old wallpaper.
The actual skill gap between a professional finish and a careful DIY job is smaller than most people assume. You don’t need specialized tools or years of experience. You need the right approach — and knowledge of where most beginners lose time and money.
These 15 hacks cover buying strategy, installation shortcuts, and low-cost alternatives. Every one of them is tied to a real dollar figure. If you’re choosing colors and patterns, check out this guide on color psychology in home interiors before you commit to a design — the wrong palette in a small room is an expensive mistake.
Why DIY Wallpaper Actually Saves Real Money
Here’s what the numbers look like side by side:
| Approach | Typical Cost (12×12 Room) |
|---|---|
| Professional labor only | $316–$821 |
| Materials (wallpaper + adhesive) | $200–$400 |
| DIY materials only | $100–$300 |
| DIY total (tools + materials) | $150–$350 |
DIY saves $300–$600 on a single room. Tools cost $50–$150 total and get reused on every future project. The labor savings alone justify the learning curve.
Before you start, use the Wallpaper Calculator to figure out exactly how many rolls you need for your room dimensions — buying too few (or too many) is one of the most common beginner mistakes.
Before You Touch a Roll — Prep Hacks That Prevent Costly Mistakes
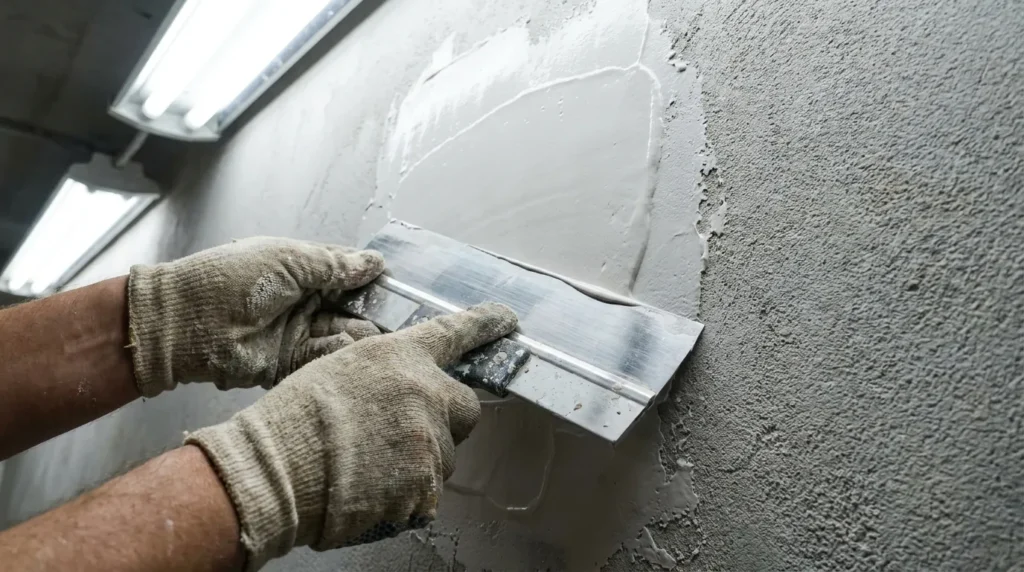
Hack 1 — Skim Coat Textured Walls Before Anything Else
Textured plaster and knockdown walls are the number one reason DIY wallpaper jobs look bad. The paper bridges the texture peaks, leaving visible bumps and air gaps underneath.
Fix it before you start. Apply a thin skim coat of joint compound across the wall using a wide taping knife. Sand it smooth once dry. This adds $20–$40 in materials and a few hours of work. It saves you from stripping and rehanging an entire room because of uneven adhesion.
For textured wall finishing techniques beyond skim coating, this textured wall painting guide covers the full range of surface prep options.
And if you’re dealing with holes or gouges before that first roll goes up, handle them first — here’s how to repair drywall holes quickly without calling anyone.
Hack 2 — Paint Seam Lines Before Hanging
This one is underused. Before the first strip goes up, identify where your vertical seams will land and paint thin 2-inch strips in a color that matches your wallpaper’s background tone.
If the seam opens slightly during humidity changes — and it will, eventually — there’s no white drywall gap showing through. This costs less than $5 in paint and takes 20 minutes.
Hack 3 — Verify Batch Numbers Before Opening a Single Roll
Wallpaper color varies between production batches — sometimes significantly. Two rolls from different batches can look identical in the package and noticeably different on the wall under natural light.
Check the batch number printed on every roll before installation. If any roll doesn’t match, return it before it’s cut. Reordering mid-project and discovering a color mismatch after hanging is a wall-stripping situation.
Buying Smarter — Hacks That Cut Material Costs by 40–60%
Hack 4 — Buy End-of-Season and Overstock Rolls
Wallpaper retailers discount discontinued patterns and seasonal stock aggressively. End-of-season sales commonly hit 30–50% off. Overstock rolls from other projects often appear on eBay, Facebook Marketplace, and Etsy for $5–$15 per roll — well below the $30–$50 standard retail price.
The only rule: buy at least 20% more than your calculated square footage. Matching batches later is nearly impossible once a run sells out.
Hack 5 — Use Sample Rolls Before Committing
Most wallpaper retailers sell sample swatches for $2–$8. Order three or four options, tape them to the wall, and live with them for 48 hours under different lighting conditions. It’s the same principle as paint sampling — and it saves you from buying 10 rolls of a pattern that looks wrong at night.
Hack 6 — Order Remnant Rolls From Other Projects
Search local buy-sell groups and home improvement forums for leftover rolls. Homeowners who over-ordered often sell surplus rolls at steep discounts. A 12×12 room with a simple pattern needs roughly 9–11 double rolls. Sourcing half of those as remnants can cut material costs by $80–$150.
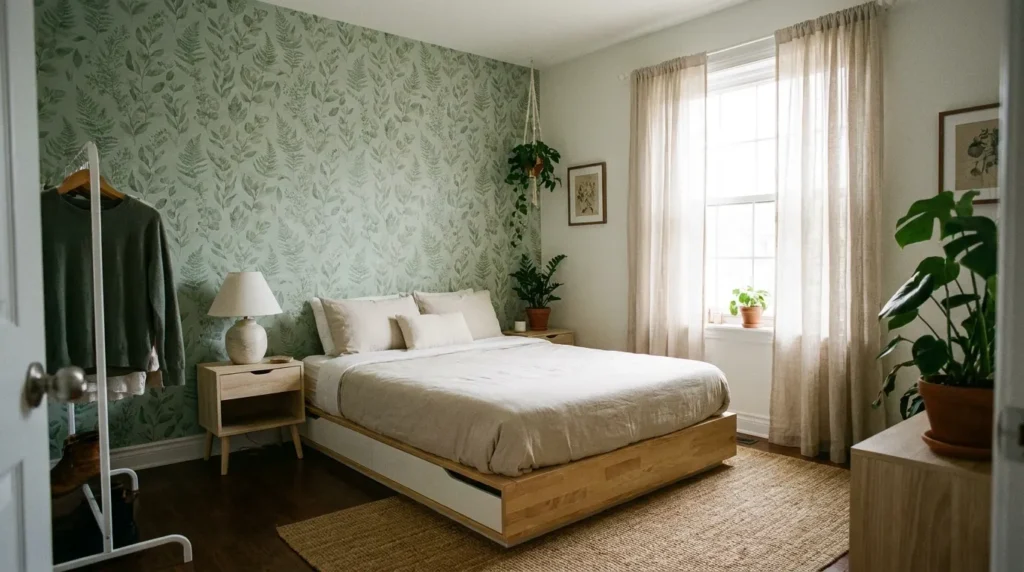
Hack 7 — Combine Wallpaper With Board and Batten to Cut Square Footage by 50%
Installing board and batten or wainscoting on the lower half of the wall means you only need wallpaper above the chair rail — roughly 4 feet of height instead of 9. That cuts your roll count nearly in half.
This is one of the most impactful budget moves available. An accent wall design approach — even just one wallpapered wall in a room — delivers similar savings while creating a stronger visual impact than papering all four walls flat.
Installation Hacks for a Pro Finish Without a Pro
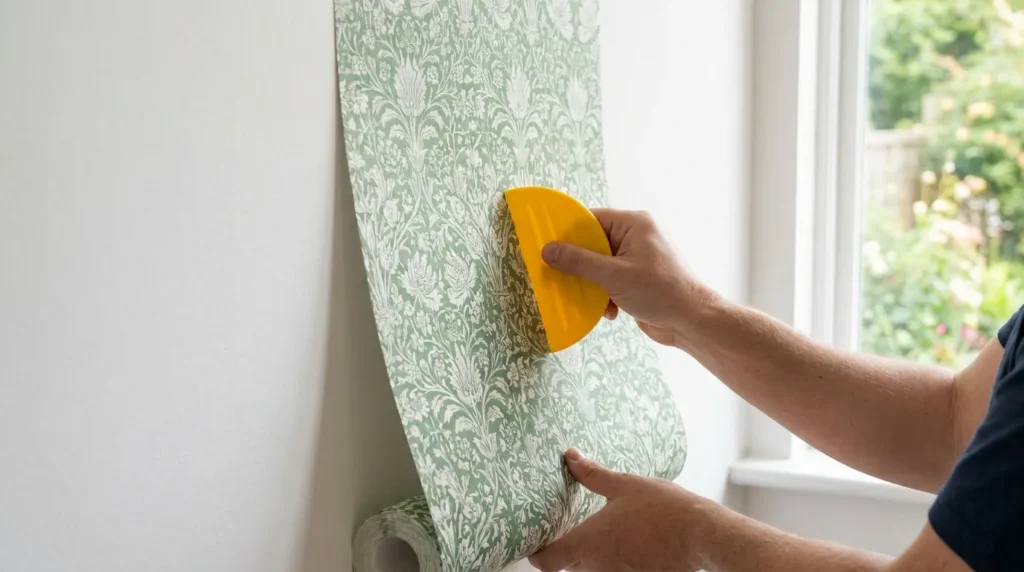
Hack 8 — Use Paste-the-Wall Instead of Paste-the-Paper
Paste-the-wall wallpaper is applied by rolling adhesive directly onto the wall, then hanging the dry paper over it. This eliminates booking (folding pasted paper back on itself to soak), reduces mess, and lets you reposition strips freely while the adhesive is wet.
Beginners who use paste-the-paper methods fight wrinkles, stretched panels, and tears. Paste-the-wall removes most of those problems.
Hack 9 — Peel Backing in 1-Foot Sections for Peel-and-Stick
For peel-and-stick wallpaper, never peel the entire backing off a strip before hanging. The exposed adhesive immediately catches on itself, causing wrinkles and tears that are hard to recover from.
Peel back 12 inches, align the top of the strip, smooth it down, peel another 12 inches, smooth again. Work in controlled sections. This single habit prevents 80% of common peel-and-stick failures.
Hack 10 — Start at Your Least Visible Wall
Your starting point is also your endpoint — and where you end, the pattern repeat won’t line up. In a full room, this is unavoidable. Choose a starting point above a doorway or in a corner that gets minimal attention. The mismatch lands where nobody looks.
Hack 11 — Use a Laser Level Instead of a Chalk Line
A chalk line leaves powder residue that can bleed through lighter wallpapers. A laser level projects a plumb line you can follow without touching the wall. Budget laser levels cost $15–$30 and are worth every dollar. Crooked first strips are impossible to fix without rehanging.
Hack 12 — Smooth With a Plastic Scraper, Not a Metal One
Metal scrapers scratch and gouge walls during installation and removal. A plastic smoother (sometimes called a wallpaper squeegee) costs $6–$10 and won’t damage the paper surface or the wall beneath it. Use it at a low angle, working from the center of each strip outward to push air to the edges.
Low-Cost Wallpaper Alternatives That Look Identical
Hack 13 — Stencil-Painted Wallpaper ($40 Total)
A repeating stencil pattern applied with Sharpie paint markers can cover an entire accent wall for $40 or less. The method works on smooth, primed drywall and is completely paintable if you want to change it later.
The key technique: don’t treat the stencil like a coloring book. Make one quick, decisive stroke per line using the stencil as a guide. Pause at the beginning or end of a stroke and you’ll get bleeding edges. Move fast and lift cleanly.
For stencil selection and technique beyond wallpaper applications, the full DIY stencil wall art guide covers pattern alignment, fixing mistakes, and choosing the right marker type for different wall finishes.
If you want to use paint instead of markers, use the Paint Coverage Calculator to figure out exactly how much you need for a stencil project — it prevents overbuying.
Hack 14 — Vinyl Roll Cut-Outs — Full Room Under $50
Self-adhesive vinyl rolls (the same material used in Cricut and Silhouette cutting machines) cost $12–$20 per roll and come in dozens of colors and finishes. Cut organic shapes — dots, botanical silhouettes, geometric forms — by hand with scissors, then apply them directly to the wall.
For a full bedroom, three rolls of a single color cover the wall in a loose pattern for under $50. If you own a cutting machine, you can achieve near-perfect pattern repeats. If you don’t, irregular organic shapes actually hide alignment imperfections better than geometric ones.
Hack 15 — Leftover Roll Hacks: Zero Waste, Extra Value
Don’t throw away remnant strips. Apply them to the backs of open bookshelves for a pop of pattern visible through the shelving. Line drawer fronts or the interior backs of cabinets. Use larger sections framed in inexpensive picture frames as wall art.
On ceilings, small sections of wallpaper add visual interest in a way that paint rarely does — and ceilings use far less material than walls. This is especially useful in small rooms where a ceiling treatment creates the illusion of height without adding clutter to the walls. For more ceiling treatment ideas, this guide on ceiling painting ideas for small rooms has techniques that pair well with wallpaper remnants.
Renter-Specific Hacks (Damage-Free Only)
Renters have two reliable options: peel-and-stick wallpaper and framed wallpaper panels.
Peel-and-stick products from major brands are repositionable and leave no adhesive residue when removed correctly. Always test on a small hidden section of your wall first — some older paint finishes pull away with the paper. The safer approach on rental walls is to start with very slow, 45-degree-angle removal from the bottom corners and reapply the backing as you work.
Framed wallpaper panels require zero wall contact beyond picture hooks. Cut sections of wallpaper and mount them in large poster frames or simple wood molding frames. They can be swapped out seasonally and leave no damage behind.
For more ideas specific to small or rental spaces, this studio apartment space-saving guide has room design strategies that pair well with removable wallpaper.
How to Fix the Most Common Beginner Mistakes
Bubbles that won’t smooth out: Wait 24–48 hours. Most bubbles from peel-and-stick disappear as the adhesive settles. If they remain, use a pin to puncture the center of the bubble, press flat, and smooth with your thumb.
Seams that lift at the edges: Apply a thin bead of seam repair adhesive (sold in most home improvement stores for $6–$10) under the lifted edge with a thin brush. Press flat and roll with a seam roller. Don’t use standard white glue — it leaves a visible residue.
Pattern mismatch between strips: This is almost always caused by unequal panel lengths. Panels must all be cut from the same measurement before hanging, not trimmed individually after. Standardize your cuts before the first strip goes up.
Paper that won’t release during removal: Score the surface lightly with a scoring tool (not a Stanley knife — too aggressive), then apply a 50/50 mix of hot water and white vinegar by spray bottle. Let it soak for 15 minutes before peeling. Metal scrapers damage plaster; use plastic throughout.
Frequently Asked Questions
How many rolls do I need for a 12×12 room with 9-foot ceilings? Calculate your wall square footage: (perimeter × wall height) minus door and window openings. For a standard 12×12 room, that’s roughly 300–330 square feet of wall space. Divide by the coverage per double roll (typically 56–60 sq ft). You’ll need 9–11 double rolls. Add 20% for pattern waste and cutting errors. Use the Wallpaper Calculator to get an exact number for your specific room.
Can I wallpaper over textured walls? Yes, but not without prep. Skim coat the wall with joint compound first, sand smooth, and prime. Skipping this step causes bubbles, lifting seams, and visible texture through the paper.
Is peel-and-stick wallpaper worth it? For renters and first-time DIYers, yes. It’s repositionable, removable, and forgiving of mistakes. For permanent installations in high-humidity rooms (bathrooms, kitchens), traditional paste wallpaper holds better and lasts longer.
What’s the cheapest way to wallpaper a room? Stencil painting costs $30–$50 total. Vinyl decals from cut rolls run $40–$60. Peel-and-stick wallpaper for an accent wall only (one wall) costs $60–$120 in materials depending on the brand and pattern repeat.
Do I need a primer before wallpaper? Yes — always. Unprimed drywall absorbs adhesive unevenly and makes removal extremely difficult without damaging the surface. Use a PVA primer or standard drywall primer. Allow 24 hours of dry time before hanging.
Final Notes on Budget and Planning
DIY wallpaper is one of the highest-return home improvement projects available. A $120 peel-and-stick accent wall genuinely transforms how a room reads — the same result that costs $600–$900 with a professional installer.
The hacks above compound each other. Buy overstock rolls, use paste-the-wall method, hang one accent wall instead of four, and add a stencil border on the adjacent walls for texture — and you’ve achieved a high-end look for under $150.
If you’re planning a broader renovation alongside the wallpaper project, the Home Renovation Budget Planner helps you track all material and labor costs in one place so nothing gets underestimated.


Leave a Reply